Don’t get me wrong, I love a good recipe challenge. I am,
after all, the woman who once spent 15 hours recreating this cake,
the same one who tested her savory
pumpkin pie recipe at least 5 times before posting. When life allows,
there’s little I enjoy more than an afternoon puttering about the kitchen. But lately,
these days don’t allow; I’m mixing the run-up to the holidays with a job
search, trying to balance the two and only sometimes succeeding. My schedule
fluctuates from quiet enough that I have ample time to spend on recipe
development to so busy that I barely have time for lunch. I believe there’s
room in life for both complex cooking projects and simple ones; I hope there
will always be days when I have enough time to craft edible art, just as I know
that there will always be days when the only goal is to feed myself, now.
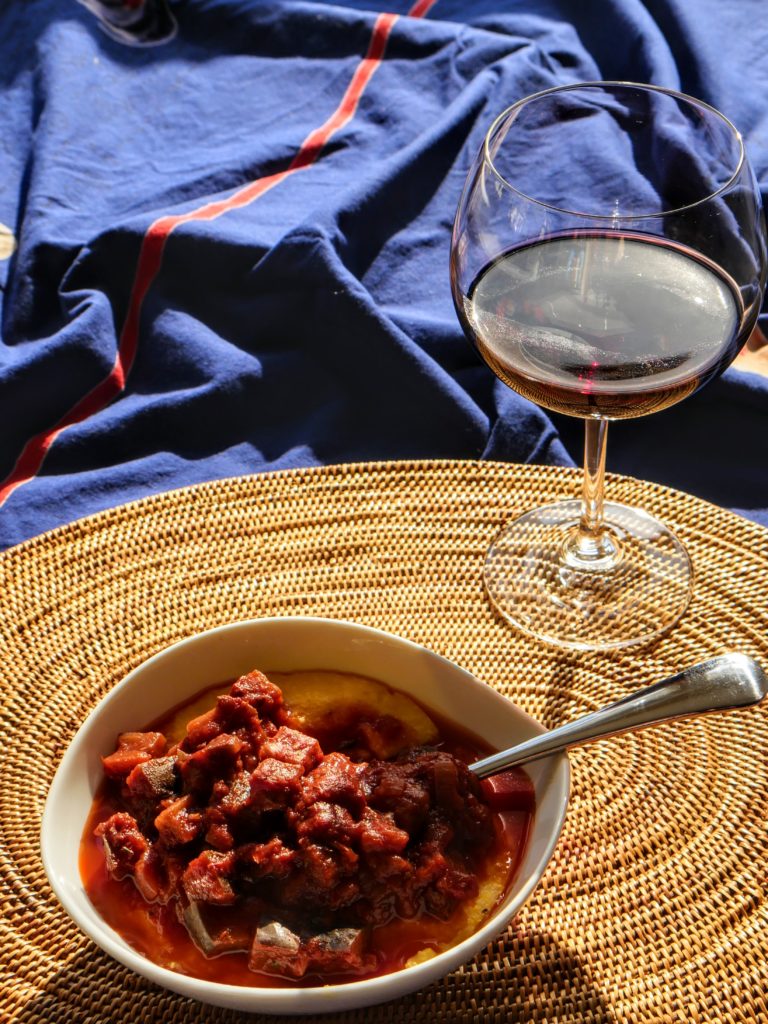
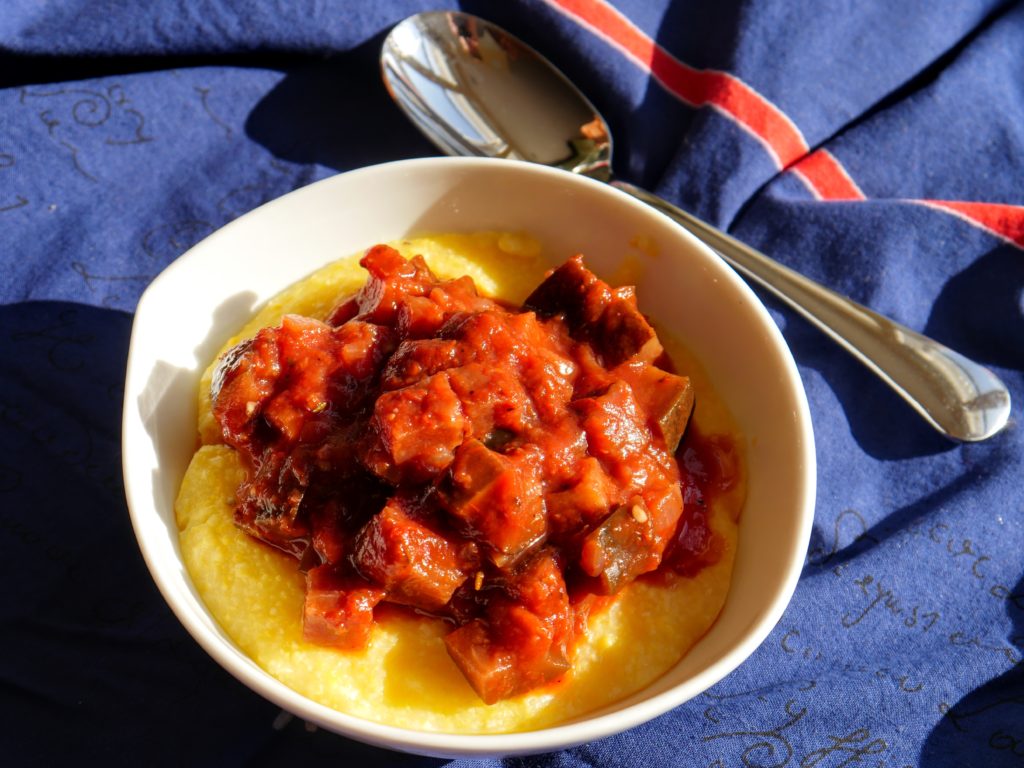
This eggplant ragout falls somewhere between those extremes:
it’s easy to throw together, but good enough to serve to friends. It can be
ready relatively quickly, in just over an hour, or simmer longer while you catch
up on other tasks. Best of all, it makes a substantial amount (and can easily
be doubled, if you have a big enough pot), so you’ll have ready meals for busy days.
Eggplant Ragout
Source: I Thought There Would Be Free Food
Serves 4–6 people
Active time: ~30 minutes; total time +75 minutes
Note: For a not
veg friendly but equally delicious take, sauté a pound of sausage
(“Italian”-flavored turkey or chicken sausage does well here) with
the onion and then proceed with the recipe as written.
Ingredients:
1 medium onion, about 4 ounces (enough to yield ~1
cup, finely diced)
6 cloves garlic
2 good-sized fresh rosemary sprigs (enough to
yield at least 1 tablespoon, minced)
1 large eggplant, about 1 pound
Olive oil
1 28-ounce can crushed tomatoes
1 cup red wine (or vegetable stock, if you
prefer)
Salt, pepper, and red pepper flakes, to taste
Directions:
Prep your ingredients: finely chop the onion;
mince the garlic and rosemary; and cut the eggplant into 1/2-inch cubes. Set
each ingredient to the side as you finish before moving onto the next.
Heat a large pot or Dutch oven over medium heat.
When the pot is warm, add enough olive oil to thinly coat the bottom; once the
oil is warm, add your onion and sauté until it starts to become translucent.
Add the garlic and cook briefly before adding the eggplant. Stir the
onion-garlic-eggplant mixture well, then add the rest of the ingredients. Don’t
forget to taste the sauce several times as it simmers, adjusting the seasonings
as needed.
Simmer your ragout on medium-low or low heat for
at least 45 minutes, or until the sauce is somewhat reduced and the eggplant is
tender and meaty. Give it a stir every once in awhile to make sure the ragout
doesn’t stick to the bottom of the pot. If it does, reduce the heat and add
more liquid—wine, water, or vegetable stock will all work.
Serve the ragout with polenta or pasta. Enjoy the
leftovers as they are, or turn them into a riff on shakshuka.
I realize this might be
controversial, but I don’t like traditional Thanksgiving food—the turkey, the gravy,
the potatoes, the green bean casserole. So much of it is one-note, heavy and
rich, too often spiced not enough and with little imagination, lacking in any
of the things that give zing and satisfaction to a meal (except you, cranberry
relish. I see you). In my vegetarian years, I hated the lack of good entrees
and felt relegated to the gustatory sidelines, expected to eat potatoes and
wait for dessert. And then there’s the biggest truth bomb: I don’t like pumpkin
pie. Some of the time, the filling gets watery and pulls away from the crust,
which is unappealing to a food-texture nerd like myself. Most of the time, it
doesn’t have much flavor. 100% of the time, I’m left wishing I’d foregone the
pumpkin pie in favor of more apple pie.
In my search for the tasty,
easy-to-make, Thanksgiving food of my dreams, I spent weeks reading cookbooks
and brainstorming before I came up with my great idea: a savory pumpkin pie. But
much as I’d love to tout my own brilliance, I’m not the first person to come up
with this idea; when I started researching, I found a slew of savory pumpkin
pie recipes on the web. Most of them, however, were fussy, calling for the
baker to make pumpkin puree from scratch (I don’t have time for that, and
having done it before, I can tell you the stuff out of the can is better than
what I can make) or to include lots of sliced onions in the pumpkin custard, an
idea that offended my aforementioned food-texture sensibilities. Add to that
that many of the recipes called for tiny amounts of uncommon ingredients, and I
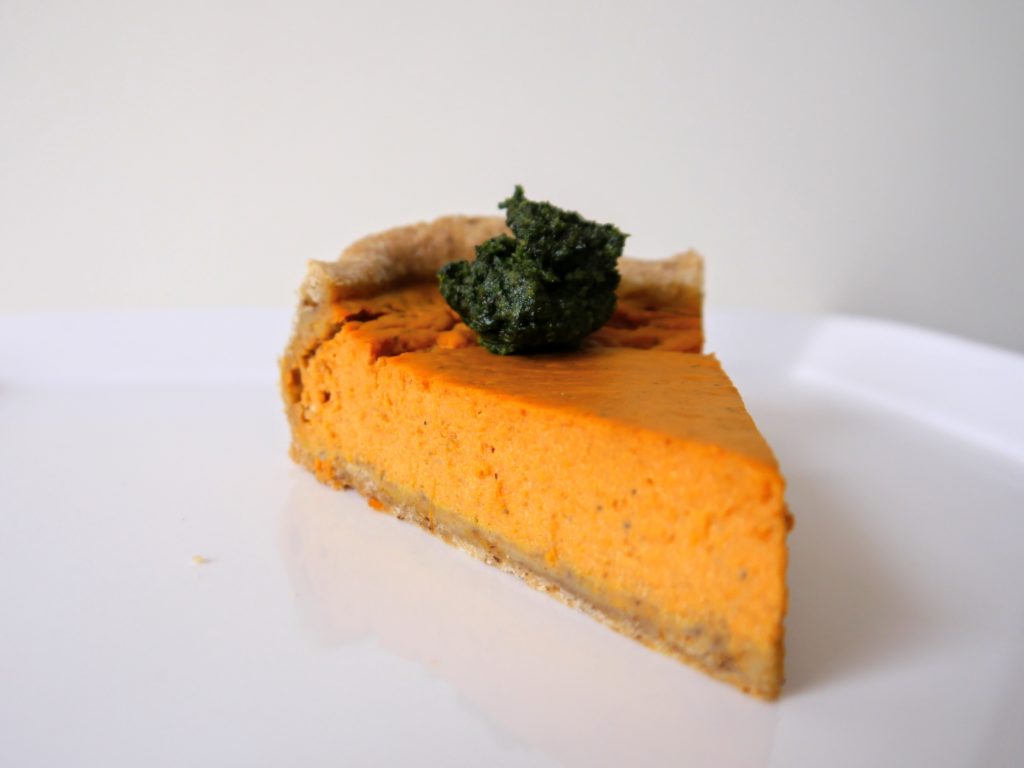
was back to the drawing board. What I finally came up with is a vegetarian main
sexy enough to tempt a carnivore, a seasonal entrée with pizzazz—this
Parmesan-enriched, parsley-sage pesto-topped, savory pumpkin pie.
Savory Pumpkin Pie
Sources: Pie crust recipe
adapted from Williams Sonoma;
parsley-sage pesto adapted from The Kitchn; custard from I
Thought There Would Be Free Food
Makes 1 pie, comfortably
serving 6–8 people
Active time: 45–60 minutes;
total time: ~2 hours
Note: If the
thought of making your own pie crust gives you anxiety, feel free to substitute
one pre-made, refrigerated pie crust. I won’t tell.
Walnut Piecrust Ingredients:
1/2 cup walnuts
1 1/4 cups all-purpose flour
1 teaspoon salt
1 stick butter, cut into 1/2-inch cubes
3–4 tablespoons ice water
Pumpkin-Parmesan Custard Ingredients:
3 eggs
1 cup milk (I use 1%)
1 15 ounce can pumpkin puree (NOT pumpkin pie filling)
1 cup grated, shaved or shredded Parmesan
1/4 teaspoon grated nutmeg
Salt and pepper, to taste
Parsley-Sage Pesto Ingredients:
1/2 cup walnuts
1/2 cup grated, shaved, or shredded Parmesan
1 large bunch parsley (~2 cups)
1 0.5 ounce package sage (~3/4 cup)
1/4 cup olive oil
Salt & pepper, to taste
Directions:
Make the
crust: Do your future self a favor by
laying out a sheet of plastic wrap on your counter—you’ll wrap your piecrust in
this shortly—and make sure you have a large bowl handy.
Heat a large skillet over medium heat. When it’s warm,
add the nuts and toast until they’re golden brown and fragrant. This will
likely take 5–10 minutes, depending on your stove. Transfer the nuts from the
skillet to a plate and let them cool slightly.
Note: If you’re planning to make the parsley-sage pesto,
toast a full cup of walnuts and then set a half-cup aside while you make the
crust.
When the nuts have cooled, place them in the bowl of a
food processor with the flour and salt, and pulse until the nuts are finely
ground.
Drop the chunks of butter into the flour-nut mixture
and pulse until the butter is coarsely ground. Add 3 tablespoons of ice water
and pulse 2–3 times, then dump the contents into a large bowl. Gently press a
bit of the dough together; if it holds, proceed to the next step. If not, add
additional water as necessary but note that the dough should still be loose and
a bit crumbly.
Gather the dough into a loose clump and transfer it to
the plastic wrap. Use the corners of the plastic wrap to form the dough into a
disc about 2 inches tall. Make sure the dough is completely covered in plastic,
then transfer to your refrigerator to chill for at least 1 hour or up to 2
days.
Note: If you don’t have a food processor, this crust can
also be made by hand, minus the walnuts. Use a pastry cutter or mezzaluna to
cut the butter into the flour-salt mixture and then add water, stirring the
dough with a fork, before gathering into a ball and refrigerating.
Make the
custard: While the dough is chilling,
whisk the eggs together in a medium bowl. Add the rest of the ingredients and
whisk to combine. Set aside.
Assemble the
pie: Preheat the oven to 400°F and
position a rack in the bottom third of your oven. Prepare a place to roll out
the pie crust, dusting the surface with a bit of flour and setting out a
rolling pin, sharp knife, and pie plate. Take out your piecrust; if it’s been
chilling for more than an hour, you might need to let it warm up slightly by setting
it on the counter for 5–10 minutes.
When the crust is roll-able, do so! I suggest working
from the middle of the dough out, easing up on the pressure when you get close
to the edge, and using a fair amount of flour to make sure it doesn’t stick.
Once the crust is about half flattened, try to gently pick it up, dust your
work surface with flour, flip the crust over, dust again, and continue rolling.
Don’t be afraid to use some flour, just be sure to brush off any excess before
baking.
Transfer the crust to a pie plate and trim away any
extra dough before crimping or fluting or doing whatever helps you express your
pie creativity. Pour the custard into the crust and carefully transfer the pie
plate to the oven. Bake for ~40–45 minutes. The pie will be done when the top
looks shiny, rather than dull, and a knife inserted into the middle of the pie
comes out relatively clean (a few specks shouldn’t be a problem). Note that
overbaking may result in cracks in the filling (ahem, as you can see in my
photo above).
Note: Baking the pie low in the oven and at a relatively
high heat will help ensure that the bottom of your crust cooks without
pre-baking, but be careful! If your oven runs hot, you might want to reduce the
heat by 10–15 degrees.
Note: Don’t toss your dough scraps! Either save them in
the freezer until you have enough to make another pie, or brush them with a
beaten egg, dust with a little cinnamon and sugar, and bake until golden brown.
I consider these crispies a bonus for the cook and am loathe to share them,
unless someone is kind enough to do the dishes for me.
Make the
pesto: Toast the walnuts and grate
the Parmesan, if you haven’t yet. Chop the tough ends off the parsley and sage
and discard, then roughly chop the rest of the herbs, stems and all, and set
aside.
Add the walnuts and Parmesan to the bowl of a food
processor and pulse until the mixture is uniformly ground. Add the rest of the
ingredients and pulse to your desired consistency. If at any point the mixture
becomes too thick to process, add a tablespoon of oil or so to help it along.
Note: The color of the pesto will darken as it’s exposed
to air, but the flavor will remain just as good. The pesto is best eaten the
day it’s made.
Once the pie is out of the oven and has cooled for
about 15 minutes, slice and serve it with dollops of the pesto. This pie is as
good warm as it is at room temperature, making it ideal for a Thanksgiving
buffet.
Some years ago,
my partner and I moved from Lansing, Michigan, to Boston. It was a big step
personally, the first time I’d left my home state with no plans to return. It
was also a big step financially, as I would be unemployed for several months
while I studied for the Massachusetts Bar exam and the cost of living in the
city was sharply higher than that of Lansing.
We found ways
stretch one income, taking a flat in East Boston long before it was trendy and
making weekly pilgrimages to Haymarket. Haymarket is where fruits and
vegetables go to die—literally. Middlemen buy up the produce that wholesalers
can’t offload to grocery stores and truck it to north Boston, where it’s sold
at cut-rate prices on Fridays and Saturdays. It’s where the city goes to shop,
and it isn’t uncommon to see be-suited attorneys and finance types queuing
behind members of Boston’s various immigrant communities. In our Haymarket
heydays, we carried home absurdly good deals—a crate of mangoes for $5, bunches
of pencil-thin asparagus for $0.50—and if the produce had to be consumed or
frozen nigh-on immediately, well, it was worth it. At the time, I was more
concerned with keeping our food expenses low (and studying for the bar), so I
overlooked Haymarket’s other benefits, like how it helps provide access to
produce for low-income communities and reduces food waste in the Boston area.
Food waste isn’t
the sexiest of environmental topics to tackle, but it is a huge one. Americans
waste 20–40
percent of their food each year, nearly the equivalent of throwing out half of
your sandwich every lunch hour. If the environmental impact of that waste isn’t
enough to make you squirm, consider the damage to your pocketbook: if the average American spends $7,700 per year on food, they’re basically tossing $3,000
into their rubbish bin along with their overly ripe bananas.
Going to Haymarket
helped us avert food waste at the retail level, but I still shudder to think of
the household-level waste we’ve generated, the pounds of carrot peelings and
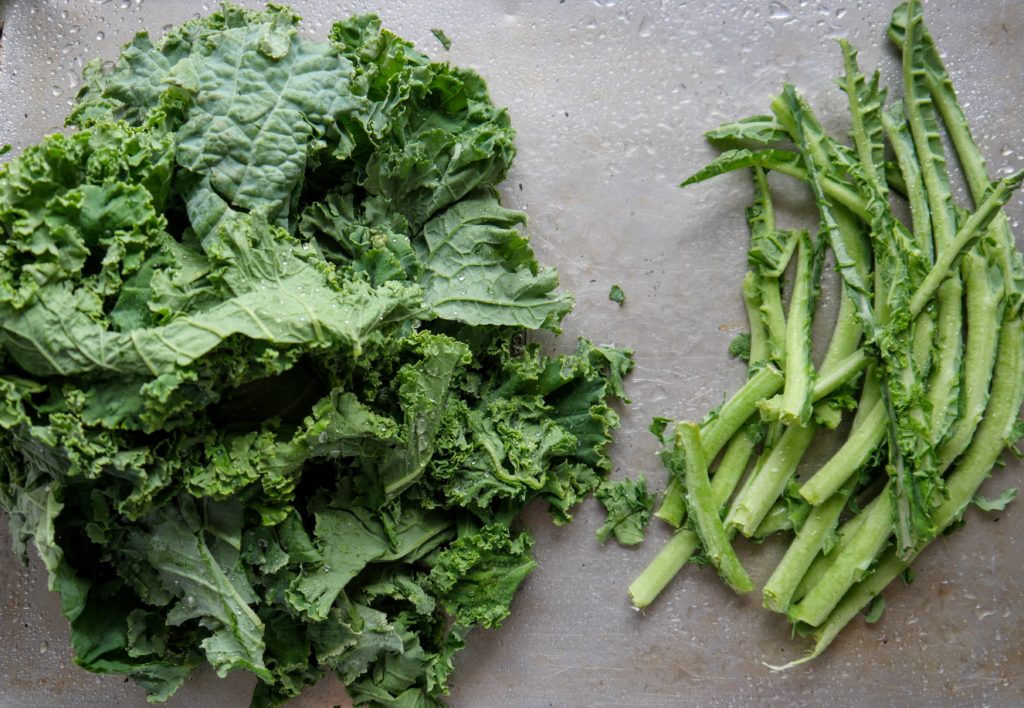
thousands of kale stems I’ve thrown away over the years. Why did I waste time
peeling carrots when I could have just given them a good scrub and eaten them
whole? And why did I get rid of all those kale stems when I could have been turning
them into a delicious pesto?
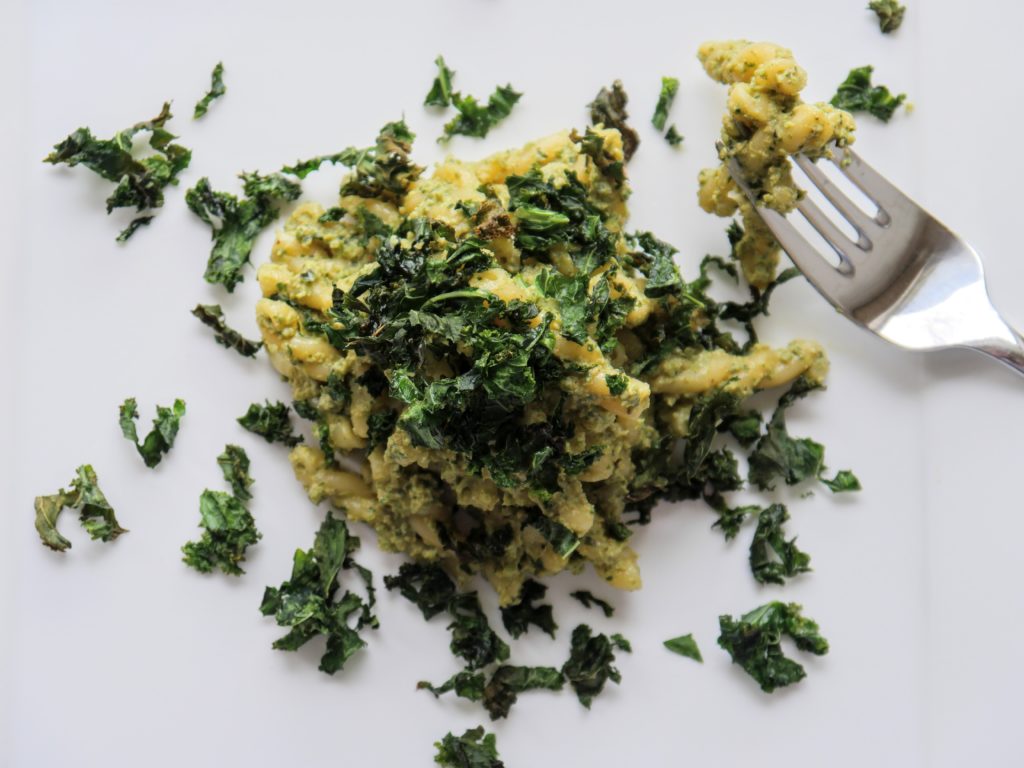
Rather than throwing
away your kale stems—ahem, perhaps those from my Tofu,
Mushrooms, and Hearty Greens in Miso Broth recipe—may I suggest making the below recipe instead? Truthfully, it isn’t so
much a recipe as a guideline for pesto that can be scaled up or down and is
infinitely adaptable. Use whatever type of nuts you have on hand—I’ve used almonds,
pecans, pine nuts, and walnuts with good results—and add more or less basil, or
even parsley, according to preference. You could even blanch whole kale, ribs
and leaves and all, and use that along with (or without) the basil. I call for
a relatively small amount of oil, but if you prefer an oil-ier pesto, feel free
to add more. Make a half batch. Save up your kale stems and make a double
batch.
Trying to save the
environment feels like such a big issue that I’ve often wondered whether there’s
anything I can do. Does shopping at Haymarket or hoarding my vegetable scraps
really matter, in the grand scheme of things? I don’t know. Maybe it doesn’t.
What I do know is that doing something feels good—close to scoring a crate of
mangoes for $5 good—even if all I’m saving is a handful of kale stems.
Kale Stem
Pesto
Source: I Thought
There Would Be Free Food
Makes ~2.5 cups
Active time: 20
minutes
Note: Since kale is remarkably hardy, you can cook a kale dish
on Monday, keep the reserved stems in the refrigerator, and not make this pesto
until the weekend. If you do so, you may need to re-trim the cut ends of the ribs
before continuing, but the end result will be just as good.
Ingredients:
Water
Salt
Stems from 2 big bunches of any-kind kale (I had about
30 stems of various sizes)
2 ounces fresh basil
1/2–1 cup your choice of nut (I prefer the higher amount)
1 cup grated, shaved or shredded Parmesan
1–2 cloves of garlic, optional
1/4–1/2 cup olive oil
Directions:
Heat water in a lidded pot large enough to hold all
your kale stems with room to spare. Salt prodigiously; the water should be ocean-style
salty.
While the water is heating you have time for several
tasks. First, chop your kale stems in half or thirds, if they’re particularly
long, and set aside. Chop away the tough ends of the basil stems and discard,
then chop the rest of the basil, stems and all, into 1-inch long pieces and set
aside.
Second, prepare an ice bath for blanching the kale
stems. Half-fill a large bowl with ice, then top it off with water, and set
aside.
Third, heat a large skillet over medium heat. When
it’s toasty warm, add your nuts and toast until they’re golden brown and
fragrant. This will likely take 5–10 minutes, depending on your stove and how
many nuts you’re using. If you’re like me and tend to burn nuts on the
stovetop, you can also try roasting them at 350°F for 3–5 minutes, check in on
them and shake the pan around, and then roast for an additional 5 minutes or so.
By this point, your water should be boiling, or close
to it. Once it’s boiling, dump in the kale stems and let them cook for ~3
minutes, or until bright green and you can insert the tip of a knife through
the meatiest part of a rib. This may take longer if the stems are very thick
and less if they’re thinner. Use a slotted spoon to remove the stems from the
boiling water (which you can use to cook pasta and make a meal of this pesto)
and plunge into the ice water until the stems have cooled, ~3 minutes. Drain the
stems in a colander and set aside.
The nuts should be toasted by now; if they are,
transfer them from the skillet to a plate and let them cool slightly. Grate, shave,
or shred your Parmesan, if you haven’t already.
Once the nuts have cooled somewhat (they needn’t be completely
so), pulse them in a food processor with the Parmesan, salt to taste, olive
oil, and garlic, if desired, until the mixture is uniformly ground. Add the
kale stems and pulse again; you may need to stop the food processor, scrape
down the sides of the bowl, and process again. Finally, add the basil and pulse
to your desired consistency. If at any point the mixture becomes too thick to
pulse, add enough oil to help it along, adding a tablespoon or so at a time. Scrap
your pesto out of the food processor and enjoy with pasta, wraps, scrambled
eggs, leftovers, or anything else that could use a dollop of green goodness.
I expected to hear a lot of comments when I told people I
was starting a food blog, “not another,” being the one I most expected
(but happily heard the least). Nowhere on the list was, “You know what I
hate about food blogs? When the writer has to tell you their life story before
they get to the recipe,” and yet this is the theme that repeated through
dozens of conversations.
It was a bit bracing to hear such strident opinions before
I’d even finished the first draft of my first post, but I also understand the
critique: if you’re looking for a recipe, the last thing you want is a lengthy discourse
on some blogger’s trip to somewhere and how that absolutely changed their life
and by the way, almost as an afterthought, here’s something to cook. No, you’re
there for the food! You want the recipe! It’s the same with the endless artsy photos
of heirloom tomatoes and impossible-to-find ingredients that can take an
endless amount of time to load. If I wanted a photo essay, I’d look for a photo
essay. I want food.
So I’ll keep this, and future posts, short given that we’re
all hungry, and just note that one of the huge benefits of being known as a
food lover is that people bring you things to cook. And if the person bringing
you things happens to volunteer with an amazing farm and be willing to
share excellent mushrooms and sweet potato greens, you have the inspiration for
a quick dinner, one that’s easily adaptable to the types of mushrooms and
greens you have on hand and ready in under an hour, because aren’t we all just
here for the food?
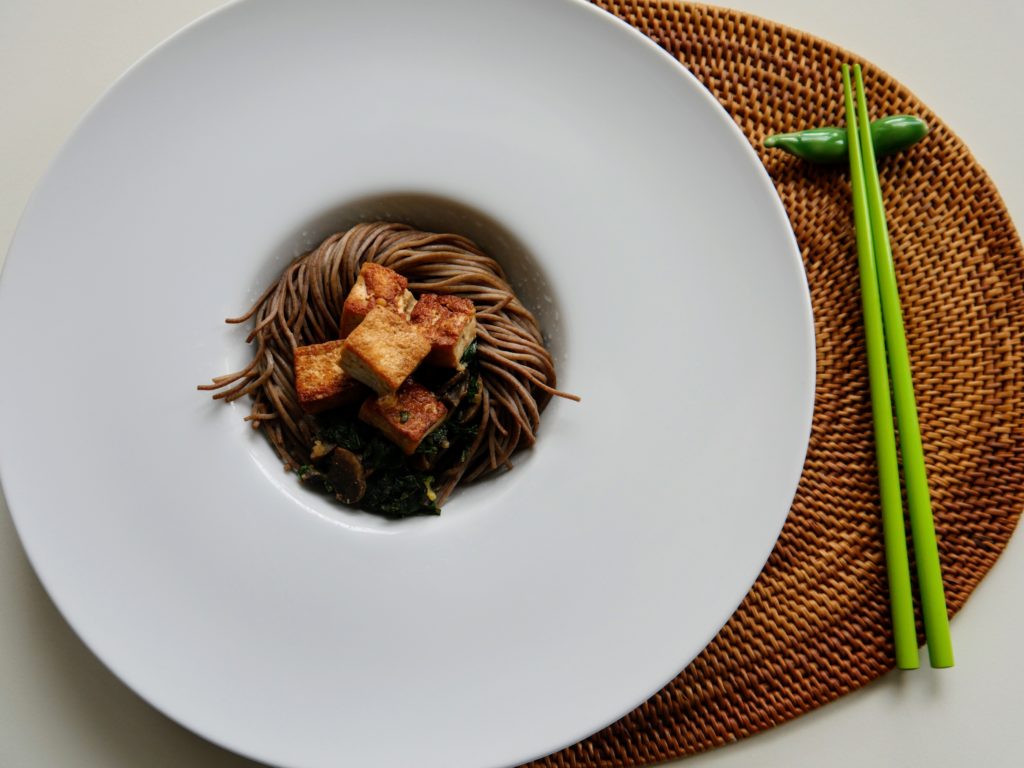
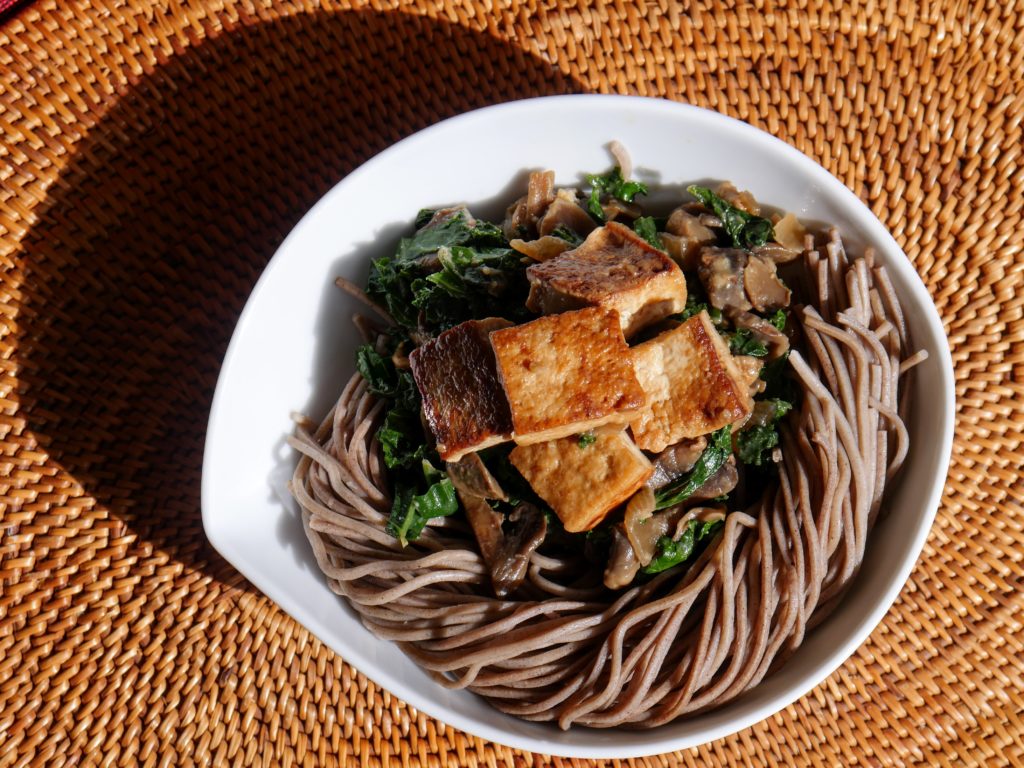
Tofu, Mushrooms, and
Hearty Greens in Miso Broth
Source: I Thought There Would Be Free Food
Serves 4–6 people, depending on hunger levels
Total time: 45–60 minutes, depending on your knife skills
Ingredients:
1 tablespoon + 1 teaspoon sesame oil, divided
1 medium onion
~ 3 garlic cloves
1 14 ounce package of firm or extra-firm tofu
16 ounces white button mushrooms (you can use
other varieties, but the cooking times may vary; for example, shiitakes release
very little water and won’t require much sautéeing)
2 tablespoons soy sauce
1/2–1 full bunch hearty greens (after chopping
you should have about 4 cups); kale, sweet potato greens, or Swiss chard will all
work well
1/4 cup red miso paste (red has a slightly
stronger flavor than other varieties, but feel free to use what’s available)
2/3 cup hot water
Soba or rice, for serving
Directions:
Remove the tofu from its soaking liquid and
slice into 8 equal rectangles. Lay the slices on one half of a clean dish towel
and then fold the other half of the towel over the tofu. Place a large cutting
board or baking sheet on top of the slices and press down firmly, with even
pressure, for 2–3 minutes, or until the towel has absorbed much of the tofu’s
excess liquid.
Stack four slices of tofu on top of each other
and then cut into eighths, forming neat cubes approximately one-inch square.
Set aside. Repeat with the remaining tofu.
Finely chop the onion and set aside. Mince the
garlic and set aside.
Heat a large skillet or wok over medium-high
heat. When the wok is hot, add 1 tablespoon of sesame oil; when it’s warm, toss
in the tofu. If your cooking vessel isn’t very large, you may need to brown the
tofu in two separate batches, as crowding the pan will cause it to steam rather
than brown.
Keep an eye on the tofu and toss occasionally to
prevent scorching. While it cooks, wash your mushrooms, trim the tough ends at
the bottom of the stems, and thinly slice the mushrooms, stems, caps, and all.
Set aside.
Once your tofu is golden brown on most sides (it
needn’t be on every side—don’t worry about perfection here), add the soy sauce.
It’ll make a nice sizzling noise, bubble about, and then cook down in fairly
short order. Once the tofu has absorbed the liquid, transfer it to a plate and
set aside.
This is an excellent time to pause and start the
water for your soba or rice, whichever you prefer. (I’ll let you take care of
making that.)
Add the additional teaspoon of sesame oil to the
wok; when it’s hot, add the onions and sauté; when they start to become
translucent, add the mushrooms and garlic. Cook until the mushrooms have released
all their water and the mixture turns dry and begins to brown.
It’ll take some minutes for the mushrooms to
cook, so you’ve got time to wash your hearty greens, de-rib them, if that’s
your preference (but don’t toss those stems! More on that in a future post),
and slice them into ribbons. The best way I’ve found to do this is to work with
a small pile of de-ribbed greens at a time, rolling them into an ovular tube/mound
kind of thing before slicing thinly (if this isn’t making any sense, Food 52
has excellent photos instructions here).
Once the mushrooms are starting to brown, toss
in the greens and sauté until they start to wilt. Meanwhile, stir together the
miso and hot water in a medium bowl until the paste has dissolved. Add the miso
mixture to your wilted greens and simmer briefly—about long enough to make sure
your soba or rice are ready to eat. When they are, return the tofu to the wok,
stir to coat it in the miso broth, and dish up.
In the not-too-distant past, I was something of a
professional traveler, spending months away from home on various assignments.
It was a mixed experience; as a travel lover and someone who enjoys learning
about other cultures, I relished it. But as someone separated from their
partner and, if I’m honest, someone separated from their kitchen, it was a
challenge.
On a three-month long trip to Amman earlier this year, my
partner surreptitiously snuck a packet of New York Times Cooking sections into
my luggage as a “travel well” and “don’t miss your oven too
much” gift. I started reading a section over breakfast each weekend, and it
quickly became a treasured routine, in part because of the connection to home
and in part because of the food. Weekend breakfast in Amman was a thing of
beauty: hot, pillowy breads; an assortment of salads and olives and pickled
vegetables (like my favorite, makdous); cheese and labneh;
ful medames. At the
end of the meal, I’d pour another cup of coffee, spread open a Cooking, and
tuck into a wedge of halva, a fudge-like Middle Eastern sesame confection
that’s sweet, a tiny bit bitter, and deliciously crumbly. It was a routine
worth savoring, and also how I came to be reading an outdated column about
cooking for Hanukkah in February. Melissa Clark’s recipe for olive oil brownies
practically leapt off the page at me, and with the taste of halva lingering in
my mouth, how could I not think to combine the two?
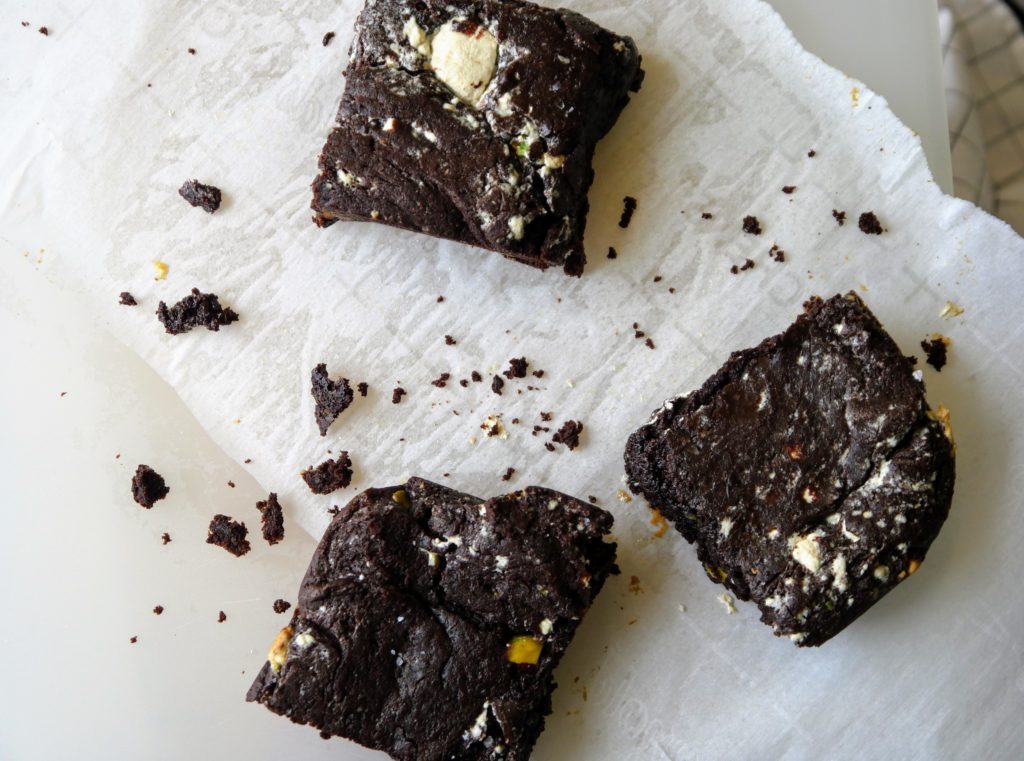
Back at home, I tinkered with Melissa’s recipe, removing a tablespoon of olive oil to make the brownies less oily, adding an extra ounce of unsweetened chocolate (because how annoying is it when most bars are four ounces but a recipe calls only for three?), and folding in a full two cups of chopped halva. The result is a one-bowl brownie, decadent chocolate married with halva, a bridge between the life I put on hold while I traveled and the one I found when I arrive
Makes 9 or 16 brownies, depending on how much you feel like
sharing
Active time: 15 minutes; total time: 35 minutes
Ingredients:
4 ounces unsweetened chocolate
1 cup sugar (I prefer dark brown sugar, but feel
free to use white or light brown sugar, if that’s what you have on hand)
1 teaspoon table salt (trust me, the salt helps
balance the sweetness of the halva)
1 tablespoon vanilla extract
1 egg
5 tablespoons olive oil
1 teaspoon instant coffee or 1/2 teaspoon
instant espresso (optional, but this will make your brownies taste more
chocolatey without adding a coffee flavor)
1/4 cup cocoa powder
1/4 cup boiling water
1 cup all purpose flour
1/4 teaspoon baking powder
About 1 pound halva, any flavor (I used
pistachio)
Flaky sea salt, to finish (optional)
Directions:
Roughly chop the unsweetened chocolate into small pieces, about 1/2 inch square. Place the chocolate in a large glass bowl and melt in the microwave—several one minute blasts at 50% power usually does the trick without burning the chocolate—or over a double boiler.
While the chocolate is melting, check your oven and make sure the rack is in the middle, and then preheat it to 350F. Grease an 8 inch by 8 inch pan with butter or cooking spray, and line the pan with parchment paper (it’s fine to leave a parchment overhang on two sides, as this will make it easier to get the brownies out of the pan).
Assemble the rest of your ingredients and chop enough halva into cubes about 1/2 inch square to get two cups. If the chocolate finishes melting before you’ve finished all of this, that’s fine; just set it aside for a few minutes.
Once the chocolate has melted and you’re ready, add the sugar, salt, vanilla, egg, oil, and instant coffee (if using) to the melted chocolate. Mix well to combine. No need for fancy techniques here; just get everything mixed up.
Add the cocoa powder and boiling water next, again mixing well and mashing out any little cocoa lumps against the side of the bowl until the batter is smooth and homogenous.
Now add the flour and baking powder, mixing well to ensure there are no unblended pockets of flour. This is a good place to sneak a taste and make sure you’ve added all the ingredients. Did you forget the salt? The olive oil? No? Well then, proceed.
Finally, add the halva. It’ll likely crumble as you stir it in, and that’s fine! This way, you’ll end up with some nice big chunks and some tiny crumbles, and it’ll be all the more delicious.
Tip the batter into the prepared pan and spread it about with a spatula to cover the bottom. Remember that these are brownies, so it doesn’t have to look perfect.
Slid the pan into the oven to bake. It’s absolutely critical that you don’t over-bake these brownies, so I recommend setting your timer for 15 minutes and checking every two or three minutes thereafter—my brownies took about 18 minutes, but they could take several minutes longer if your oven runs cool. You’ll know the brownies are down when everything looks set (it shouldn’t look as though it would jiggle if you shook the pan) and only parts of the middle are still shiny.
Remove from the oven and immediately scatter sea salt over the top. Allow to cool most of the way before cutting and serving. These will keep on the counter, covered, for several days.
I didn’t quit my job to start this blog (I’m under no illusions I’m the next Deb Perelman, let alone the next Julia Child), but I realized that I’d outgrown it, wasn’t getting any younger, and that it was time to reprioritize, to focus on what I most want to do—like starting the blog I’ve been dreaming about for years. From those realizations, it was a series of terrifying steps to submitting my notice, buying a domain name, figuring out what web hosting/widgets/plugins, and hitting publish on this first post.
That’s an awful lot of risky moves for someone with a strong aversion to the F word—failure—which is why I’ve felt the need for a little extra boost these past few weeks, and why the first recipe on this blog is for bread. You see, making bread requires bravery. It’s no surprise to me that so many casual bakers are afraid to attempt it; there’s so much that can go wrong! To transform flour, salt, and yeast into a beautiful loaf, you have to face a lot of potential obstacles, from dough that doesn’t rise to over-proofing. Maybe your bread turns out perfectly—great, and congratulations! Maybe it never rises or you forget the salt or your oven goes on the fritz and burns it. That’s okay too. Hopefully you learned something, and hopefully it was more fun to have tried than not. The experience of trying is what baking and cooking are all about it. Heck, they’re what this site is all about: trying for the sake of trying. Trying for the sake of fun. Trying, just because.
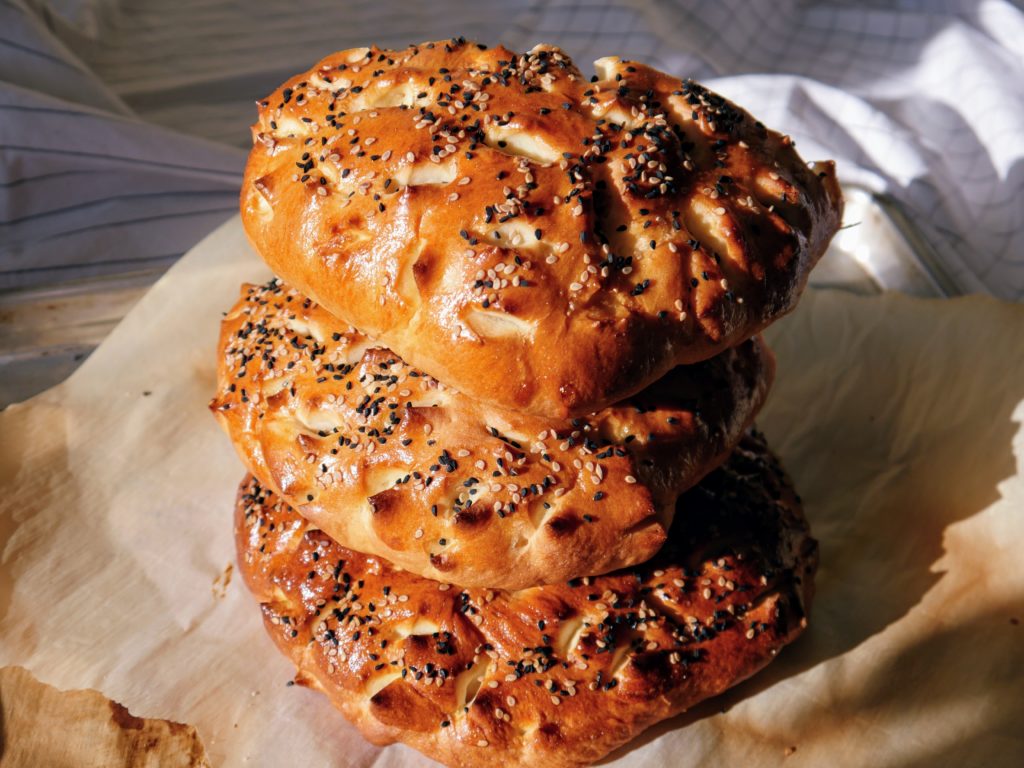
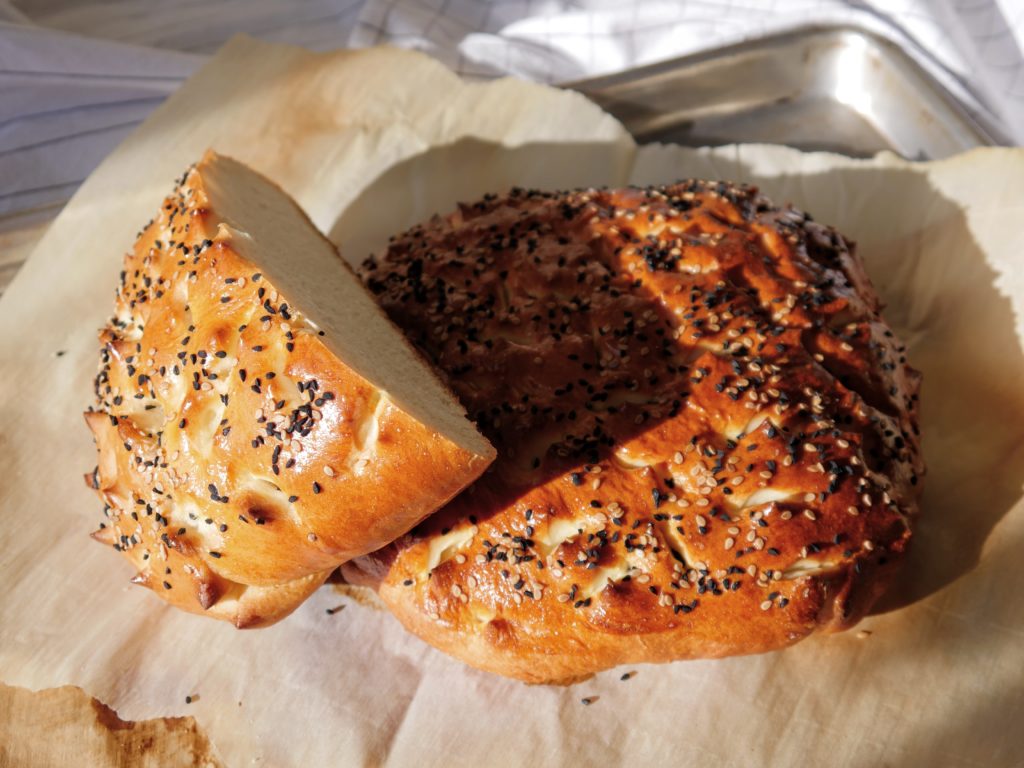
Enough talk, more carbs. Bukhari bread is inspired by the intricate breads of Uzbekistan, and it is lovely: soft, a little sweet, tender from the egg-enriched dough, and with a bit of crunch thanks to a scattering of nigella (black cumin) and sesame seeds. The top is covered with endearing little peaks, a hedgehog of a bread, and it’s deeply satisfying to plop a still-warm loaf on the middle of your table and invite your friends to tear into it. Bukhari bread makes an excellent accompaniment to virtually any meal, but I think it’s best alongside a dish of layered tahini and date molasses, which swirls together and ends up a fabulous mix of savory and sweet—an excellent reward for bravery.
Makes 1 large or 2 small loaves, comfortably serving 6
people
Active time: 1 hour; total time: 4 hours
Ingredients:
1 1/2 tablespoons active dry yeast
2 tablespoons sugar
1 cup warm water
3 1/2 cups all purpose flour (I prefer unbleached)
2 teaspoons table salt
1 egg, lightly beaten
3 tablespoons neutral oil (olive, sunflower, canola—whatever you have on hand), plus enough extra to grease a large bowl
1 tablespoon nigella seeds, sesame seeds, or a mixture of both (my favorite)
1 egg beaten with a little water (for egg wash—optional but highly recommended)
Directions:
Put yeast and sugar in a small bowl. Add the water, stir to mix, and set aside to proof. It’s ready to use when the mixture is bubbly and frothy, which should take about 5 minutes.
Meanwhile, stir together the flour and salt in a large bowl. When the yeast is ready, add it to the flour/salt mixture along with the beaten egg and oil and stir to combine. Your dough likely won’t look very dough-like at this point and that’s fine; just work everything together a bit.
Once the wet and dry ingredients are largely combined, tip everything out onto a clean countertop. Knead for 10–15 minutes until you have a ball of smooth, only slightly tacky dough. If you’ve been kneading for at least three minutes and the dough feels very firm and dry, consider adding a bit of additional water, one tablespoon at a time, as necessary, kneading after each addition until you reached the desired consistency. If you have the opposite problem and your dough is so wet it’s slopping about the counter, consider adding a bit of additional flour, tablespoon by tablespoon, kneading well after each addition.
When your dough is ready, place in a large, well-oiled bowl. Cover and let it rise until doubled in size, 1–2 hours depending on how warm it is where your dough is living.
After your dough has risen, knock it down to push out the air. At this point, you can opt to bake one large loaf or two small ones.
To make one large loaf: Plop the knocked-down dough on a parchment-lined baking sheet. Use your fingers to press it out to a circle-like shape, about 1/2 inches tall and 11 inches in diameter. Cover loosely with plastic wrap or a damp towel and leave to rise again, about 1 hour.
To make two small loaves: Divide the knocked-down dough into two equal pieces (you can do this in the bowl your dough rose in). Working in turns, give each ball a few quick kneads before putting onto a parchment-lined baking sheet—you’ll need one for each loaf. The dough will likely resist being pressed out at this point, so cover it loosely and let it rest for 5–10 minutes. Come back and press each ball into a circle-like shape about 1/2 inch tall and 7 inches in diameter. Cover loosely and leave to rise again, about 1 hour.
When your bread is about done with its second rise—it should be at least 1 inch tall—make sure you have a rack set in the middle of the oven, then start it preheating to 475F.
Here’s the fun part: take a pair of kitchen shears (or exquisitely clean scissors) and snip into the bread, as little or as much as you like, as deep or as shallow as you want. You have full creative license!
When you’re done with the scissors, use a pastry brush to coat the top of your bread with a beaten egg, then sprinkle on the nigella and/or sesame seeds. The egg wash is optional, but without it, the seeds won’t adhere to your bread.
To bake one loaf: Pop your loaf into the oven and bake for 10 minutes at 475F. Reduce the oven temp to 400F, rotate the baking sheet, and bake your bread another 6 minutes or so, or until the loaf is golden.
To bake two loaves: If your oven is big enough to hold two baking sheets at once, do that; otherwise, you’ll need to repeat these instructions for both loaves. Bake each loaf at 475F for 7 minutes, then reduce the oven temperature to 400F, rotate the baking sheet, and bake your bread for another about 3 minutes, or until golden.
Bukhari bread is best eaten warm on the day it was baked. If you can’t finish it, eat it as soon as possible or pop part of your bread into the freezer for another time.