Orange-Rosemary Polenta Cake

Dessert

I started developing this recipe in November, perfected it in December, and shot the photos in January. It is now, as you might be aware, May. Even for a very slow blogger such as myself (Exhibit A: Sourdough Croissants), this is, well—slow.

The tortoise-like pace of my writing has been in direct contrast to that of the rest of my life since the new year. Opportunities have been flying my way, thick and fast, and I’ve been trying hard to grab hold of them. My gratitude for those opportunities is boundless, but apparently my energy is not: I write this while sick with a cold, my body’s giving way a sure sign that I’ve been going a bit too hard since the New Year.

Life has taken a backseat to work these past few months, but I’m gradually reclaiming my non-professional personhood. Right now, what I crave most is time to be my full self. After months of never-ending to-do lists and not-enough rest, all I want is time to putter about the flat or play with our pup, time to read for pleasure or cook for more than sustenance. With such a craving for time, it’s unsurprising that I find myself turning to the slow recipes, the ones with lots to give: no-knead breads, long-simmered chicken stocks or stews. Unfussy, unpretentious food, that is abundant in forgiveness (nothing with a rigid schedule or that requires a great deal of attention) and in quantity (if one has little time to cook, one should make the most of that time). With the gift of time, baking and cooking—and, just as importantly, eating—are starting to feel like a joy again, not a chore.

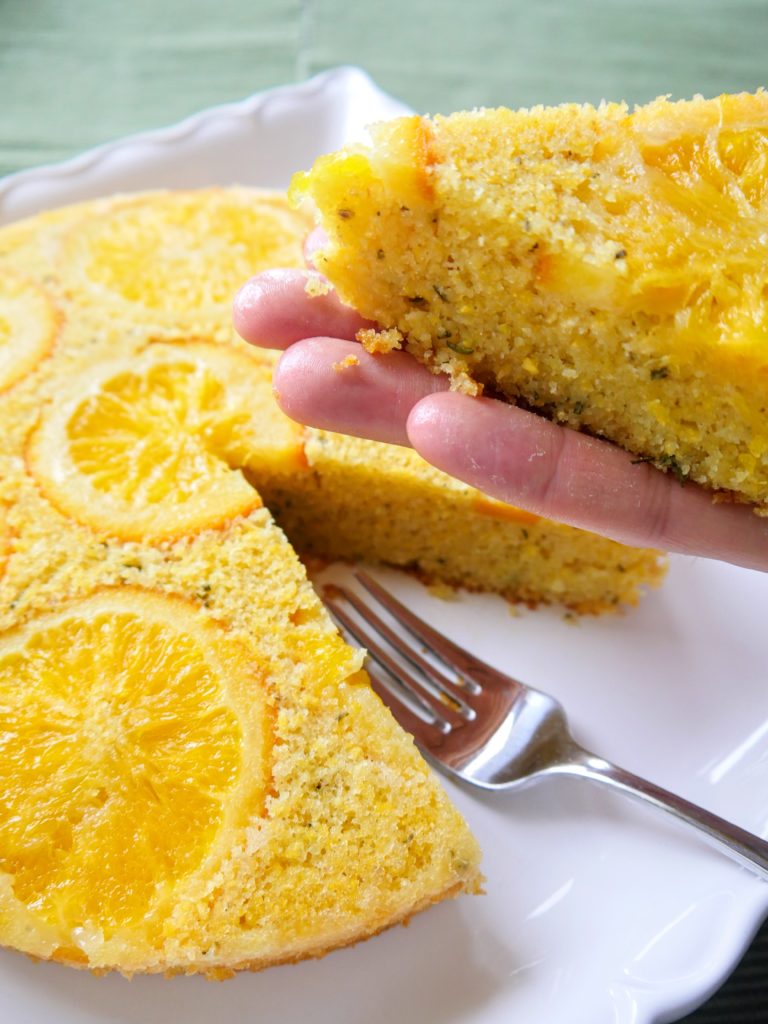
This cake strikes exactly the right balance, requiring a bit of kitchen puttering but no master chef-level skills. (Unintentionally, it also strikes the balance between seasons, offering a good use for end-of-season citrus, before the rhubarb and strawberries arrive.) As orange slices cook in a simple syrup, you mince a bit of rosemary and fold it into a simple cake batter. Arrange the oranges in the bottom of the pan, pour in the batter, and bake; it even gets better after sitting for a day—another gift of time.

Orange-Rosemary Polenta Cake

Sources: loosely inspired by Melissa Clark’s Upside-Down Blood Orange Cake

Makes 1 8-inch cake

Active time: ~40 minutes; total time ~90 minutes

Note: You can candy the orange slices several days before making the cake. Simply store them, in their syrup, in the refrigerator until you’re ready to bake. Rewarm gently before using.

Ingredients:

  • 2 cups sugar, divided
  • 1 large orange
  • Fresh rosemary
  • 3/4 cup medium-grind cornmeal
  • 3/4 cup all-purpose flour
  • 1 1/2 teaspoons baking powder
  • 1 teaspoon salt
  • 2 sticks room-temperature butter (plus a bit more for buttering the pan)
  • 1 cup sugar
  • 2 teaspoons vanilla
  • 4 large, room-temperature eggs
  • 1/2 cup milk

Directions:

  • Preheat your oven to 350°F degrees.
  • While the oven is preheating, heat 1 cup sugar and 1 cup water in a small saucepan until boiling. Thinly slice the orange, peel and all, excluding any slices that are all pith. Once the sugar syrup is at a boil, reduce the heat to medium and add the orange. Cook, stirring regularly, until the peel is softened and translucent.
  • As the orange candies, finely mince the rosemary—you should have ~1 tablespoon.
  • Butter and flour an 8-inch cake pan; set aside. Stir together the dry ingredients (cornmeal, flour, baking powder, and salt) in a medium mixing bowl until well combined; set aside.
  • In a large mixing bowl, cream together the butter and sugar until light and fluffy. Add the eggs, one at a time, pausing to beat well to incorporate after each addition. Scrape down the bowl and add the vanilla, beating well.
  • Add half the dry ingredients, beating to incorporate, followed by half the milk. Mix well and scrape down the bowl. Repeat with the remaining dry ingredients and milk, mixing well and giving the bowl a final scrape down.
  • Using a fork or pair of tongs, gently lift the orange slices from the sugar syrup and let the majority of the syrup drip away before arranging the slices in the bottom of the cake pan. (It’s fine to get a little syrup in the pan.) Gently pour the batter over the oranges and smooth the top.
  • Put the cake in the oven and bake for ~45–50 minutes, or until the top is golden brown and a cake tester inserted into the center comes out with just a few crumbs clinging to it. Let cool for at least 10 minutes before inverting onto a plate or serving platter. This cake is best cut with a small serrated knife, and keeps beautifully, gently covered in plastic, for several days. It is superb garnished with a dollop of fresh, softly whipped cream.

Cinnamon Pecan Chocolate Tart

Dessert

Some of my recipes are attempts at recreation: I’ve eaten a dish that’s so good I simply must find out how to make it and put it on regular rotation in my kitchen. Others, however, start not as an attempt to recreate but to rectify, to do justice to what I thought something was going to be, before reality failed.

Such is the genesis of this tart. More than a year ago, my partner and went out for a hike and then stopped at a little French bakery outside of town. We picked up some bread and a pastry or two, and though my Chief Recipe Taster tucked into his choice before we’d even left the place, I waited. I was going to take my pastry—my pecan tart, you guessed it—home and savor it. The first bite would dazzle me. The cinnamon would supplement the toastiness of the pecans, offsetting the sweetness of the filling; the crust would crumble under my teeth. Sounds great, right? Except that that’s not what happened, not at all. I had my favorite chair and a good movie all right, but the tart was all wrong. It was too sweet, the filling a bit gloppy and the flavor cloying; the pastry didn’t shatter and didn’t really have much flavor, either. The best that could be said for the entire thing was meh.

I knew I could do better, so I set out to do so. My first attempts were uniformly meh as well. I’d decided to incorporate chocolate (because why not), but I couldn’t figure out the best way to do that. I couldn’t find a crust recipe that I liked. The fillings were all wrong—too sweet, not enough cinnamon, too thick. I got so frustrated, and so tired of eating trials and errors, that I put the recipe aside for awhile.

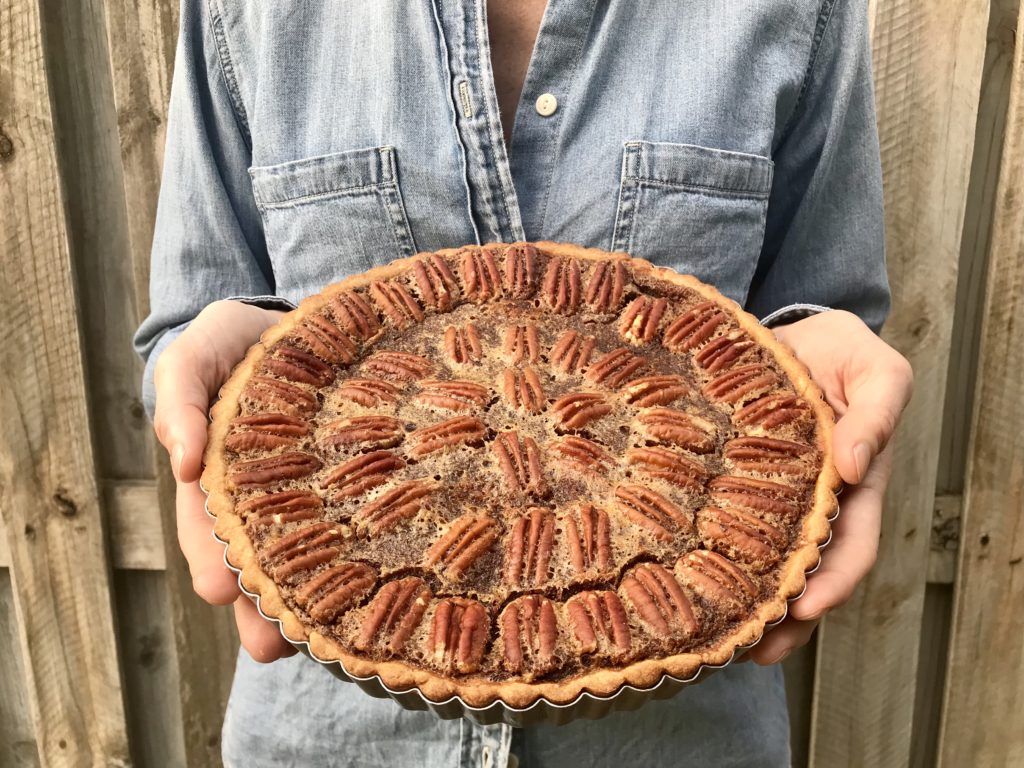
As soon as the weather turned cool this year, however, my thoughts turned back to the tart. “What if,” I wondered, “I coated the bottom of the tart shell with a chocolate ganache…” and because you can hardly ever go wrong when chocolate ganache is your starting point, I was off and running from there. A bit of research, a trial tart or two, and the recipe was done. After I’d baked the last trial tart, I sat down to give it a try. This time, it was everything I’d hoped for. Using a ganache, rather than just tossing chocolate chips into the filling, keeps the chocolate bitable; using a pate sucree, rather than a pie crust, keeps the pastry rich and finely textured, a nice counterpoint to the gooey filling. A judicious amount of salt keeps the sweetness in check, and the cinnamon makes it all more interesting. There’s no failure of reality here; this recipe more than does justice to what that original tart might have been.

Cinnamon Pecan Chocolate Tart

Sources: Crust adapted from, and filling inspired by, Dorie Greenspan’s Baking: From My Home to Yours

Makes 1 9-inch tart

Active time: ~60 minutes; total time ~90 minutes

Note: You can spread the work of this tart out over two days by making the tart crust and ganache ahead of time. If you do so, press the tart crust into the pan and cover well; store it in the refrigerator until you’re ready to fill and bake it. Likewise, cover and chill the ganache. Take it out of the refrigerator an hour or so before you plan to use it, or zap it on low power in the microwave until it’s spreadable again. Either way, give it a good mix to ensure it’s smooth and spreadable before using.

Crust Ingredients:

  • 1 1/2 cups all-purpose flour
  • 1/2 cup confectioner’s sugar
  • 1/2 teaspoon salt
  • 9 tablespoons butter, cut into 1/2-inch cubes and kept very cold
  • 1 large egg yolk

Ganache Ingredients

  • 1/4 cup bittersweet chocolate chips (I use Ghiradelli 60%)
  • 1/4 cup heavy cream

Filling Ingredients

  • 3/4 cup light corn syrup
  • 1/2 cup lightly packed brown sugar
  • 2 tablespoons butter, melted and cooled
  • 3 large eggs
  • 1 teaspoon vanilla extract
  • 1 tablespoon ground cinnamon
  • 1 teaspoon salt

1–1 1/2 cups pecan halves (not pieces)

Make the crust: Put the flour, sugar, and salt in the bowl of a food processor and pulse several times to combine. Sprinkle the butter cubes over the dry ingredients and pulse until the butter is cut in and is roughly the size of oatmeal flakes. Add the egg yolk and pulse for about 20 seconds several times. The sound of the food processor will change—this is your signal that the mixture is about to come together. Let it just barely do so, then tip the dough into a large bowl. Lightly toss it about a few times to ensure the ingredients are fully incorporated. Press about 2/3 of the mixture into the bottom of a 9-inch tart pan with a removable bottom and use the rest of the dough to line the sides. I like to roll my tart dough into logs and press those against the sides—I get a more consistent thickness around the edges this way. You can, of course, dump all of the dough into the tart pan and press it to cover the bottom and sides; baker’s preference. Let the prepared tart crust chill in the refrigerator for at least 30 minutes or up to one day.

Make the ganache: Put the chocolate chips in a heatproof bowl. Bring the heavy cream to a simmer then pour over the chocolate. Let stand for a few minutes, then slowly whisk until you have a silky, homogenous mixture. If not making the ganache ahead of time, let it cool to at least room temperature.

Preheat your oven to 375°F degrees.

Make the filling: Whisk all of the ingredients together until smooth and well combined. Rap the bowl against your counter a few times to surface and pop any air bubbles. Set aside.

Put it all together: Remove the tart shell from the refrigerator and place it on a cookie sheet covered with parchment paper. Spread the bottom of the tart shell evenly with the ganache. If your tart shell is very cold, the ganache might freeze on impact; this is nothing to worry about. Gently pour the filling over the ganache. Arrange the pecan halves decoratively on top of the filling and carefully slide the tray into the oven. Bake for 30–35 minutes, until the top is puffed and the filling doesn’t jiggle much when you give the tray a shake.

Let the tart cool completely to room temperature—which will take several hours—before slicing. Enjoy with vanilla ice cream or fresh, homemade whipped cream. This tart is best eaten the day it’s made.

Molasses Cookies

Dessert

Most every Labor Day, I set off to bike across Michigan with my father and my partner, usually a family friend or two. It’s one of my favorite events of the year.

The ride is DALMAC, a five-day, volunteer-run tour that’s been going on for 50 years. It’s a simple premise: you leave from Michigan’s state capitol, Lansing, and ride to the northernmost point of the lower peninsula, Mackinac City. The days are simple, too: you wake up, pack up, ride 70 miles, unpack, eat. You’re responsible for so little, just getting yourself from point A to point B, and there is great joy in that simplicity.[SF1]  There’s nothing more in the way of agenda, no long to-do list—just you, your bike, and Michigan.

In the good years, when the weather is fine*, DALMAC can convince you that Michigan is the most beautiful place on earth. The first two days take you through farmland, flat, green, fecund patches of earth. Then you come into the rolling hills of northern Michigan, with their foggy mornings and the sharp tangy smell of wild apples. By the fourth and fifth days, you’re skirting around the shore of Lake Michigan, catching glimpses of the clear blue water as you climb and dip and curve around vineyards and pastures and yet more farms. Every year, I catch myself wondering if there is any place more breathtaking than Michigan during the slide from summer into fall.

Michigan is indisputably lovely, but some of my sentimentality about DALMAC might also be due to the company of two of my favorite people (my dad and my partner) and some of it to the food, Midwestern cuisine at its finest. The food at camp might be utilitarian rather than gourmand, but the food along the route more than makes up for it. There’s the campground at Lake George with its huge, smoking grills full of brats, burgers, and hot dogs; the girls’ cross-country team that sells root beer floats outside of Marion; the Douglas Lake Bar and Steakhouse in tiny Pellston; the little church on the hilltop in East Boardman or the Good Hart General Store along the lake, both with endless rows of baked goods. And, last but not least, there is the thing that we ride for, the promise of which makes tired legs pump harder and any size hill seem manageable: the DALMAC molasses cookie.

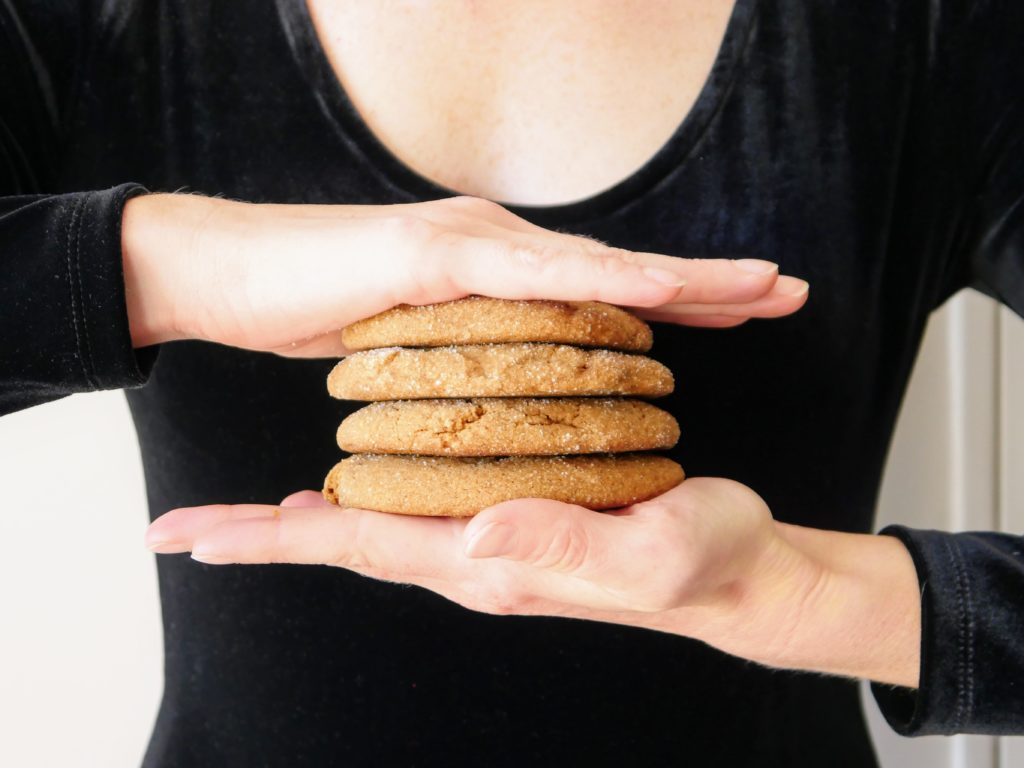
Along every route, the tour organizers arrange a few rest stops along stretches where there aren’t many other options for food, and if you’re very lucky, the organizers will have cookies at a few of those stops. Let me tell you about these cookies: they are the size of your face. There are hundreds of them, in all the greatest-hits flavors—chocolate chip, oatmeal raisin, peanut butter, and the sublime molasses. Your day’s riding might have been chilly or hilly; you might be close to bonking; your bum might be very, very, sore, but these cookies are magic. Bite into a thick molasses chomper and forget your woes; they’re soft, redolent with butter and spice; pleasantly but not-too sweet. These cookies are mythic: we talk about how good they are months after we finish the ride.

And if a cookie is that good, you’ve got to have it more than once a year, right? But frankly, I despaired of every making a molasses cookie as good as the ones I had on DALMAC. Fresh air, a ravenous appetite, and the golden glint of nostalgia make everything taste better. I tried here or there throughout the years, generally landing on something that was good but not great. Finally, however, I found the right formula: a generous but not overly so amount of spice; all brown sugar for deeper flavor, and just enough flour to give the cookies heft without impeding their buttery softness. They might not be quite as good as a DALMAC cookie eaten on an and-of-summer day in Michigan, but these come pretty close.

*For the sake of honesty, I must add that the weather is NOT always fine—there’s a reason we refer to the 2010 ride as “DALMAC of the damned.”

Molasses Cookies

Source: Adapted from The New Best Recipe

Makes ~9 or 10 four-inch cookies

Active time: ~30 minutes; total time ~45 minutes

Ingredients:

  • 12 tablespoons butter, at cool room temperature
  • 1/2 cup brown sugar (dark or light)
  • 1 large egg yolk
  • 1 teaspoon vanilla
  • 1/2 cup molasses (dark or light but not blackstrap)
  • 2 1/4 cups all-purpose flour
  • 1 teaspoon baking soda
  • 1 1/2 teaspoons ground cinnamon
  • 1 1/2 teaspoons ground ginger
  • 1/2 teaspoon ground cloves
  • 1/2 teaspoon ground black pepper
  • 1/4 teaspoon ground allspice
  • 1 teaspoon salt
  • 1/2 cup granulated sugar, for cookie rolling

Directions:

  • Center two racks in the middle of your oven, then preheat it to 375°F. Line two baking trays with parchment paper; set aside.
  • Cream the butter and sugar together until the mixture has lightened in color and texture. Add the egg yolk, vanilla, and molasses, and beat to combine. Scrape down the bowl.
  • Add all of the dry ingredients (flour through salt), beating on the lowest speed to incorporate. Give the bowl a scrape to ensure that you’ve incorporated all of the dry ingredients, and mix again briefly, if needed.
  • Portion the dough into 9 or 10 balls—it will be soft, so you may need to lightly wet your hands to prevent it from sticking. Roll the balls in the sugar, then transfer to the baking trays; give each dough ball plenty of space to expand.
  • Put the trays in the oven and allow the cookies to bake for 5 or 6 minutes; rotate the sheets from top-to-bottom and side-to-side. Bake for an additional 5 or 6 minutes. When you pull the trays from the oven, the cookies should be set along the edges, lightly puffed and browned, but still a bit wobbly in the center. This is fine; a slightly undercooked cookie is always superior to a slightly overcooked cookie.
  • Let the cookies cool as long as you can stand—I won’t advocate burning your mouth but they really are best when still warm. Anything you don’t immediately consume will keep well, covered on your counter, for a few days.

Banjaan Borani

Entrees

I spent the month of July in Kabul. When the assignment arose, I was excited—euphoric!—for all kinds of reasons, some altruistic (supporting my colleagues) and many somewhat selfish. Beyond the anticipation of international travel, on hold these many months, was the thrill of going to a place I’d heard about for decades. I’ve been curious about Afghanistan since I was in high school, observing 9/11 and my country’s subsequent invasions of Afghanistan and Iraq. I don’t think it’s a stretch to say that those events influenced my career path and engendered a deep curiosity to know what Afghanistan was really like, what Afghans were really like.

So when the opportunity came, I grabbed it. And, like so many things, it was everything/nothing that I’d expected. I knew I wouldn’t get to see much, since I’d be stuck on a compound for most of my visit. And I’ve lived on compounds before, so I knew to expect periods of claustrophobia, loneliness, and boredom. I knew I would miss my partner and our puppy. That all came to pass, as did a number of things that I didn’t know to expect. I didn’t expect to find Kabul so beautiful. I didn’t expect to hear “Happy Birthday” on repeat all-day every-day, the soundtrack to the ice cream carts circling my neighborhood. I didn’t expect to see the mountains from my balcony or eat the best mangoes I’ve ever tasted. I figured that I would find a few colleagues to become friendly with; I didn’t expect that they would so profoundly affect me: A, who speaks no English but always greeted me with enthusiasm and who collects the women’s lunch leftovers to take to her widowed sister; SP, who is fiery and bright and loves Hershey’s kisses; SA, soft spoken and iron willed and who arranged a special meal for me; M, thoughtful and savvy, who brought me perfect Afghan cherries, sad on my behalf that I couldn’t see much of the city. My time in Afghanistan was more than I anticipated, and also deeply unsatisfying, feelings that were complicated by what came later: a week after I left, on a regular, commercial flight, the Taliban completed their sweep through the country and seized Kabul.

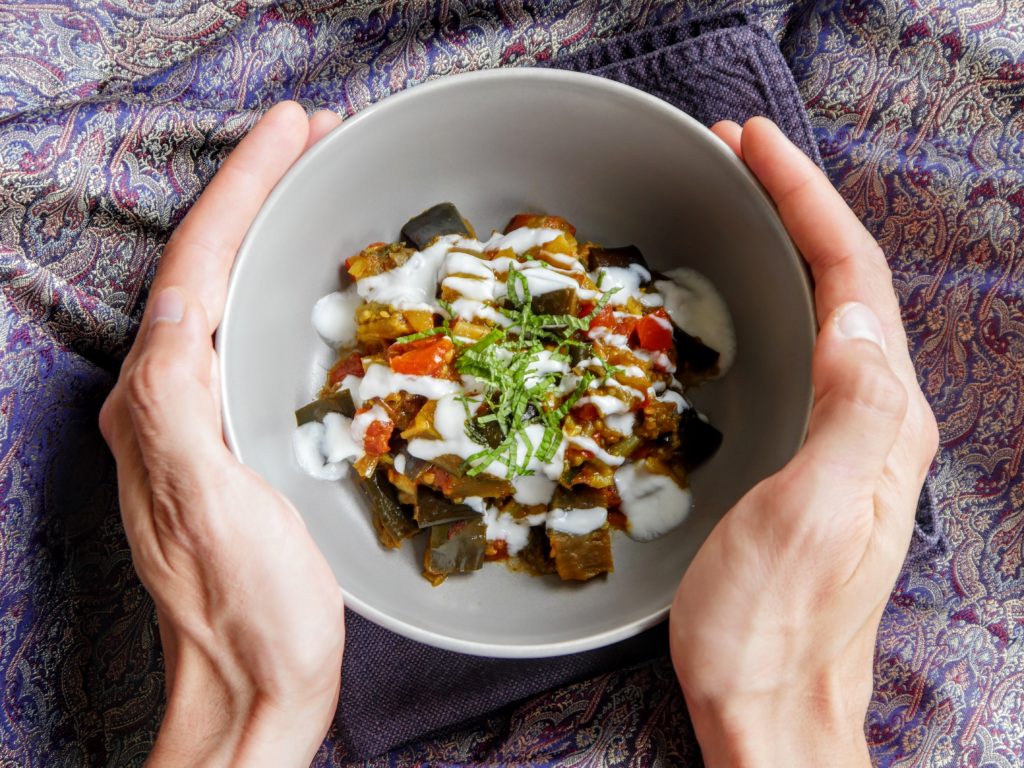
It’s been difficult to make sense of my experience and my feelings about it. I have the personal to contend with—the dualities of boredom and purpose, anxiety and enjoyment that I lived are not easy to process. There is also something bigger and harder to define, the sense that I un/willingly participated in world events, as an American and as an individual, that through the accident of my birth and my decision to work in this field, I have made decisions that have in/directly affected other peoples’ lives. Responsibilities lie somewhere in all of this, I think, but what they are and what I do with them, I’m still figuring out. None of this is easy to parse. The words stick in my throat when I try to talk with friends, they falter in my pen as I try to write. I’m giving myself permission to sort through the jumble slowly, on long bike rides and runs, or in the kitchen as I chop, sauté, and stir, perfecting my recipe for banjaan borani, an eggplant stew I had often in Kabul. Gradually, I’m coming to terms with the fact that it might take me years to come to terms with it all, if I ever do.

What does all of this have to do with food? Maybe nothing. Or maybe everything, because food is one of the primary ways that I experienced Afghanistan, and it was rich and varied and left me wanting more. And that is, perhaps, the perfect metaphor for my time in Kabul: it gave me just enough to whet my appetite but left my craving, to know something about the country and the people, undiminished.


*If you want to learn more about Afghanistan, it’s history and culture and cuisine, I recommend Durkhanai Ayubi’s cookbook, Parwana.

*If you have been following events in the country and want to help people still in Afghanistan, consider donating to Women for Afghan Women. If you’d like to help support Afghan refugees in the United States, consider volunteering with a resettlement agency, such as Lutheran Immigration and Refugee Services or the International Rescue Committee.


Banjaan Borani

Source: Inspired by Parwana

Serves ~6 people

Active time: 45 minutes; total time: 35 minutes

Note: There are probably a thousand different ways to make banjaan borani. Many recipes recommend peeling the eggplant, and/or frying it; cooking it as thick steaks; cutting the tomatoes in big slices; etc. I like to make it as close to what I ate in Kabul, and as easily as possible in my little kitchen, as I can.

Ingredients:

  • 2 pounds eggplant
  • Sunflower or vegetable oil
  • Salt and pepper
  • 1 large onion
  • 4 large cloves garlic
  • 1 1/2 teaspoons ground coriander
  • 1 1/2 teaspoon ground turmeric
  • 1 teaspoon white sugar
  • 2 teaspoons white vinegar
  • 5 large tomatoes
  • 2 cups plain yogurt
  • Lemon juice
  • Fresh mint
  • Rice or bread, to serve

Directions:

  • Slice the eggplant (either horizontally or vertically, it doesn’t matter) into 1/2-inch thick “steaks.” Brush them with oil and sprinkle them with salt and pepper. Either grill or broil the eggplant until it’s lightly browned.
  • While the eggplant is cooking, chop the onion and mince the garlic; set aside. Chop the tomatoes and set them aside.
  • When the eggplant is done and cool enough to handle, chop it into ~1-inch cubes. This can be done several hours in advance or even the day before. If you cook it the day before, keep the eggplant in the refrigerator until ready to use.
  • Heat a large skillet or Dutch oven over medium heat. When it’s hot, add a tablespoon or so of oil and then the onion and garlic. Sauté them until they’re turning translucent and starting to soften.
  • Add the eggplant, spices, sugar, vinegar, salt to taste, and tomatoes. Stir to combine.
  • Reduce the heat to medium-low and let the mixture cook, adding water if it starts to stick, until most of the liquid from the tomatoes has cooked off and you have a thick, stew-like consistency.
  • Meanwhile, make the yogurt sauce: whisk the yogurt with lemon juice, to taste, and a pinch of salt. I like my yogurt thin and tangy, but you can leave it thicker and creamier, if you prefer. Chiffonade some fresh mint leaves while you’re at it.
  • When the stew is ready, ladle it into a bowl and top with yogurt and fresh mint. Excellent with either rice or fresh bread.

Lemon Raspberry Bars

Dessert
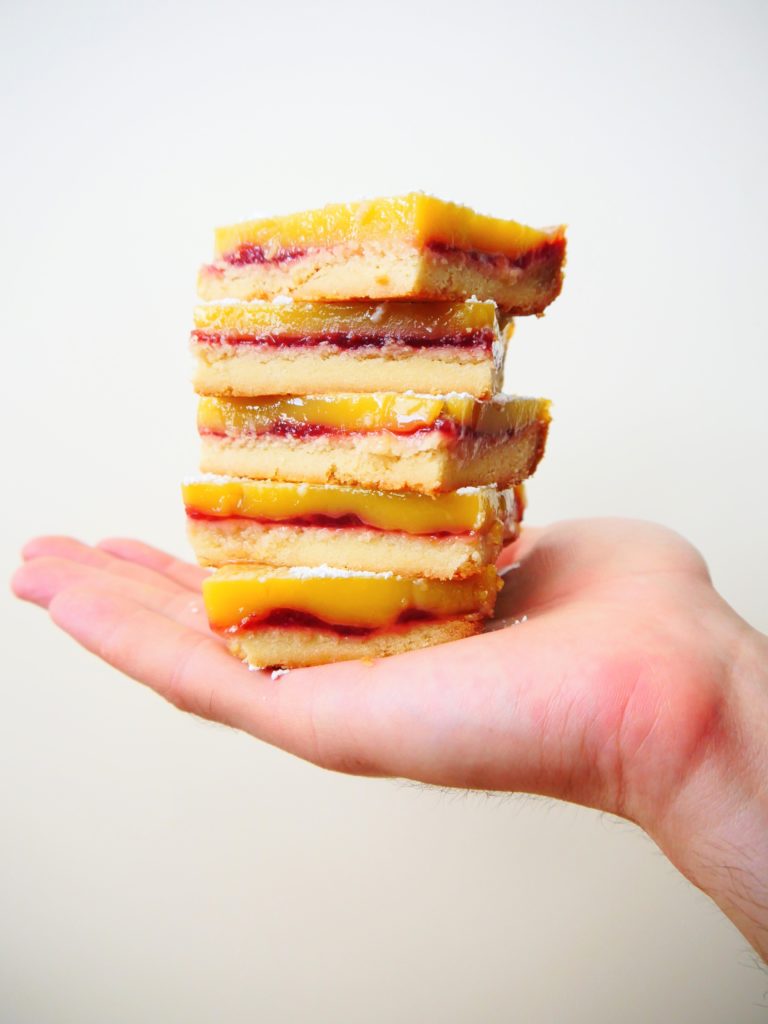
Five lemon raspberry bars (shortbread crust, raspberry jam, and lemon curd) sit stacked on Sarah's Chief Recipe Taster's hand.

I will never claim to understand inspiration. Sometimes I go weeks with nary an idea in sight and then have an avalanche of them. Sometimes I need to research and think deep weighty thoughts before an idea takes shape; other times, an offhanded comment is enough to get me started.

Such was the case with these bars. In mid-April, my Chief Recipe Taster and I were out hiking with a friend. As we got close to lunchtime, the talk naturally turned to food—what we’d been cooking lately, what we were in the mood for. Our friend mentioned that she’d recently made lemon bars and added a few fresh raspberries on top. The thought of a lemon raspberry bar made my mouth water. Inspiration seized me: I had to make my own. My ideal bar would be easy, made completely in the food processor; they would be somewhat seasonal (fresh raspberries were months away, at that point); and throw-together-able, with ingredients I usually had in the kitchen (lemon juice and raspberry jam). They’d be the kind of thing you could make with minimal effort and little forethought.

Sounds great, you might say. But wait a minute—you got this idea in mid-April and are just now posting about it at the end of June? Yes, that’s correct, and it wasn’t for lack of trying—it was because my Chief Recipe Taster can only eat so many desserts a day. After six(!) batches with a variety of problems (too much butter, too much filling, an unworkable idea for a crumb topping), I finally got reality to match inspiration. I might not understand inspiration, but I’m always happy when it strikes.

Lemon Raspberry Bars

Source: I Thought There Would Be Free Food

Makes 1 8×8-inch pan, ~9 squares

Active time: ~15 minutes; total time: ~65 minutes

Crust Ingredients

  • 1 cup all-purpose flour
  • 1/3 cup confectioners’ sugar
  • 1/2 teaspoon salt
  • 1 stick butter, cut into 8 pieces

Filling Ingredients

  • 1/2 cup lemon juice (either bottled or fresh-squeezed are fine)
  • 1 cup confectioners’ sugar
  • 3 eggs
  • 3 tablespoons raspberry jam (either seed-full or seedless will work)

Extra confectioner’s sugar for dusting, if desired

Directions

  • Center a rack in the middle of your oven, then preheat it to 350°F.
  • Butter and flour an 8×8-inch baking dish. Set it aside.
  • While the oven is heating, put all of the crust ingredients (flour, confectioners’ sugar, salt, and butter) into a food processor. Pulse several times for a few seconds each go, then leave the processor running until the dough starts to clump together, about ~45 seconds. It’s okay if the mixture isn’t uniform—a few stray crumbs won’t matter.
  • Tip the crust into the prepared baking dish and use the heel of your hand, or a large spoon, to firmly press the crust into the dish. Prick the crust several times with a fork, then slide the dish into the oven and bake until golden brown, ~20 minutes.
  • While the crust is baking, add the lemon juice, confectioners’ sugar, and eggs to the food processor (no need to clean it before doing this) and process until the filling is well-blended and uniform. Let it settle, stirring gently if needed, to get rid of any froth on top of the mixture.
  • Once the crust is done, remove it from the oven and lower the oven temperature to 325°F. Spread the crust with the raspberry jam. Slowly, slowly pour the lemon filling over the jam, taking care so as not to mix the two layers. Return the dish to the oven and bake for a further ~25-30 minutes, until the edges are lightly brown and the center is set (you’re looking for a Jell-O like jiggle, not the Kool-Aid man).
  • Let the bars cool completely before dusting them with powdered sugar, if you’re so inclined. Cut and eat.

What Making (Lots of) Sourdough Croissants Taught Me About Failure

Essays
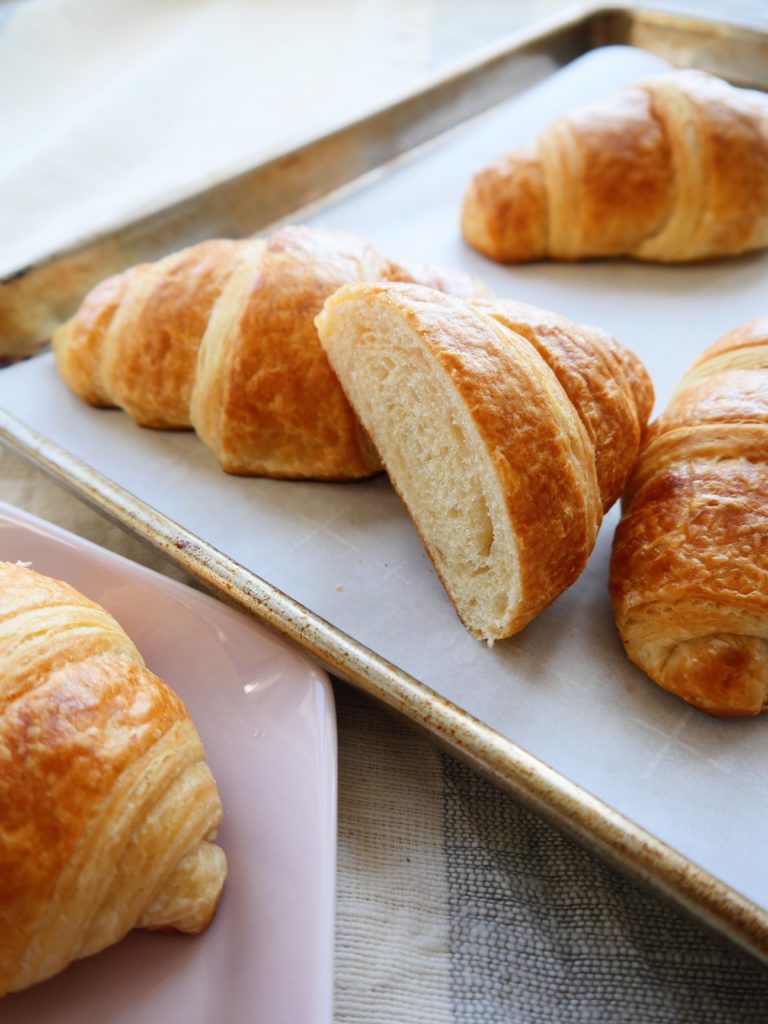
Several golden brown croissants rest on a parchment-paper lined baking sheet. Next to the sheet, another croissant sits on a pale pink plate.
Several golden brown croissants rest on a parchment-paper lined baking sheet.
Next to the sheet, another croissant sits on a pale pink plate.

A recent Sunday morning started with a squeal—mine—at an hour that pained my partner (if the look on his face was anything to go by) and at a level that pained the dog (if the look on her face was any indication). “Lookatthoselayers,” I enthused, jabbing a finger toward the tray of sourdough croissants proofing on the counter. The dog and my Chief Recipe Taster took a dutiful look. Truly, they were beautiful: what looked to be hundreds of layers of dough and butter are stacked perfectly, proportionately, on top of one another and then rolled into crescents. I basted them carefully with an egg wash; slid them lovingly, into a hot-but-not-too-hot oven. I set the timer, suffused with satisfaction. This time, this time, it would be different. This time, they would turn out.

You see, my baking history is littered with numerous decidedly less-than-perfect croissants. In my decade plus of serious amateur baking, I have produced croissants that could be used as cruise ship anchors, those marred by improperly incorporated butter packages, and others that have been too wet, too dry, or not at all flaky. Mind you, those were the croissants that I made with commercial yeast, before the idea of using sourdough ever occurred to me. Substituting one leavening agent for another did not, unsurprisingly, alleviate my problems; it added a whole new set of variables. Was I using enough starter? Was it active enough? Was it properly hydrated?

On the Sunday in question, however, I was supremely confident; my unbaked croissants had never looked better. So I poured myself another cup of coffee and sat down with a crossword puzzle. I was already anticipating how they’d smell and taste when I smelled something I’d not planned on, something not so delicious, something decidedly like burning butter. Panicked, I rushed over to the oven and found that, sure enough, my croissants were spilling butter like the Exxon Valdez spilled oil. So much butter had leaked out and onto the bottom of the tray that my poor croissants were frying on the bottom and baking on the top. When the timer went off, I pulled them out and dropped the tray onto the stove, frustrated. My Chief Recipe Taster nabbed one, singeing his fingers and tongue as he stuffed a bite in his mouth. “Mmmph,” he said. “Not bad!” I appreciated the support, but I knew the truth—once again, my croissants were a flop.

Given how those croissants turned out, as well as the many other croissants I’ve made over the years that have also not turned out, it might be easy to conclude that I am a failure at croissant making. I have not had much success in croissant making; ergo, I am a failure at making croissants. Right?

As a recovering perfectionist, I am pretty much allergic to failure. In fact, I am so averse to failure that I am loathe to even try things that I think I might not succeed at. Take a martial arts class? No way. Sign up for an ultra-distance bike ride? Nope. Volunteer for a work project that feels way over my head? I’d rather not, because trying something I “know” I could fail at seems like a great way to get hurt. For a few years now, it’s seemed safer to not try. But increasingly, saying “I’d rather not” has started to feel less like I’m keeping myself safe and more like I’m holding myself back. So over the course of a few weeks, I set out to examine failure: what it is, what it means to me.

My thought experiment ran into trouble almost as soon as I began. I’d started in what seemed like the most obvious place to start: by defining “failure.” Well, I thought, that was simple—failing is not succeeding. I thought of times in my life when I had not succeeded. I remembered the class in which I’d gotten a “D,” the marathon I couldn’t finish, the fact that I wasn’t accepted into my first-choice college—even this food blog, which pretty much only my mom reads (thanks, Mom!). But as I went back and dwelled in my memories of those perceived failures, I realized that what I had felt had names besides failure: disappointment, regret, the uncomfortable sense of having made a mistake. The more I thought about those experiences, the less they felt like failures and more just like experiments in the world that didn’t go the way I’d hoped. I realized too that I had learned something from each of those experiences, so perhaps they were less failures and more… growth. None of those experiences had been fun or comfortable, but when is growth either of those things?

I also realized that this is the way I already think about things in the kitchen: I don’t see baking flops as failures, but as valuable experiments. I turn into a mad scientist in the kitchen, taking risks all over the place, always asking “what if,” or “could this be better?” Sometimes, those risks pay off; sometimes they don’t. Somehow, I rarely get upset, even after a flop: I might be disappointed, I might have made a mistake somewhere along the way, but it isn’t a failure—for me, there is no such thing as failure in the kitchen. I tried something, I have a result, and that gives me new information to use when I repeat the experiment.

I decided to extend my reasoning. What if I entertained the idea that there was no such thing as failure? Just thinking that thought did funny things to my brain. It was like opening a window and letting a bracing breeze swirl in a clear away the fog. If there was, for me, no such thing as failure, then there was so much less fear of it, and so much less to lose if I took a chance. Thinking like this makes me want to sign up for a 150-mile bike ride, just to see what I can do. It makes me want to try. It makes me want to tear down every one of those “what would you do if you knew you could not fail” signs and replace them with a new slogan: “there is no such thing as failure.”

This is all easy to say, harder to do; I’m still working on applying this concept to my life outside of the kitchen. In fact, figuring out how to do that has delayed the writing and publishing of this essay for a solid month, because it would be neat and tidy to end with a rousing paragraph about how I learned to banish the concept of failure from every aspect of my life and you can, too. But that isn’t what’s happened. I’m still experimenting, still learning to push myself from that “I’d rather not” mindset to the mad scientist one. It’s slow going, but it is going—and it continues in the kitchen, too. Just one week after I made the croissants that managed to both bake and fry, I made another batch. Because of that experience, I knew to not let my croissants get too warm while proofing. I’d learned. I was careful with the next batch. And you know what? They turned out great—a successful experiment.

P.S. Want to try making croissants yourself? This recipe was the basis for my sourdough experiments. And recently—after my trials and tribulations, of course—the New York Times created this guide.

Rosemary Shortbread

Dessert
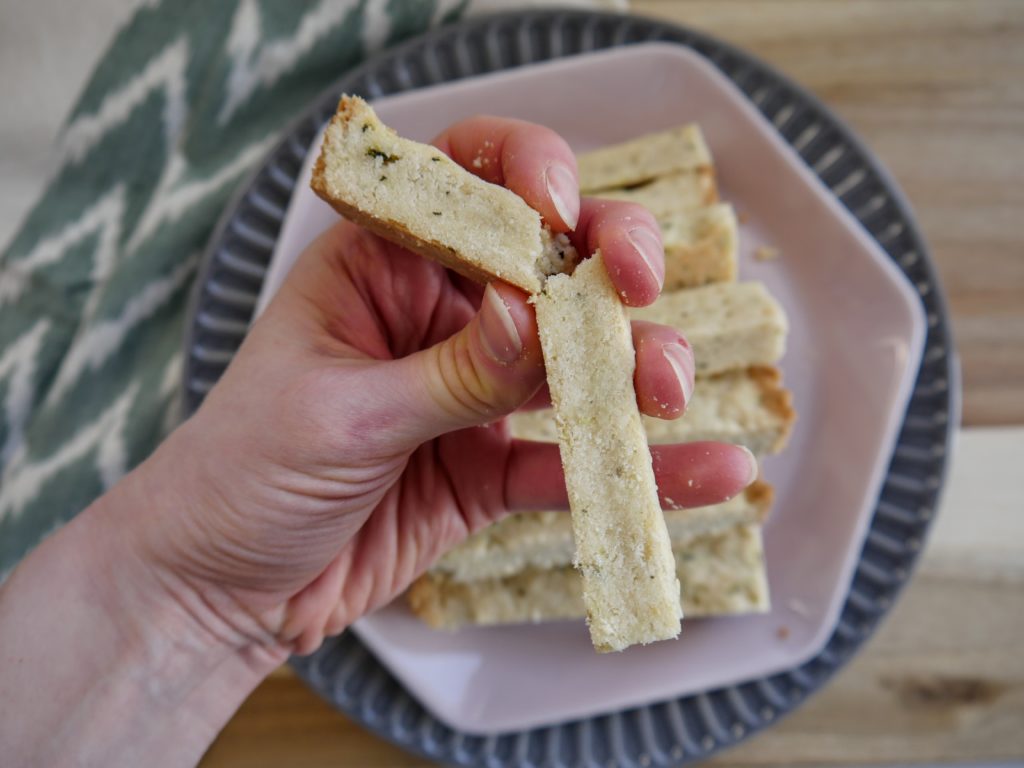
Sarah's left hand is caught in the act of breaking a piece of rosemary shortbread in two.

All winters, in my opinion, have a tendency to feel monochromatic (fifty shades of gray skies and dirty snow) but this one has also felt monotonous. The news cycle was almost universally depressing and often the same—political turmoil, all-too visible manifestations of white supremacy, pandemic—as was lockdown life: work, eat, sleep, repeat. I found myself in a rut, begrudgingly performing the patterns of life. I desperately wanted, needed, some newness but didn’t know how to find it within the confines of quarantine. All of the things I would have done pre-COVID (planned a trip, met up with friends, gone to a museum or art show or film) felt closed off.

Apparently, however, I start to get creative if I get frustrated enough. A few weeks ago, I began to look for ways to make the familiar a little bit unfamiliar, to add something of the unexpected to the expected. It’s small things: walking our puppy a slightly different route, attending a live-streamed play, starting a new workout program. It isn’t much, but it’s been enough to help me shake my gloom, and to consider ways to apply that thinking to this blog. I started here, combining two things—rosemary and shortbread—that are familiar, but not familiarly used together. It’s an unexpected combination, but somehow the herb makes the vanilla in the cookie more vanilla-y, the butter more butter-y; adding something new helped me appreciate what was already there. The experiment paid off: not only was the shortbread delicious and worth sharing, it has me excited to think of other ways I might introduce the unexpected into my life, my food, and my writing.

Rosemary Shortbread

Sources: adapted from my mom’s recipe

Makes one 9-inch pan

Active time: 15 minutes; total time 45 minutes

Ingredients:

  • 2 sticks butter, softened
  • 1 teaspoon salt
  • 1 teaspoon vanilla
  • 1/2 cup confectioner’s sugar
  • 2 cups flour
  • 1 1/2–2 tablespoons finely minced rosemary, depending on how pronounced you’d like the flavor to be

Directions:

  • Center a rack in the middle of your oven, then preheat it to 350°F.
  • While the oven is preheating, cream together the butter, salt, vanilla, and sugar in a large bowl.
  • Add the flour and rosemary, and mix well to combine.
  • Tip the dough into a greased 9-inch pan and pat it down firmly, distributing it evenly throughout the pan. The shape of the pan is up to you—use a 9-inch square, a round, or a tart pan—as is material; both glass and metal work fine.
  • Prick the shortbread all over with a fork. You can do this as decoratively or haphazardly as you want; you don’t need to make it look like a pin cushion, but get in at least 9 or 10.
  • Bake the shortbread for ~30 minutes, or until the edges are light golden brown. Let it cool for about 10 minutes before slicing, and cool fully before eating and enjoying.

Artichoke Pâté

Snacks
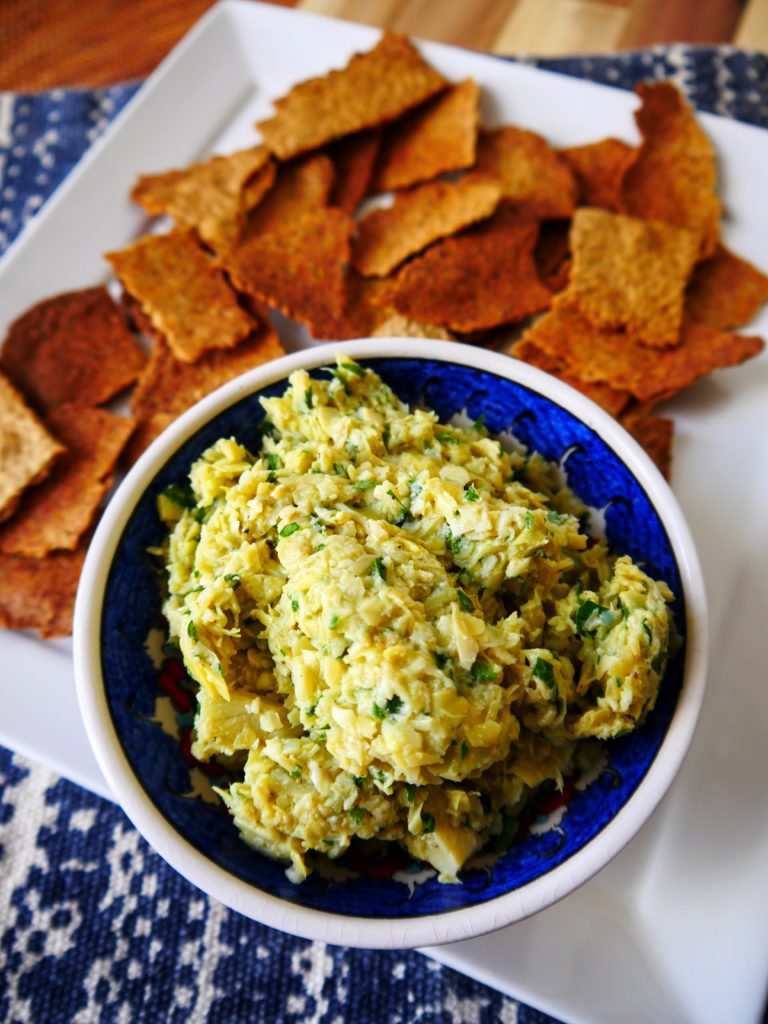
A blue bowl full of artichoke pâté sits on a white plate. The bowl is surrounded by toasty brown crackers.

I believe in the power of semantics, that what we call things has power. The labels we assign others, and ourselves, are markers of identity—whether someone is in our “tribe” or not—and of value, good or bad, or right or wrong. Labels can be useful, but are often just a little bit too easy. They require us to strip away nuance, to reduce something down to our understanding of it. Sometimes we get this calculation right. More often, we get it wrong.

For an example of labeling gone wrong, as well as a rather stunning leap of logic, I offer: pâté. Ask my mother-in-law for her views on it and she’ll wax rhapsodically. Ask my Chief Recipe Taster and he’ll wrinkle his nose before murmuring darkly about 1950s-style Jell-O meat molds. So when my MIL pulled a container of “artichoke pâté” out of the fridge for appetizer hour this summer, it’s understandable that she was excited about it and he was not. But it was as unlike pâté as, well, Jell-O—just well-chopped artichoke hearts with a bit of garlic, parsley, and olive oil. We fell on it, slavering, and the little tub was gone before we’d finished our first glasses of wine. It was nothing like what you might label “real” pâté, and so good that my pate-hating Chief Recipe Taster asked whether I could mimic the stuff. A clearer case of mislabeling (both, perhaps, on the part of the producer as well as my taster) there never was.

Is it a bit of stretch to discuss the harmfulness of labelling vis-a-vis artichokes? Yes, my friend, I recognize that it is. But food is personal and the personal is political, and aren’t we in a moment here, one that calls us to rethink and reject labels? If we can’t start with pate, then how can we tackle the bigger issues?

Artichoke Pâté

Source: I Thought There Would Be Free Food

Makes 2 cups

Active time: ~5 minutes

Note: I make this pate in the food processor but you can also make it by hand. Just finely mince the garlic and chop the artichokes and parsley. Mix all of these together with the olive oil, and salt and pepper to taste.

Ingredients:

• 1 medium clove garlic

• 1 can water-packed artichokes, drained

• 1/4 c loosely packed parsley

• Olive oil (best quality—you’ll really taste it here)

• Salt and pepper, to taste

Directions:

• Blitz the garlic clove in the food processor until finely minced.

• Add the artichokes and parsley and pulse until both are well chopped.

• Drizzle in some olive oil and salt and pepper to taste. Pulse to combine.

• Give everything a good stir and then tip into a bowl. You can serve it straightaway or put it in the fridge for up to 24 hours.

Sourdough Pumpkin Rolls with Sage and Browned Butter

Breads, Sides

Two weeks ago, my Chief Recipe Taster and I adopted a puppy. Rory is a three-month old Australian cattle dog mix who loves belly rubs and playing fetch. She adores pouncing on toys and getting peanut butter out of Kongs. Oh, and did I mention? She also excels at trying my patience.

I thought I knew what getting a puppy would entail. I was prepared for sleepless nights and extensive “sit” training. I was less prepared for a being who vacillates between puppy-like sweetness and adolescent-like disobedience and sucks up every minute of my time. Overnight, we went from largely deciding for ourselves how to spend our off-work hours to orienting our schedules around Rory. It’s largely been a fun and worthwhile adjustment, but an adjustment nonetheless.

With less time to spend in the kitchen, I find myself turning to that can be patient, like bread. Bread is perfect for this period; after a bit of activity I can let the dough rest, play with our  pup, and return to it later. Unless you flagrantly abuse the dough by not letting it proof long enough or far too much, it is forgiving—a few minutes under or over shouldn’t hurt. This recipe uses both sourdough starter and yeast as leavening agents, so you pretty much can’t fail, while milk, butter, and eggs lend a pillowy texture. The rolls are the perfect accompaniment to fall soups and stews, and would be a welcome addition to your Thanksgiving table, too. They’re a bread that extends you patience while you exercise your own.

Sourdough Pumpkin Rolls with Sage and Browned Butter

Source: I Thought There Would Be Free Food

Makes 16 rolls

Active time: ~60 minutes; total time: ~4 hours

Ingredients:

  • 115 grams milk, any percent
  • 3 grams active dry yeast
  • 40 grams brown sugar
  • 60 grams butter
  • 15 grams finely minced sage
  • 100 grams ripe sourdough starter
  • 2 egg yolks, lightly beaten
  • 145 grams pumpkin puree (NOT pumpkin pie filling)
  • 300 grams all-purpose flour
  • 150 grams whole-wheat flour
  • 10 grams table salt
  • 1 egg yolk mixed with a little water, for egg wash (optional)

Directions:

  • Warm the milk in the microwave or on the stove until it’s just above room temperature—it should feel warm to the touch, not hot.
  • Add the yeast and brown sugar to a large bowl. Add the milk when it is warm, and stir to combine. Let the yeast proof for ~10 minutes.
  • While the yeast is proofing, brown the butter. Place the butter in a small skillet and heat over medium-low. Once the butter has melted, increase the heat to medium. Swirl the pan regularly or stir it with a spatula to ensure that the butter browns evenly. Once the butter is studded with little brown bits and smells toasty and delicious, take the skillet off the heat and stir in the sage. Set aside and let cool slightly.
  • Once the yeast has proofed, add the sourdough starter, egg yolks, pumpkin puree, and brown butter-sage mixture to the bowl and stir to combine.
  • Add the flours and salt to the bowl and mix with your hand or a spatula. Using your hands, work the dough into a mass and then knead until the dough is smooth, ~10 minutes. If needed, add splashes of milk or flour to achieve the right consistency.
  • Place the dough in a greased bowl, cover, and let rise until puffy and almost doubled in size. This will likely take at least 90 minutes, depending on the temperature of your kitchen.
  • When the dough has doubled, knock it down gently and turn out onto a lightly floured workspace.
  • Divide the dough into 16 pieces. From here, you can roll each piece into a rope at least 18 inches long and form them into knots using these instructions, or simply shape them into balls. Either way, set the formed rolls on a parchment-covered baking sheet, cover loosely with a light towel or plastic wrap, and let rise until puffy, at least 60 minutes.
  • Towards the end of the proofing period, position a rack in the middle of your oven and preheat it to 350°F.
  • Once the rolls have proofed, gently brush each roll with the egg wash mixture. Bake the rolls for 17-20 minutes, until lightly golden brown. Serve warm.

Cookies and Cream Cake

Dessert
A slice of Oreo-studded white cake, layered with Oreo-studded vanilla frosting and topped with a pink birthday candle, sits on a white plate in the foreground. Behind it to the left, slices of cake that weren't as pretty as Sarah wanted rest on another white plate.
Candles and cutting carnage during the first-anniversary photo shoot

A few days ago, this little blog of mine turned 1. I had a celebratory post all planned out; I’d been developing a cake recipe for weeks, thinking about what I would write, and had the accompanying photographs framed out in my head. But when I went to translate vision into reality, reality hit hard. The cake just would not behave—or maybe it was me who wasn’t behaving. I cut too far into one of the layers when I tried to level it, and didn’t get the amount of frosting between layers the same. The next day, when I went to photograph the cake, none of the slices I cut were as perfect as I wanted them to be, perhaps, ahem, because my Chief Recipe Taster and I just couldn’t wait to taste-test the confection and had cut into it the day before. By the time I got around to staging, the light in the corner of our flat where I take my photos wasn’t quite as good as I’d hoped, and none of the photos were, either (exhibit A, the least-bad photo which features some of the cutting carnage in the background). Nothing turned out how I’d planned.

Truth be told, this incident pretty much sums up my first year of food blogging: I’ve tried a lot and then needed to try again. Most times this trying has been the result of something in the recipe not turning out as I hoped for (we ate that Savory Pumpkin Pie about five times before I was completely satisfied with it). But other times, the trying and failing was the result of events outside of my control. The advent of the pandemic and its effects on the world; the murders of Ahmaud Arbery, Breonna Taylor, George Floyd, and so many other BIPOC folks in the U.S. and around the world; environmental degradation; the death of RBG and the run-up to this election: so much has happened this year and I, like so many others, have struggled to keep pace. At times, everything going on made me think of giving up blogging—who needs to read about cake or Michigan strawberries when disease and inequality are rampant and seem to grow worse every day? What, I have wondered frequently this year, is the point?

Sometimes I stopped writing to wrestle with this question—there was quite a long pause between the “Orange You Glad This Isn’t a COVID Pun?” cocktail and Buckwheat Crepes with Sautéed Leeks and Fried Eggs—but in the end, two things always drew me back. The first is one that many of us who spend our days hunched over computers may recognize: the simple joy of creating something with my hands, something physical if temporal. It doesn’t matter if I’m shredding zucchini for muffins or chopping eggplant for ragout, knowing that there will be some tangible outcome is satisfying in and of itself.

The second is a bit different. You see, I believe that baking and cooking, the act of preparing food, is a subtle act of resistance and a demonstration of hope. After all, despite my fears about the state of the world, would I really keep creating if I didn’t believe in a future? Even on the days when I’m deeply afraid of what that future might look like, why else would I create a celebration cake but for the fact that something right now is worth celebrating, that something in the future might be worth celebrating?

So I keep coming up with recipe ideas, keep testing them obsessively, keep photographing them and returning to my little corner of the Internet to write about them. I do it even though I don’t have many followers. I do it as an act and as an affirmation, and really, I think that that is enough.

Cookies and Cream Cake

Sources: cake adapted from Stella Parks’s Brave Tart; frosting adapted from Martha Stewart’s Cooking School

Makes one 6-inch, three-layer cake; one 8-inch, two-layer cake; or one 9×13, single-layer cake

Active time: ~90 minutes; total time ~3 hours

Notes:

  • The frosting recipe makes enough to “naked” frost a three-tier, six-inch layer cake. If you prefer to frost the cake all the way around, you may want to double the recipe.
  • Many of the ingredients in this recipe need to be at “room temperature.” This should be ~70°F, or when you can just press an indent into the butter and the eggs don’t feel chilly to the touch.

Cake Ingredients:

  • 1 14.3 ounce-bag Oreos
  • 1 stick room-temperature butter
  • 1/3 cup room-temperature coconut oil
  • 1 generous cup white sugar
  • 1 1/4 teaspoons baking powder
  • 1/2 teaspoon baking soda
  • 1 teaspoon salt
  • 4 room-temperature egg whites
  • 1 tablespoon vanilla extract
  • 1/2 teaspoon almond extract
  • 2 cups cake flour
  • 1 cup room-temperature buttermilk

Frosting Ingredients

  • 3 large egg whites
  • 1/2 teaspoon salt
  • 3/4 cup white sugar
  • 1/8 teaspoon cream of tartar
  • 2 sticks room-temperature butter
  • 1/2 teaspoon vanilla extract

Directions:

  • Position a rack in the middle of your oven before preheating it to 350°F.
  • Prepare your cake tins. Grease them well, with either cooking spray or butter (if using butter, don’t forget to flour them, too) and line the bottoms with parchment paper.
  • Crush or roughly chop the Oreos so that they’re a mix of sizes. Divide them into two bowls, one for the cake and one for the frosting.
  • Make the cake: Add the butter, coconut oil, sugar, baking powder, baking soda, and salt to large bowl or that of a stand mixer fitted with the paddle attachment. Beat the ingredients with a hand mixer or stand mixer set to medium speed until they are light and fluffy, approximately 5 minutes. Add the egg whites one at a time and beat well to combine after each. Beat in the vanilla and almond extracts.
  • Add half of the flour, then mix on low to combine. Add half of the buttermilk and, again, mix to combine. Repeat with the remaining flour and buttermilk. Gently but thoroughly, fold the Oreos into the batter.
  • Divide the batter evenly between the cake tins. Gently smooth the tops with a spatula before transferring them to the oven.
  • Bake the cakes for about 40 minutes, or until they are pale gold on the top and a cake tester inserted into the middle of each cake comes out with just a few crumbs clinging to it.
  • When the cakes are done, remove them from the oven. Let them cool in the tins for a bit before turning them out onto a wire cooling rack, removing the parchment rounds from their bottoms, and turning them right-side up again. After they cool completely—which will take at least an hour—you can frost them or wrap them well in plastic wrap and frost them the next day.
  • Make the frosting: Set a medium saucepan filled with about 2 inches of water to simmer. While the water is heating, whisk egg whites, salt, and sugar in a medium heat-proof bowl. Set the bowl over the saucepan and cook until the sugar has dissolved and the egg whites are warm—you can test this by dipping a spatula in the mixture and carefully running a finger through it.
  • Once the egg whites are warm and sugar dissolved, transfer them to the bowl of a standing mixer. Using the whisk attachment, mix the egg white-sugar syrup on low speed until foamy. Add the cream of tartar and increase the speed to medium-high; beat until you get stiff, glossy peaks. This will take ~10 minutes.
  • With the mixer on medium-low, add the butter, two tablespoons at a time, beating well to incorporate after each addition.
  • After you’ve added all of the butter, beat in the vanilla. Reduce the mixer speed to low and add the Oreos; mix to combine. Your frosting should look smooth and creamy; if it appears curdled or too loose, the temperature may be off; see here for a trouble-shooting guide.
  • Keep the buttercream at room temperature, covered with plastic wrap, if you’re planning to frost your cake soon; otherwise, it can keep in the refrigerator for several days. If you do chill it, bring the frosting to room temperature and whip it in your stand mixer before using.
  • Frost the cake: Use a sharp, serrated knife to carefully level your cake layers (scraps = baker’s reward). Place one layer on a serving platter and top with a healthy dollop of frosting; use a butter knife or off-set spatula to spread the frosting around the cake, working from the middle out. Repeat with additional cake layers. I like to let my cake sit for at least an hour before cutting into it, to ensure that the layers and frosting have time to meld together.