Braised Chickpeas with Tomatoes, Orange, and Rosemary

Entrees, Vegan
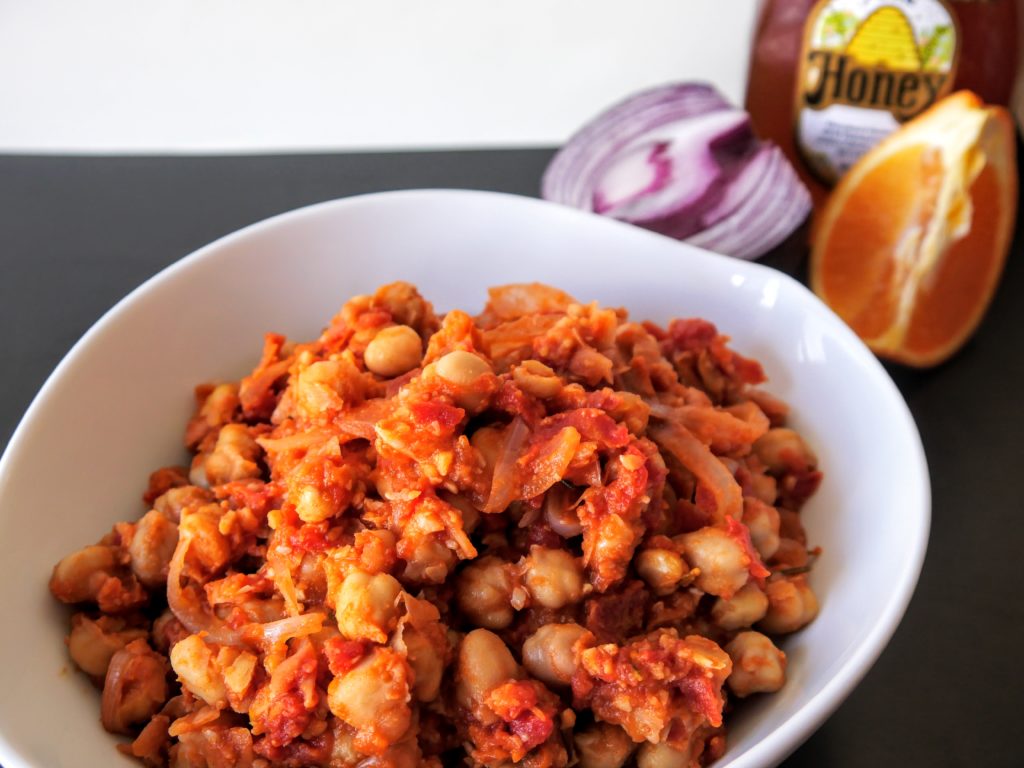
Chickpeas, cooked with tomatoes and onions, sit in a white bowl on a black surface. A halved red onion,  quartered orange, and jar of honey lay beyond the bowl.

Can we talk about chickpeas for a moment? They’re one of my all-time favorite foods, largely due to their versatility: they can be hummus or chana masala; their canning liquid can be used to make mousses and puddings. Chickpeas are like tofu, when done well (yes, tofu can be done well)—they take on the flavors of what they’re cooked with and in that process become something more than the sum of their parts.

Apparently everyone discovered the wonder that is chickpeas, given how few of them I’ve seen in the grocery store over the past few weeks. I hope people are doing more than draining and sprinkling them over salads, which is quick and tasty but also quite a lot of wasted potential. With a modicum of effort and not much beyond pantry staples, chickpeas can become something nigh on transcendent. Braised with tomatoes and enlivened by oranges and rosemary, these chickpeas are a bit citrusy, a bit herby, and a lot delicious.

Braised Chickpeas with Tomatoes, Orange, and Rosemary

Source: Adapted from Milk Street Magazine

Serves ~6 people

Total Time: ~45 minutes

Ingredients:

  • Olive oil
  • 2 tablespoons tomato paste
  • 1 tablespoon honey, plus more for serving
  • 2 29-ounce cans chickpeas, drained
  • 1 28-ounce can diced tomatoes or whole peeled tomatoes, liquid reserved and solids chopped
  • 1 medium orange (save the peel for the next two recipes!)
  • 1/2 medium red onion, thinly sliced
  • 3 or 4 medium garlic cloves, minced
  • 1 4-inch long sprig fresh rosemary
  • Salt and pepper, to taste
  • Fresh oregano and parsley for sprinkling, if desired

Directions:

  • Heat a large Dutch oven over medium heat. Add enough olive oil to lightly cover the bottom, then add the tomato paste and honey. Cook, stirring often, until the tomato paste begins to deepen in color, about 4 minutes.
  • Add the chickpeas and tomatoes (along with their liquid, if you used whole tomatoes).
  • Increase the heat to medium-high to bring everything to a simmer, then cook until most of the liquid has evaporated, about 10 minutes.
  • While the chickpeas are cooking, zest about one quarter of your orange and set it aside. Slice the orange into quarters and set them aside.
  • Reduce the heat to medium-low before adding the onion, garlic, rosemary, and salt and pepper to the chickpea mixture. Juice one-quarter of your orange into the Dutch oven, and stir well to combine.
  • Cover the pot and cook for an additional 10 minutes, until the onions are soft, adding a few tablespoons of additional water if needed to prevent sticking or scorching.
  • Turn off the heat under the pot. Stir in the orange zest before dishing the chickpeas into  individual bowls. Drizzle with additional olive oil and honey and sprinkle with fresh oregano and parsley, if desired, before serving.

A Salad Suggestion for Difficult Days

Entrees, Salad, Vegan
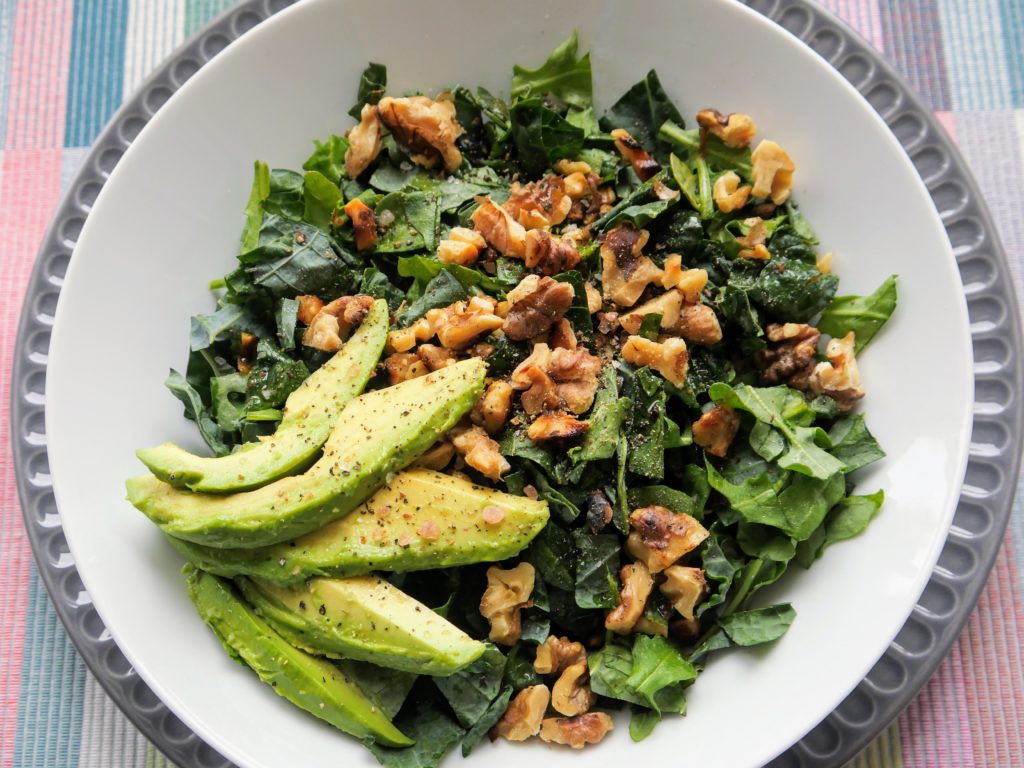
A white bowl - full of kale, arugula, walnuts, and sliced avocado - rests on a grey plate, both on a pastel-plaid placemat.

Does anyone else feel like this month has been a year long? It’s hard to believe how much has changed in such a short amount of time.

I don’t know about you, but all of those changes have had an effect. I haven’t felt much like cooking the last few weeks, and even less like writing (perfectly evidenced by the fact that it took me about four days to summon even that sentence). I’m privileged to still be working, but between work and stress, it feels like my creativity has run dry. I just don’t know where to start or what to say.

On the days when life leaves me with little inspiration or time to reflect, there are a few dishes that I fall back on, meals that I’ve made so many times that they take almost no thought. This salad is one of those. For years, it’s been my go-to “I’m out of meal planning ideas” and the thing I crave when I return from deployments. Lately, it’s been lunch or dinner on several occasions. It’s comfort food with little prep time, little cook time, and a short ingredient list. It’s a suggestion of a meal for difficult days.

A Salad Suggestion for Difficult Days

Source: I Thought There Would Be Free Food

Serves: As many people as you want

Active time: 30 minutes

Note: For a one-person salad, I like three or four kale leaves and a good handful of arugula. It’s easily scaled to feed as many as needed.

Ingredients:

  • Kale (I prefer lacinto)
  • Arugula
  • Nuts (my favorite are pecans, but walnuts and hazelnuts are also delicious)
  • Avocado
  • A wedge of lemon or lemon juice
  • Olive oil
  • Salt and pepper, to taste

Directions:

  • Rinse, de-rib (save those stems!) and chop the kale. I like to chop it into fairly small bits, around 1/2-inch squared, because I am an inelegant salad eater and this relieves quite a bit of my “is a leaf hanging out of my mouth” anxiety. Chop the arugula, too, and toss both greens together in a bowl.
  • Heat a skillet over medium heat. While it’s heating, coarsely chop the nuts, then add them to the pan when it’s warm. Toast the nuts until they’re golden brown and fragrant. This will likely take 5–10 minutes.
  • Meanwhile, dress however much kale and arugula you feel like eating with some lemon juice. Give it a good toss. Cut as much avocado as you’d like and set it aside.
  • Once the nuts have finished toasting, add as many as you’d like onto your salad. Drizzle with olive oil and toss everything together. Garnish with avocado and salt and pepper, to taste.

Trying, Failing, and Peanut Butter-Date Energy Bites

Snacks, Vegan
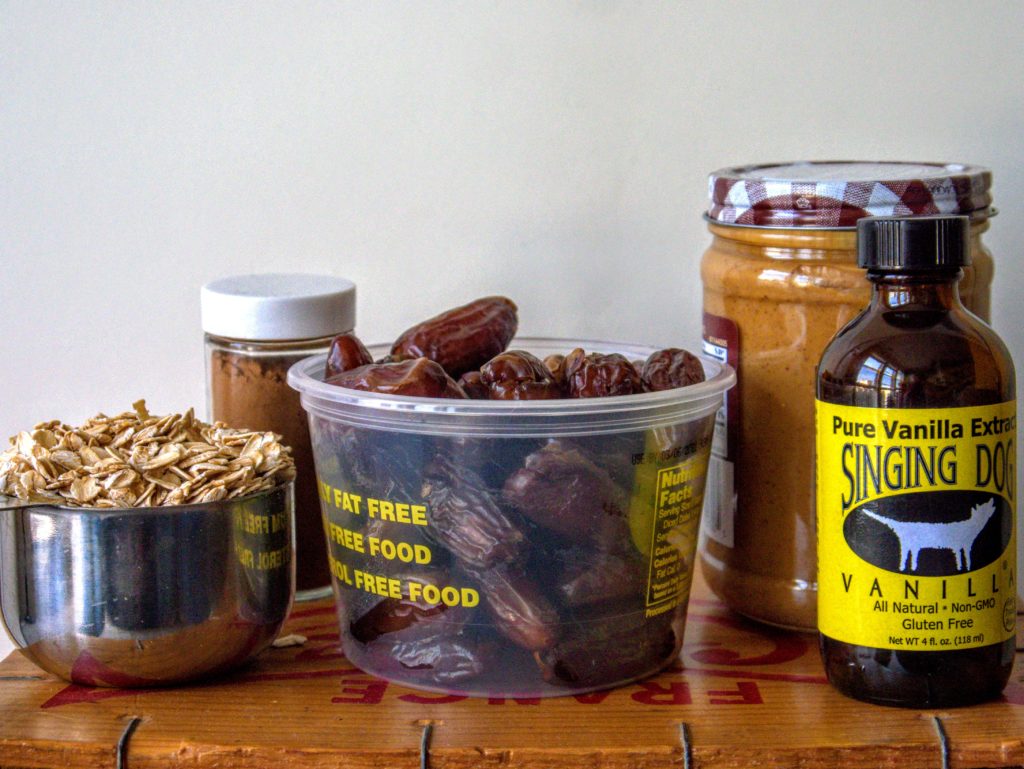
Oats in a measuring cup, a glass jar of cinnamon and one of peanut butter, dates, and a bottle of vanilla sit on top of a wooden surface in front of a white wall.

I’ve been thinking about failing a lot lately, probably because it feels like I’ve had a higher-than-average spat of kitchen flops. There was the mushroom-leek soup with parsley dumplings the approximate weight of a collapsing star, the sourdough bread that didn’t rise, and the chocolate-cinnamon-pecan tart that led to an impromptu oven cleaning. Suffice it to say, the past few weeks of cooking have not been kind to me.

I don’t mind a kitchen failure or two; it’s just part of recipe development and growing as a cook. What I do mind is a failure that begets no lesson, so after mishap number three I spent some time considering what had gone wrong. Sure, there were issues specific to each dish, but there was one that was common to them all: I wasn’t really there.

Obviously I was in my kitchen physically, but mentally I was a million miles away during each of those fiascos, chewing over what had happened at work or rushing through cooking so I could get on with something else. My experience reminded me of everything that Ann Patchett said in this lovely little essay, which with hubris I will boil down to one sentence: if you want to do a task well, just do that task. While cooking or baking, do not start a serious conversation with your partner about how their day was; do not also open your mail; do not throw in a load of laundry, or even think about doing so. For however long it takes to cook the thing you’re cooking, just do that.

I am a person who believes that every minute of the day should be productive so calmly waiting for the onions to turn translucent over medium heat is a bit torturous because shouldn’t I just check my work email one more time? But to avoid future food failures, I made myself take a step back. I committed to spend 20 minutes doing only one thing, cooking, and started over with a simple recipe. I measured out all of my ingredients before I started, just as you’re supposed to do and I often skip over, and paid attention. I was rewarded with a not-flop—in fact a resounding success—to sustain me on the busy days when it seems that it will be impossible to do just one thing.

A laptop, keys, and cell phone lay on a metal surface, along with peanut butter-date energy bites and dates, all scattered with whole oats.

Peanut Butter-Date Energy Bites

Source: I Thought There Would Be Free Food

Makes ~20 bites

Total time: ~20 minutes

Ingredients:

  • 3/4 cup old-fashioned oats
  • 1 teaspoon ground cinnamon
  • 1/2–1 teaspoon salt, to taste
  • 10 ounces dried, pitted dates
  • 1/2 cup peanut butter (I used natural, but other varieties should work as well)
  • 1 teaspoon vanilla extract

Directions:

  • Halve the dates, then set them aside.
  • Put the oats, cinnamon, and salt in the bowl of a food processor and process until the oats are finely ground into uniform nubs.
  • Add the dates, peanut butter, and vanilla extract and process until a cohesive mixture forms. You might need to stop and scrap down the sides of the food processor once or twice.
  • Grab a small handful of the mixture and tightly compress then roll into a ball. You may need to compress the mixture once or twice before rolling, or it will crumble a bit; you should end up a Ping Pong-sized ball. Repeat as needed.
  • Place the finished bites into a seal-able container and let them firm up in the refrigerator for at least 30 minutes before enjoying.

Butternut Squash and Kale Tacos with Cashew Crema

Entrees, Vegan
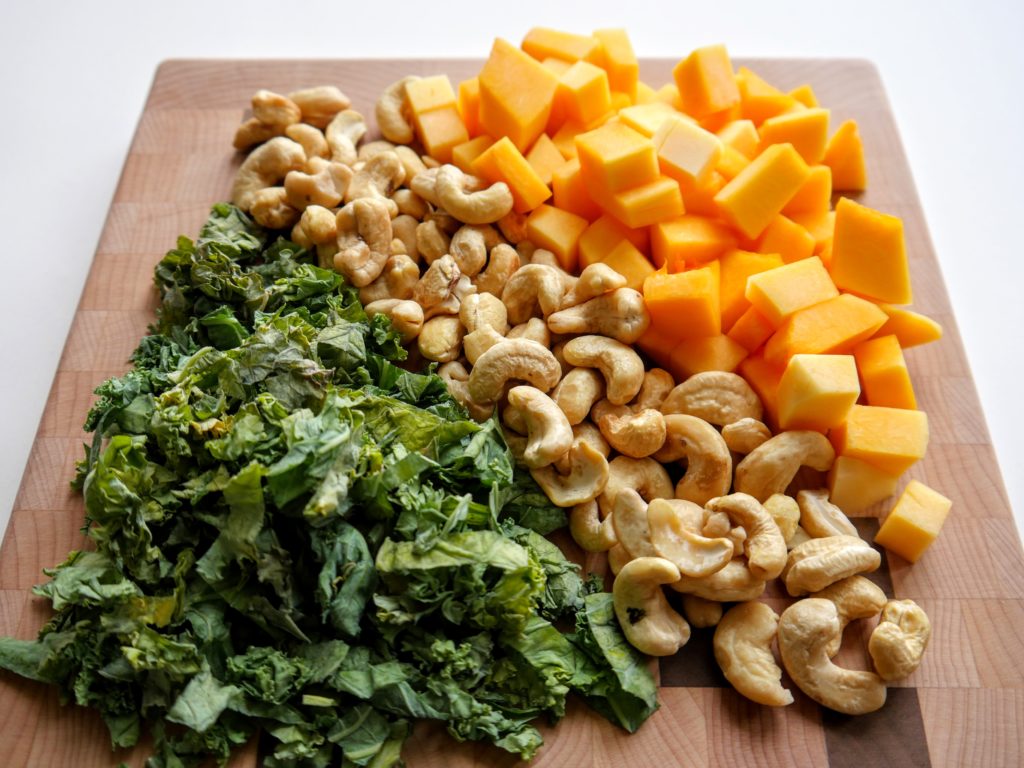
Three stripes of butternut squash, raw cashews, and kale run diagonally across a wooden cutting board.

I spent a lot of time in Nairobi for my previous job—nearly a year, all told. It was an easy place to be, vibrant and beautiful, with burgeoning food and design scenes, and I enjoyed my time there. But spend that much time away from home and you’re bound to suffer some homesickness, no matter how much you come to enjoy ugali or kachumbari.

Homesickness is a strange thing. Sometimes it’s as simple as missing a person or a place, and there were many days when I missed my partner and our cozy routines. Other days, however, my homesickness took different turns; I would find myself yearning to wear a particular sweatshirt, or wishing I could go for a run along my favorite route. And sometimes my homesickness got downright peculiar, and I found myself craving Mexican food. At home, I might have had Mexican a few times a month, but in Nairobi, it was all I wanted to eat. Somehow it was a symbol of home, something unattainable in a place where I could get most any other type of cuisine or creature comfort. Common sense and rationality didn’t diminish the craving, so when a taco stand opened in my Nairobi neighborhood, I found myself there constantly, chomping down on black bean or chicken tacos to assuage my homesickness for the people and things I missed most.

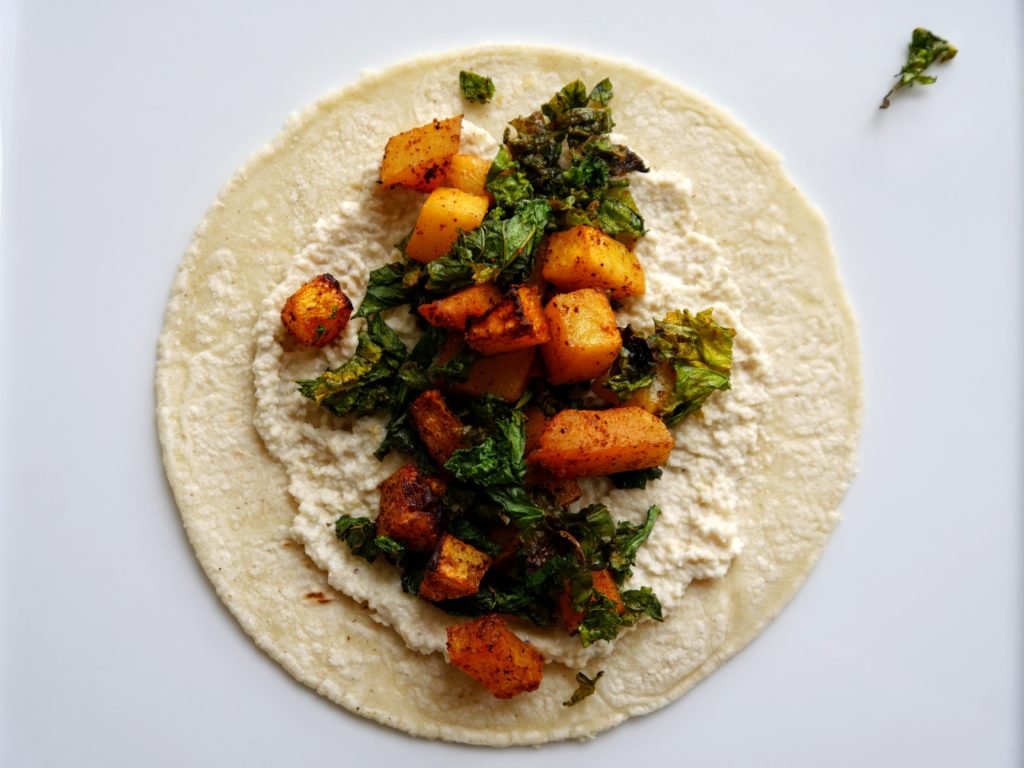
Of the many tacos I ate in Nairobi, the one I loved the most was filled with squash and kale, topped with a lemony cashew crema. It’s the one that I plotted to make again when I returned home. Now that I’m back, it’s gone from being a cure for homesickness to a connection to a place I grew to love.

A corn tortilla sits on a white surface. The tortilla is spread with a creamy cashew sauce and piled with chunks of spiced butternut squash and roasted kale.

Butternut Squash & Kale Tacos With Cashew Crema

Source: I Thought There Would Be Free Food

Makes: At least 12 tacos

Total Time: ~45 minutes

Ingredients:

  • 1 cup raw cashews
  • ~2 pounds butternut squash, weighed before peeling and seeding
  • Olive oil
  • 2 teaspoons ground cumin
  • 2 teaspoons chili powder
  • Salt, to taste
  • 1 bunch kale
  • Juice of 1 lemon
  • Tortillas, for serving

Directions:

  • Put the cashews in a small bowl, glass or metal, and pour in just enough boiling water to cover the cashews. Set the bowl aside.
  • Prepare the kale: de-rib and chop it into thin ribbons 1–2 inches long (save those ribs for Kale Stem Pesto!). Put the kale into a bowl and toss with a drizzle of olive oil and sprinkle with salt, to taste.
  • Peel and seed the squash, then slice into 1/2-inch cubes. Place in a large bowl and toss with a few glugs of olive oil, cumin powder, chili powder, and salt. Spread onto a large, greased cookie sheet, then pop into the oven and broil on low for about 10 minutes.
  • While the squash is broiling, make the cashew crema. Drain out half of the soaking water and put the cashews and remaining water into a blender or food processor with 1 tablespoon of lemon juice and salt to taste. Blend until smooth, adding additional water or lemon juice as needed to create a creamy sauce. Set aside.
  • Increase the broiler heat to high and broil the squash for an additional 3–5 minutes, or until it begins to caramelize.
  • Remove the cookie sheet from the oven, spread the kale on top of the squash and return the sheet to the oven to broil on high for 2–3 minutes. Watch it carefully to ensure the kale browns and doesn’t char. Once it has browned, remove the sheet from the oven and stir the veggies to combine. Enjoy the squash–kale mixture in tortillas with the cashew crema.

Eggplant Ragout

Entrees, Vegan
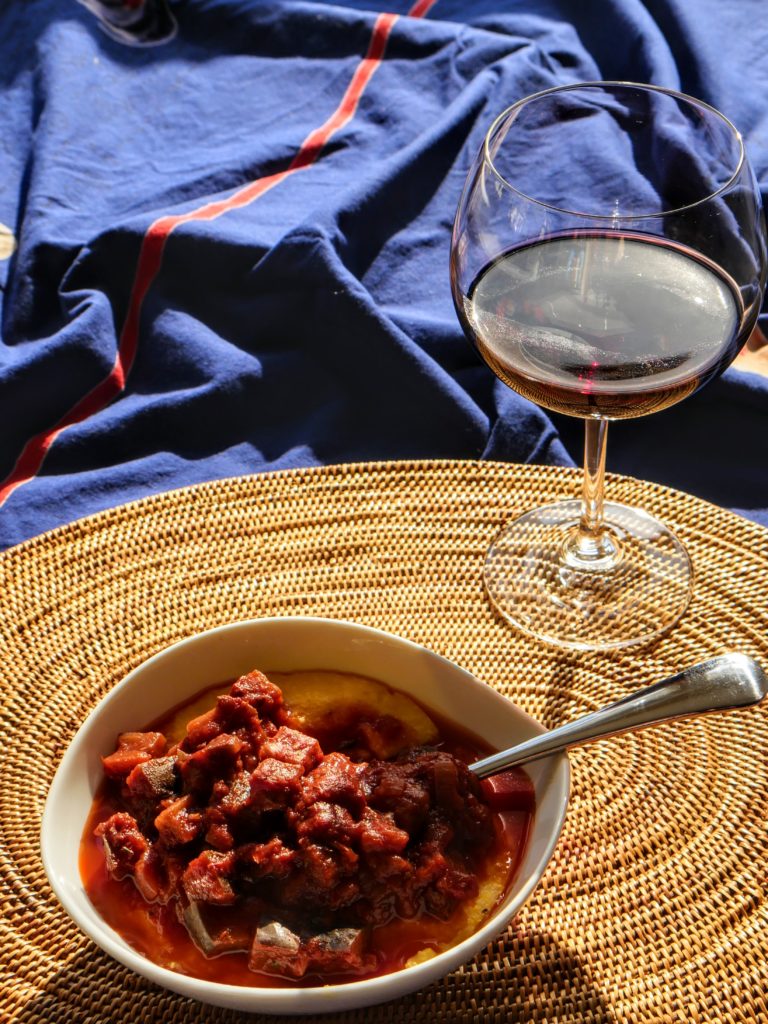
A bowl of polenta topped with eggplant-tomato ragout and a glass of red wine sit on a woven straw mat.

Don’t get me wrong, I love a good recipe challenge. I am, after all, the woman who once spent 15 hours recreating this cake, the same one who tested her savory pumpkin pie recipe at least 5 times before posting. When life allows, there’s little I enjoy more than an afternoon puttering about the kitchen. But lately, these days don’t allow; I’m mixing the run-up to the holidays with a job search, trying to balance the two and only sometimes succeeding. My schedule fluctuates from quiet enough that I have ample time to spend on recipe development to so busy that I barely have time for lunch. I believe there’s room in life for both complex cooking projects and simple ones; I hope there will always be days when I have enough time to craft edible art, just as I know that there will always be days when the only goal is to feed myself, now.

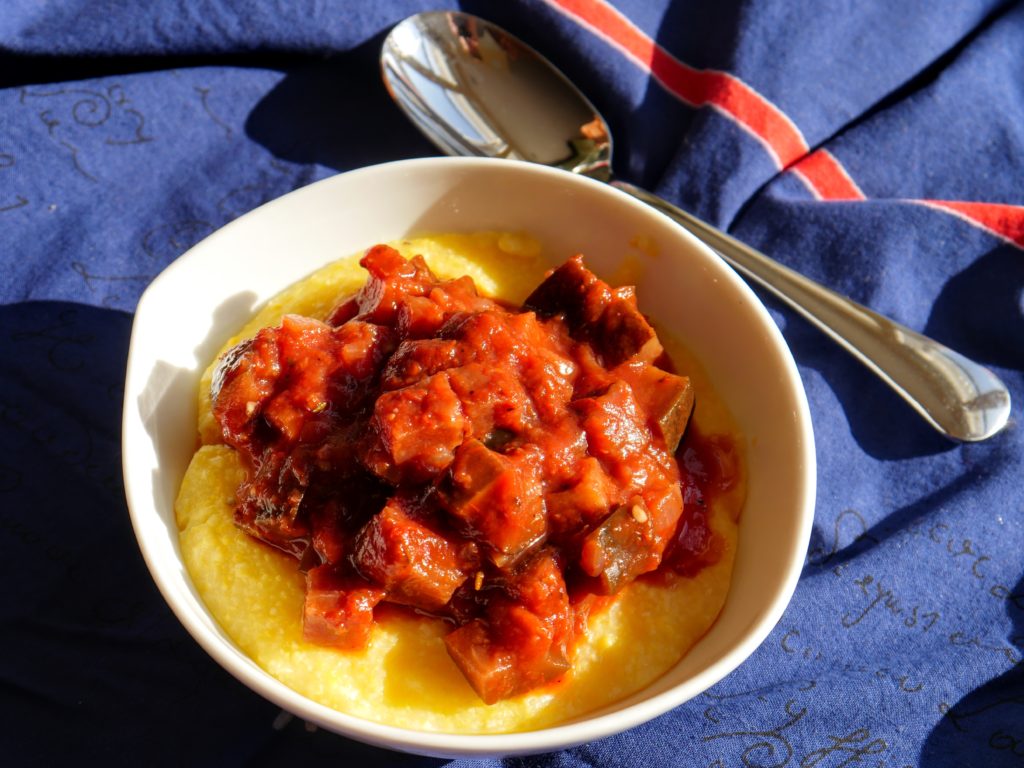
This eggplant ragout falls somewhere between those extremes: it’s easy to throw together, but good enough to serve to friends. It can be ready relatively quickly, in just over an hour, or simmer longer while you catch up on other tasks. Best of all, it makes a substantial amount (and can easily be doubled, if you have a big enough pot), so you’ll have ready meals for busy days.

A bowl of polenta topped with eggplant-tomato ragout sits on a blue and red cloth.

Eggplant Ragout

Source: I Thought There Would Be Free Food

Serves 4–6 people

Active time: ~30 minutes; total time +75 minutes

Note: For a not veg friendly but equally delicious take, sauté a pound of sausage (“Italian”-flavored turkey or chicken sausage does well here) with the onion and then proceed with the recipe as written.

Ingredients:

  • 1 medium onion, about 4 ounces (enough to yield ~1 cup, finely diced)
  • 6 cloves garlic
  • 2 good-sized fresh rosemary sprigs (enough to yield at least 1 tablespoon, minced)
  • 1 large eggplant, about 1 pound
  • Olive oil
  • 1 28-ounce can crushed tomatoes
  • 1 cup red wine (or vegetable stock, if you prefer)
  • Salt, pepper, and red pepper flakes, to taste

Directions:

  • Prep your ingredients: finely chop the onion; mince the garlic and rosemary; and cut the eggplant into 1/2-inch cubes. Set each ingredient to the side as you finish before moving onto the next.
  • Heat a large pot or Dutch oven over medium heat. When the pot is warm, add enough olive oil to thinly coat the bottom; once the oil is warm, add your onion and sauté until it starts to become translucent. Add the garlic and cook briefly before adding the eggplant. Stir the onion-garlic-eggplant mixture well, then add the rest of the ingredients. Don’t forget to taste the sauce several times as it simmers, adjusting the seasonings as needed.
  • Simmer your ragout on medium-low or low heat for at least 45 minutes, or until the sauce is somewhat reduced and the eggplant is tender and meaty. Give it a stir every once in awhile to make sure the ragout doesn’t stick to the bottom of the pot. If it does, reduce the heat and add more liquid—wine, water, or vegetable stock will all work.
  • Serve the ragout with polenta or pasta. Enjoy the leftovers as they are, or turn them into a riff on shakshuka.

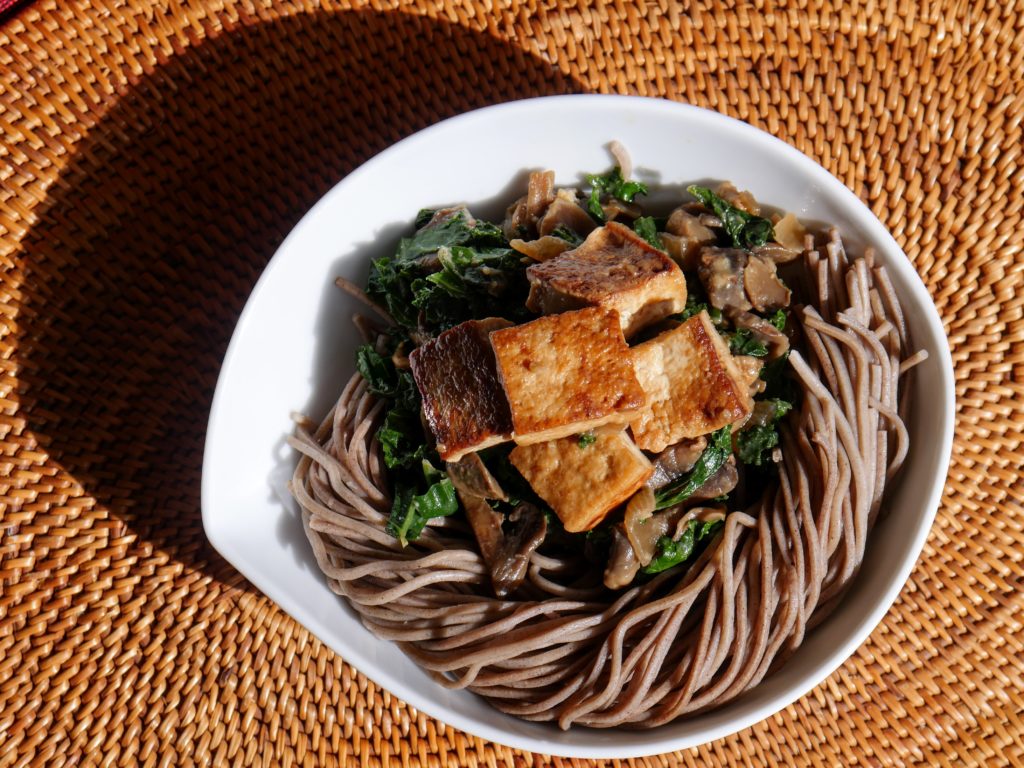
Tofu, Mushrooms, and Hearty Greens in Miso Broth

Entrees, Vegan

I expected to hear a lot of comments when I told people I was starting a food blog, “not another,” being the one I most expected (but happily heard the least). Nowhere on the list was, “You know what I hate about food blogs? When the writer has to tell you their life story before they get to the recipe,” and yet this is the theme that repeated through dozens of conversations.

It was a bit bracing to hear such strident opinions before I’d even finished the first draft of my first post, but I also understand the critique: if you’re looking for a recipe, the last thing you want is a lengthy discourse on some blogger’s trip to somewhere and how that absolutely changed their life and by the way, almost as an afterthought, here’s something to cook. No, you’re there for the food! You want the recipe! It’s the same with the endless artsy photos of heirloom tomatoes and impossible-to-find ingredients that can take an endless amount of time to load. If I wanted a photo essay, I’d look for a photo essay. I want food.

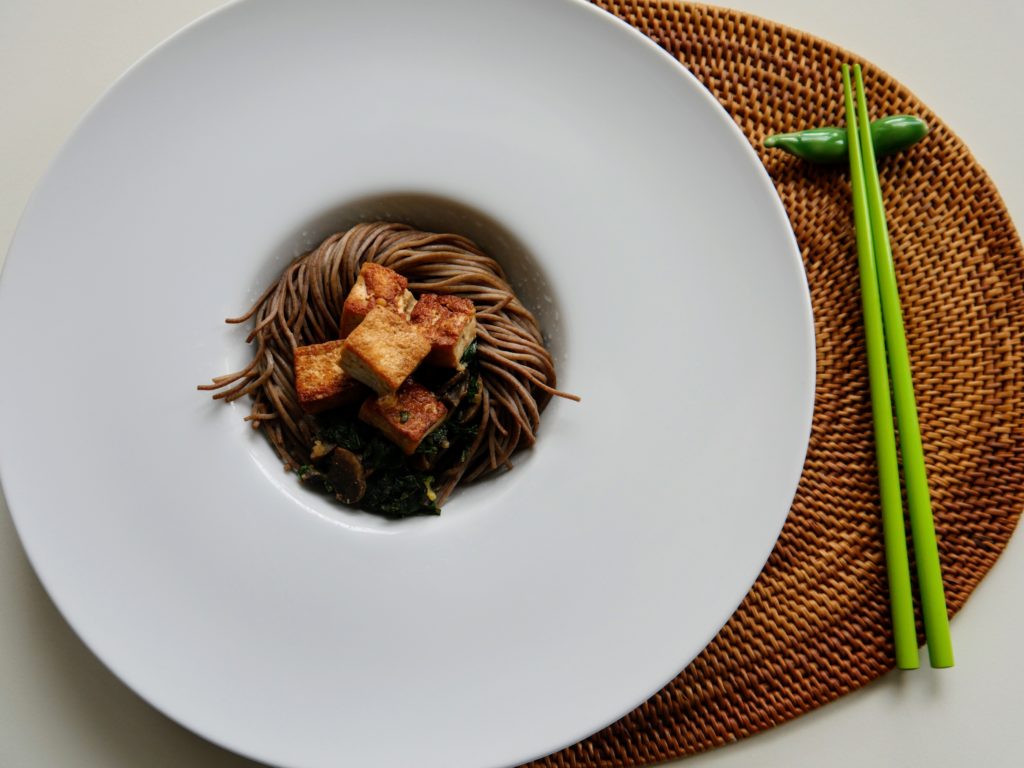
So I’ll keep this, and future posts, short given that we’re all hungry, and just note that one of the huge benefits of being known as a food lover is that people bring you things to cook. And if the person bringing you things happens to volunteer with an amazing farm and be willing to share excellent mushrooms and sweet potato greens, you have the inspiration for a quick dinner, one that’s easily adaptable to the types of mushrooms and greens you have on hand and ready in under an hour, because aren’t we all just here for the food?

Tofu, Mushrooms, and Hearty Greens in Miso Broth

Source: I Thought There Would Be Free Food

Serves 4–6 people, depending on hunger levels

Total time: 45–60 minutes, depending on your knife skills

Ingredients:

  • 1 tablespoon + 1 teaspoon sesame oil, divided
  • 1 medium onion
  • ~ 3 garlic cloves
  • 1 14 ounce package of firm or extra-firm tofu
  • 16 ounces white button mushrooms (you can use other varieties, but the cooking times may vary; for example, shiitakes release very little water and won’t require much sautéeing)
  • 2 tablespoons soy sauce
  • 1/2–1 full bunch hearty greens (after chopping you should have about 4 cups); kale, sweet potato greens, or Swiss chard will all work well
  • 1/4 cup red miso paste (red has a slightly stronger flavor than other varieties, but feel free to use what’s available)
  • 2/3 cup hot water
  • Soba or rice, for serving

Directions:

  • Remove the tofu from its soaking liquid and slice into 8 equal rectangles. Lay the slices on one half of a clean dish towel and then fold the other half of the towel over the tofu. Place a large cutting board or baking sheet on top of the slices and press down firmly, with even pressure, for 2–3 minutes, or until the towel has absorbed much of the tofu’s excess liquid.
  • Stack four slices of tofu on top of each other and then cut into eighths, forming neat cubes approximately one-inch square. Set aside. Repeat with the remaining tofu.
  • Finely chop the onion and set aside. Mince the garlic and set aside.
  • Heat a large skillet or wok over medium-high heat. When the wok is hot, add 1 tablespoon of sesame oil; when it’s warm, toss in the tofu. If your cooking vessel isn’t very large, you may need to brown the tofu in two separate batches, as crowding the pan will cause it to steam rather than brown.
  • Keep an eye on the tofu and toss occasionally to prevent scorching. While it cooks, wash your mushrooms, trim the tough ends at the bottom of the stems, and thinly slice the mushrooms, stems, caps, and all. Set aside.
  • Once your tofu is golden brown on most sides (it needn’t be on every side—don’t worry about perfection here), add the soy sauce. It’ll make a nice sizzling noise, bubble about, and then cook down in fairly short order. Once the tofu has absorbed the liquid, transfer it to a plate and set aside.
  • This is an excellent time to pause and start the water for your soba or rice, whichever you prefer. (I’ll let you take care of making that.)
  • Add the additional teaspoon of sesame oil to the wok; when it’s hot, add the onions and sauté; when they start to become translucent, add the mushrooms and garlic. Cook until the mushrooms have released all their water and the mixture turns dry and begins to brown.
  • It’ll take some minutes for the mushrooms to cook, so you’ve got time to wash your hearty greens, de-rib them, if that’s your preference (but don’t toss those stems! More on that in a future post), and slice them into ribbons. The best way I’ve found to do this is to work with a small pile of de-ribbed greens at a time, rolling them into an ovular tube/mound kind of thing before slicing thinly (if this isn’t making any sense, Food 52 has excellent photos instructions here).
  • Once the mushrooms are starting to brown, toss in the greens and sauté until they start to wilt. Meanwhile, stir together the miso and hot water in a medium bowl until the paste has dissolved. Add the miso mixture to your wilted greens and simmer briefly—about long enough to make sure your soba or rice are ready to eat. When they are, return the tofu to the wok, stir to coat it in the miso broth, and dish up.