Candied Orange Peel & Fennel No-Knead Bread

Breads

There are a lot of advantages to being married to me. In addition to my obvious wit and way with words, I can be counted on to make the bed every morning, water the plants regularly, and have a firm one-book-in, one-book-out rule, which ensures that most of the books fit on the shelves, most of the time. And let’s not overlook the obvious: as a food blogging hobbyist, there’s never a shortage of good things to eat around the house.

There are disadvantages, though, primarily that—due to my hobby—a solid 65% of our refrigerator and freezer real estate is taken up with “projects”: sourdough starter, jars of carrot-ginger curd / salted caramel sauce / salted caramel cream cheese frosting, etc. While no one was complaining about the extra caramel sauce, some leftovers are a bit harder to use up, like the many containers of candied citrus peel that have been clogging our freezer since April 2020.

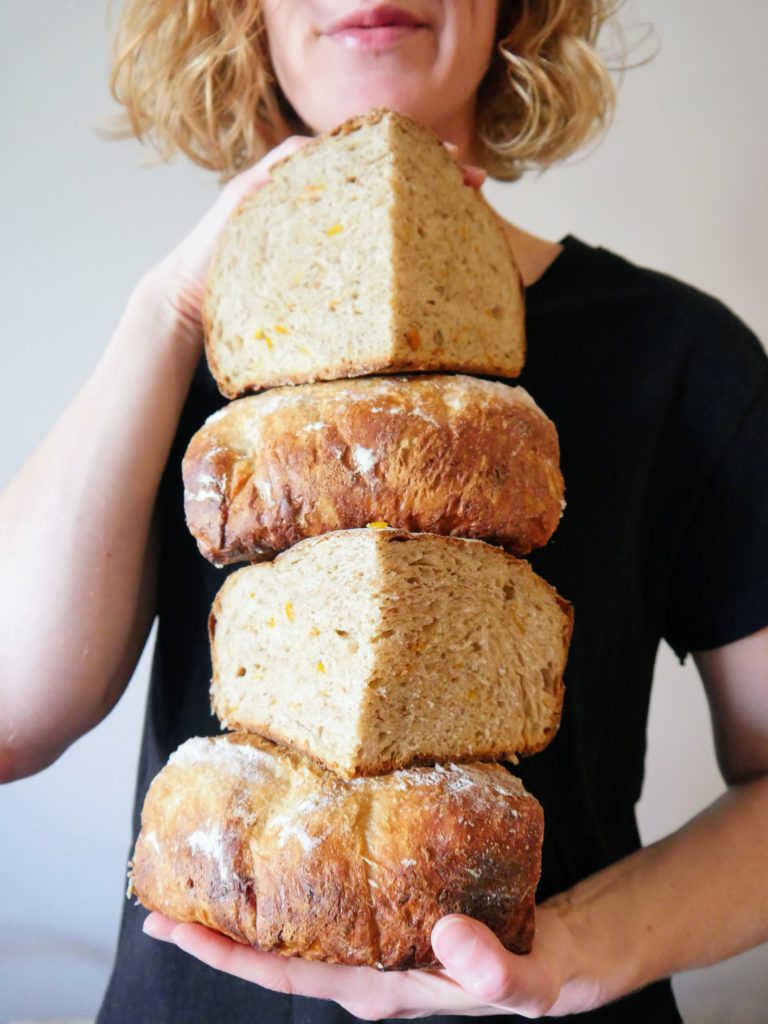
In a valiant attempt to be as zero-waste as possible (an understandable concern, particularly during the early days of the COVID-19 pandemic when you could hardly find toilet paper, let alone produce), I preserved the peel of many an orange, grapefruit, and mandarin, and have been trying to dream up ways to use it ever since. We’ve used it in cocktails and biscotti, dropped it into chocolate bark and folded it into muffin batter, and are still finding jars of it stashed away. This January, I resolved to clean out some of the projects (not to mention random ingredient odds and ends—I’m looking at you, single tablespoon of malted milk powder and dried up natural food dyes) and devised this recipe. Two months later, I’ve made a dent in my citrus peel stash and we’ve enjoyed multiple loaves of this bread. With as good as it is toasted and slathered with butter, maybe there aren’t any disadvantages to being married to me.

Candied Orange Peel & Fennel No-Knead Bread

Sources: Adapted from the inimitable Jim Lahey

Makes 1 large loaf of bread

Active time: ~30 minutes; total time ~18–24 hours

Ingredients:

  • 600 grams all-purpose flour
  • 260 grams whole-wheat flour
  • 2 grams yeast
  • 25 grams salt
  • 75 grams chopped candied orange peel
  • 10 grams whole fennel seeds (you can lightly toast and crush them, if you want to be fancy)
  • 690 grams room-temperature water

Directions:

  • Mix all ingredients together in a large bowl. The dough will be “shaggy”—i.e., it will seem dry and as though you need to add more water. Resist that urge. Let that dough be shaggy. Scrape down the sides of the bowl, cover it, and let rest for at least 12, and as many as 18, hours at room temperature.
  • Dust a clean work surface with flour and scrape the dough onto it. Fold the dough over and onto itself, shaping it into a loose ball. Flip over and give the dough a few more pats to shape it, if needed.
  • Transfer the ball of dough to a large sheet of parchment paper, then put the entire thing, dough and paper, into a clean large mixing bowl. Cover the dough with plastic wrap and leave it to rise at room temperature for another two hours or so. When it’s ready to bake, the dough should have increased in size and not spring back quickly if poked.
  • Towards the end of the second rise, place a 6- to 8-quart covered pot (I prefer a cast iron Dutch oven) in your oven and preheat it to 450°F.
  • Dust the top of your dough with flour and score with a knife or lame.
  • Once the oven is up to temperature, carefully (use potholders!) take off the top of the Dutch oven. Using the parchment paper “sling,” lift your dough and place it, paper and all, into the Dutch oven. Cover the Dutch oven and bake the bread for ~30 minutes, then remove the lid and bake for another ~15–20 minutes, until the loaf is dark golden brown.
  • Remove the Dutch oven from the oven and use the parchment sling to transfer the bread to a cooling rack. If possible, let the bread cool before slicing in and enjoying.
Sourdough Pumpkin Rolls with Sage and Browned Butter

Breads, Sides

Two weeks ago, my Chief Recipe Taster and I adopted a puppy. Rory is a three-month old Australian cattle dog mix who loves belly rubs and playing fetch. She adores pouncing on toys and getting peanut butter out of Kongs. Oh, and did I mention? She also excels at trying my patience.

I thought I knew what getting a puppy would entail. I was prepared for sleepless nights and extensive “sit” training. I was less prepared for a being who vacillates between puppy-like sweetness and adolescent-like disobedience and sucks up every minute of my time. Overnight, we went from largely deciding for ourselves how to spend our off-work hours to orienting our schedules around Rory. It’s largely been a fun and worthwhile adjustment, but an adjustment nonetheless.

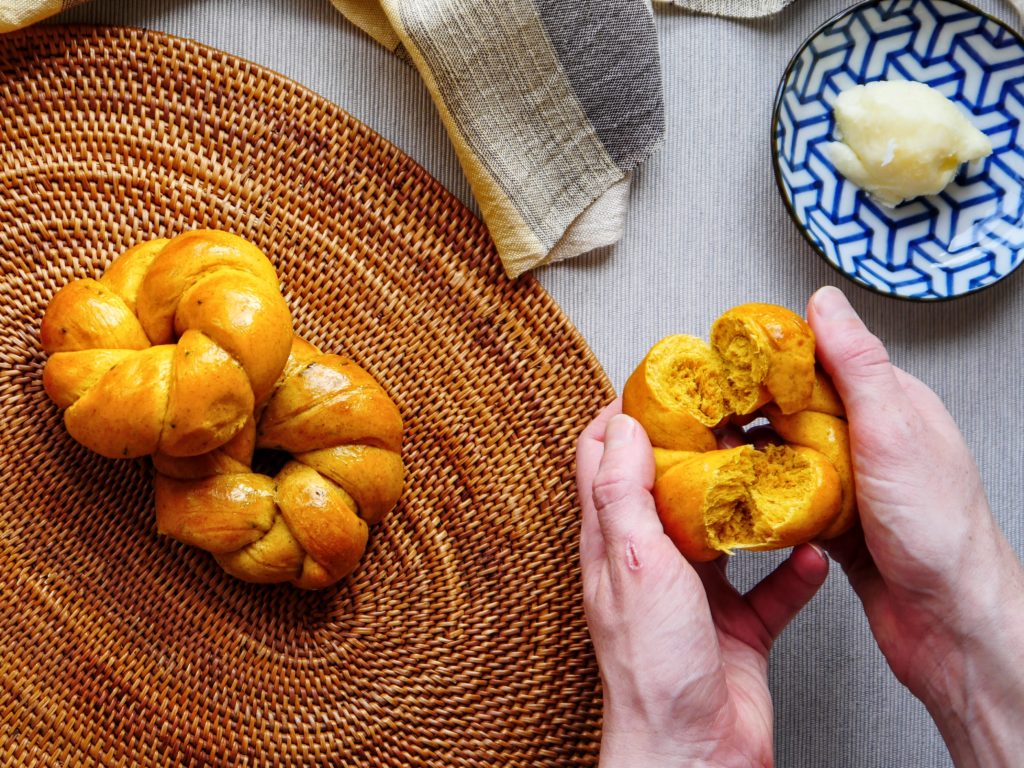
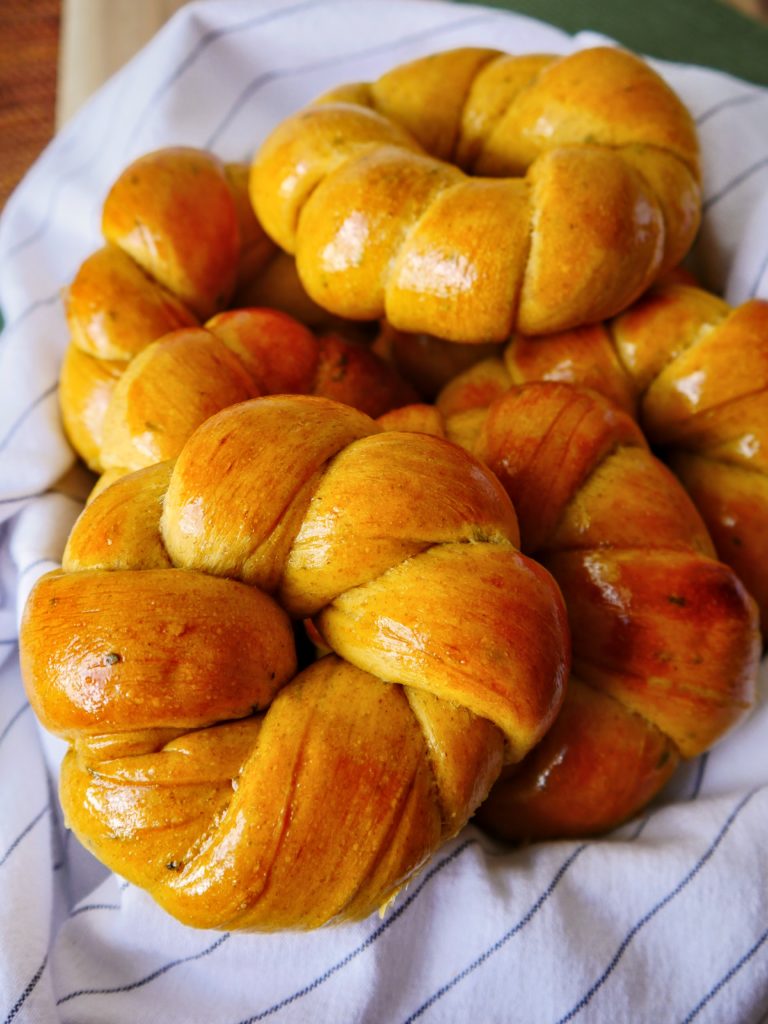
With less time to spend in the kitchen, I find myself turning to that can be patient, like bread. Bread is perfect for this period; after a bit of activity I can let the dough rest, play with our  pup, and return to it later. Unless you flagrantly abuse the dough by not letting it proof long enough or far too much, it is forgiving—a few minutes under or over shouldn’t hurt. This recipe uses both sourdough starter and yeast as leavening agents, so you pretty much can’t fail, while milk, butter, and eggs lend a pillowy texture. The rolls are the perfect accompaniment to fall soups and stews, and would be a welcome addition to your Thanksgiving table, too. They’re a bread that extends you patience while you exercise your own.

Sourdough Pumpkin Rolls with Sage and Browned Butter

Source: I Thought There Would Be Free Food

Makes 16 rolls

Active time: ~60 minutes; total time: ~4 hours

Ingredients:

  • 115 grams milk, any percent
  • 3 grams active dry yeast
  • 40 grams brown sugar
  • 60 grams butter
  • 15 grams finely minced sage
  • 100 grams ripe sourdough starter
  • 2 egg yolks, lightly beaten
  • 145 grams pumpkin puree (NOT pumpkin pie filling)
  • 300 grams all-purpose flour
  • 150 grams whole-wheat flour
  • 10 grams table salt
  • 1 egg yolk mixed with a little water, for egg wash (optional)

Directions:

  • Warm the milk in the microwave or on the stove until it’s just above room temperature—it should feel warm to the touch, not hot.
  • Add the yeast and brown sugar to a large bowl. Add the milk when it is warm, and stir to combine. Let the yeast proof for ~10 minutes.
  • While the yeast is proofing, brown the butter. Place the butter in a small skillet and heat over medium-low. Once the butter has melted, increase the heat to medium. Swirl the pan regularly or stir it with a spatula to ensure that the butter browns evenly. Once the butter is studded with little brown bits and smells toasty and delicious, take the skillet off the heat and stir in the sage. Set aside and let cool slightly.
  • Once the yeast has proofed, add the sourdough starter, egg yolks, pumpkin puree, and brown butter-sage mixture to the bowl and stir to combine.
  • Add the flours and salt to the bowl and mix with your hand or a spatula. Using your hands, work the dough into a mass and then knead until the dough is smooth, ~10 minutes. If needed, add splashes of milk or flour to achieve the right consistency.
  • Place the dough in a greased bowl, cover, and let rise until puffy and almost doubled in size. This will likely take at least 90 minutes, depending on the temperature of your kitchen.
  • When the dough has doubled, knock it down gently and turn out onto a lightly floured workspace.
  • Divide the dough into 16 pieces. From here, you can roll each piece into a rope at least 18 inches long and form them into knots using these instructions, or simply shape them into balls. Either way, set the formed rolls on a parchment-covered baking sheet, cover loosely with a light towel or plastic wrap, and let rise until puffy, at least 60 minutes.
  • Towards the end of the proofing period, position a rack in the middle of your oven and preheat it to 350°F.
  • Once the rolls have proofed, gently brush each roll with the egg wash mixture. Bake the rolls for 17-20 minutes, until lightly golden brown. Serve warm.

Zucchini-Feta Muffins

Breads, Sides
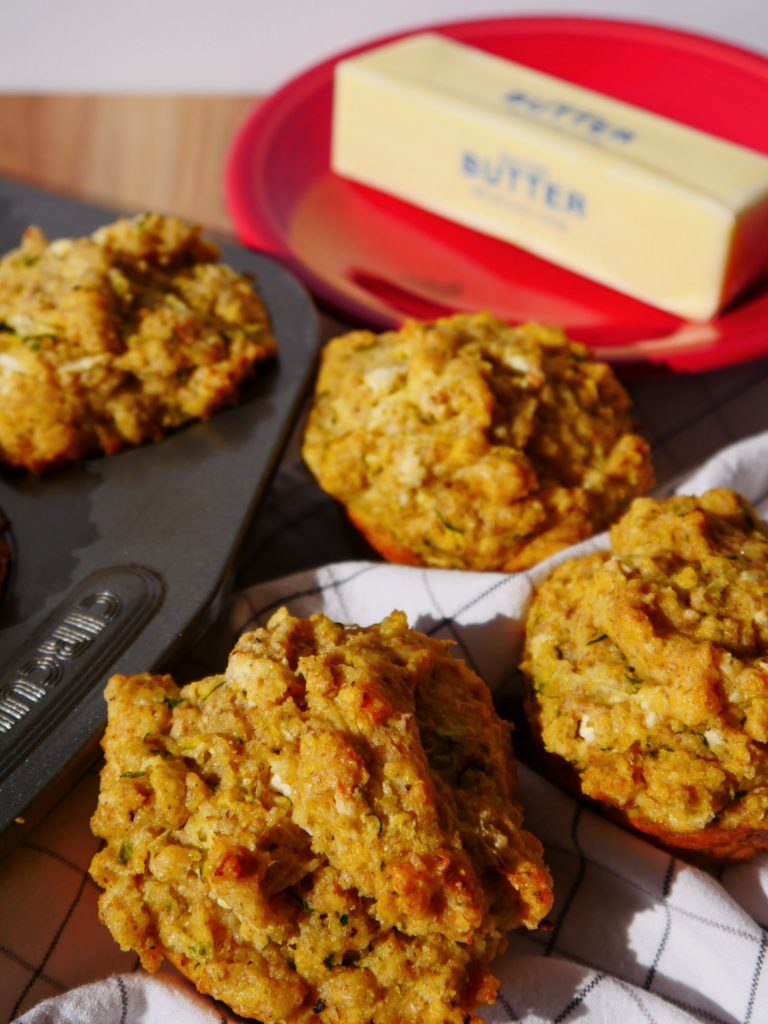
Golden muffins studded with bits of feta and shreds of zucchini nestle into a white tea towel. A stick of butter on a red plate is visible in the background.

For someone who has spent the past two months bemoaning the swirling heat vortex that is DC in the summer, you would think I’d have been thrilled to see the food blogosphere explode into a panoply of apple-studded, pumpkin-spiced foods on September 1. But no: now that it’s cool enough you can go outside without instantly breaking into a sweat, I’m ready for summer 2.0.

Thankfully, the produce stands around here agree with me. Sure, apples are starting to take up some real estate, but there are still plenty of peaches and our CSA bag arrives stuffed with zucchini each week. I appreciate zucchini for what it is: the tofu of the vegetable world. It plays well with others ingredients and takes on whatever flavors and characteristics you might want it to. This recipe plays with zucchini on two levels, first liberating it from the cloyingly sweet quick breads you tend to see and then pairing it with an old favorite, feta, as often seen in dishes from around the Mediterranean. The result is a savory muffin that goes well with other late-summer produce like eggplant, red peppers, and tomatoes. They’re good enough to make you want to pause your fall fare and hold onto the last of summer for a bit longer.

Zucchini-Feta Muffins

Source: I Thought There Would Be Free Food

Makes 12 muffins

Active time: ~25 minutes; total time ~55 minutes

Ingredients:

  • 1 medium zucchini, ~10 ounces or 292 grams
  • ~4.5 ounces feta
  • 1 cup whole wheat flour
  • 1 cup all-purpose flour
  • 1 cup cornmeal
  • 1 tablespoon baking powder
  • 1 teaspoon salt
  • 1 teaspoon ground black pepper
  • 2 eggs
  • 1 scant cup milk
  • 1/3 cup vegetable oil

Directions:

  • Preheat oven to 350°F and grease a 12-cup muffin tin.
  • Trim the ends off of your zucchini and then grate it using a box grater, large-holed microplane, or food processor. Working with a handful of zucchini at a time and standing over your kitchen sink, squeeze the zucchini in your fists until most of the liquid has run out. Repeat with the remaining handfuls, then set all of the zucchini aside.
  • Crumble the feta into small chunks no larger than a pencil eraser. You should have about one cup. Set aside.
  • Mix together the flours, cornmeal, baking powder, salt, and black pepper in a large bowl.
  • Whisk together the eggs, milk, and vegetable oil in a medium bowl.
  • Add the wet ingredients to the dry ingredients and fold to combine them. When the ingredients are mostly combined, add the zucchini and feta. Fold them into the batter until they are well distributed.
  • Divide the muffin batter evenly amongst the cups. Bake for ~30 minutes, until lightly browned. Enjoy warm or toasted with a pat of butter.

Persimmon Quick Bread

Breads
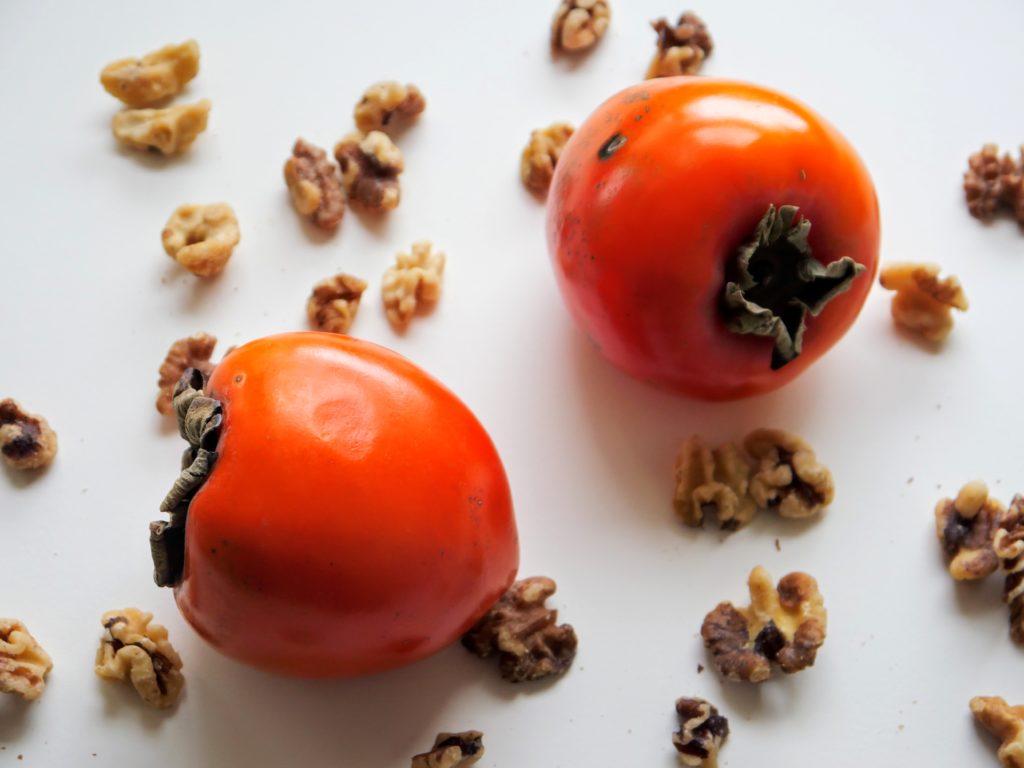
Two ripe persimmons sit on a white surface, surrounded by scattered walnuts.

I am an inveterate recipe tinkerer, unable to leave well enough alone. No matter how many times or how fervently I insist that I’ll make a recipe exactly the way that it was written—at least the first time through—I am incapable of doing so. I’m forever adding a little more salt or spice, reducing the oil just a smidge, or attempting to streamline a few steps.

There’s hubris in being a recipe tinkerer, which came home to me a few weeks ago, when I first made this persimmon quick bread. The original recipe is by James Beard, who is kind of a BFD—after all, they named one of the most prestigious food awards in America after him, and he’s widely regarded as a pivotal figure in American culinary history. He wrote a few books, appeared on a TV show or two, and sometimes vacationed with Julia Child, if that tells you anything. In short, Beard was a guy who knew his stuff, food-wise, and his recipes are well thought-out. Still, I found myself from changing this recipe to my liking.

At first blush, fiddling with a Beard recipe seems crazy: who am I to do such a thing? I have no formal culinary training and am barely two months into this blogging business; why do I suppose that I can make something better than James Beard? But at second look, this is precisely what I should be doing, and what I expect you to do as well—to make something different, hopefully better, perhaps worse, but nevertheless according to your own likes and dislikes. This is, after all, how innovation happens, and it’s how we grow as cooks and make food that we like to eat. We are curious. We try, we taste, we try again. And if it makes you feel any better, Beard himself is no stranger to tinkering; David Lebovitz points out that Beard gives an “inexact” amount of sugar in this recipe, an unusual act that allows the baker to bake according to their preference. Whether he states it explicitly or not, Beard is intrinsically aware that we all cook to our own liking, and that’s a good thing.

Beard’s recipe was far too sweet for me, so I reduced the sugar by half and replaced some of the all-purpose flour with whole wheat to make this less of a dessert and more of an anytime treat. I substituted ground allspice, which I always have on hand, for ground mace, which I generally don’t (you could also try nutmeg or ginger), and swapped the bourbon for rum, since I didn’t want to use the good stuff for bread. If you disagree with any of these changes, I think it goes without saying that you’re welcome to adjust them.

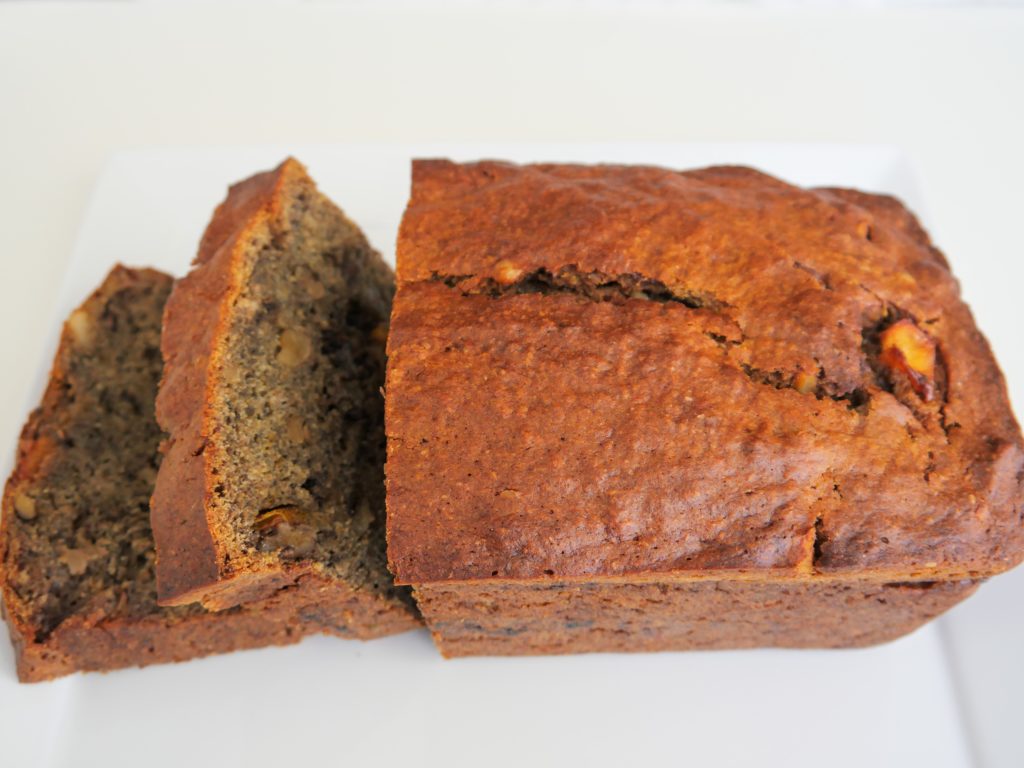
A loaf of golden brown bread with two cut slices falling from the left side rests on a white plate against a white background.

Persimmon Quick Bread

Adapted from James Beard’s Beard on Bread

Makes one 9″ x 5″ or 8 1/2″ x 4 1/2″ loaf

Active time: ~25 minutes; total time ~85 minutes

Note: There are many different varieties of persimmons, but the two I see most commonly are Fuyu and Hachiya. Fuyu are non-astringent and can be used when relatively firm, although I recommend letting them get very ripe for this recipe. Hachiya taste unpleasantly astringent unless they are very ripe.

Ingredients:

  • 1 cup walnuts (optional)
  • 2 very ripe persimmons
  • 1 cup all-purpose flour
  • 3/4 cup whole-wheat flour
  • 1 teaspoon baking soda
  • 1–2 teaspoons ground allspice (I prefer the higher amount)
  • 1 teaspoon salt
  • 3/4 cup lightly packed brown sugar (light or dark)
  • 1/2 cup (1 stick) butter
  • 2 eggs, lightly beaten
  • 1/3 cup bourbon, rum, or milk, if you prefer an alcohol-free version

Directions:

  • Preheat the oven to 350°F. Butter and flour or otherwise grease a 9 x 5″ or 8 1/2 x 4 1/2″ loaf pan; set aside.
  • If using the walnuts: Heat a medium skillet over medium heat. While it’s heating, coarsely chop the walnuts, then add them to the pan when it’s warm and toast until they’re golden brown and fragrant. This will likely take 5–10 minutes. Transfer the nuts from the skillet to a plate and let them cool slightly.
  • While the nuts are toasting, melt butter on the stove or in a microwave; I do it in the microwave for about 2 minutes on 30% power. Set the melted butter aside.
  • Bisect the persimmons along their equators and scoop their pulp into a small bowl. Discard the peels, then mash the puree with a fork until you have a mix of smooth and a few lumps; it needn’t be uniform.
  • Combine dry ingredients in a mixing bowl and stir with a fork to combine, mashing any brown sugar lumps as necessary. Add the persimmons, butter, eggs, and liquor or milk, and stir to combine.
  • Pour batter into prepared loaf pan and bake for ~60 minutes, perhaps a little less for a smaller loaf pan, or until the loaf is beautifully burnished and a cake tester inserted into the middle of the loaf emerges with just a few crumbs hanging. Remove your loaf from the tin and allow it to cool on a rack.
  • This bread is excellent warm, with butter; toasted, with a drizzle of honey; and pretty much any other way you care to have it—I certainly won’t tell you what to do.

Bukhari for Bravery

Breads

It’s been quite a month.

First, I quit my job.

Then, I started a food blog.

I didn’t quit my job to start this blog (I’m under no illusions I’m the next Deb Perelman, let alone the next Julia Child), but I realized that I’d outgrown it, wasn’t getting any younger, and that it was time to reprioritize, to focus on what I most want to do—like starting the blog I’ve been dreaming about for years. From those realizations, it was a series of terrifying steps to submitting my notice, buying a domain name, figuring out what web hosting/widgets/plugins, and hitting publish on this first post.

That’s an awful lot of risky moves for someone with a strong aversion to the F word—failure—which is why I’ve felt the need for a little extra boost these past few weeks, and why the first recipe on this blog is for bread. You see, making bread requires bravery. It’s no surprise to me that so many casual bakers are afraid to attempt it; there’s so much that can go wrong! To transform flour, salt, and yeast into a beautiful loaf, you have to face a lot of potential obstacles, from dough that doesn’t rise to over-proofing. Maybe your bread turns out perfectly—great, and congratulations! Maybe it never rises or you forget the salt or your oven goes on the fritz and burns it. That’s okay too. Hopefully you learned something, and hopefully it was more fun to have tried than not. The experience of trying is what baking and cooking are all about it. Heck, they’re what this site is all about: trying for the sake of trying. Trying for the sake of fun. Trying, just because.

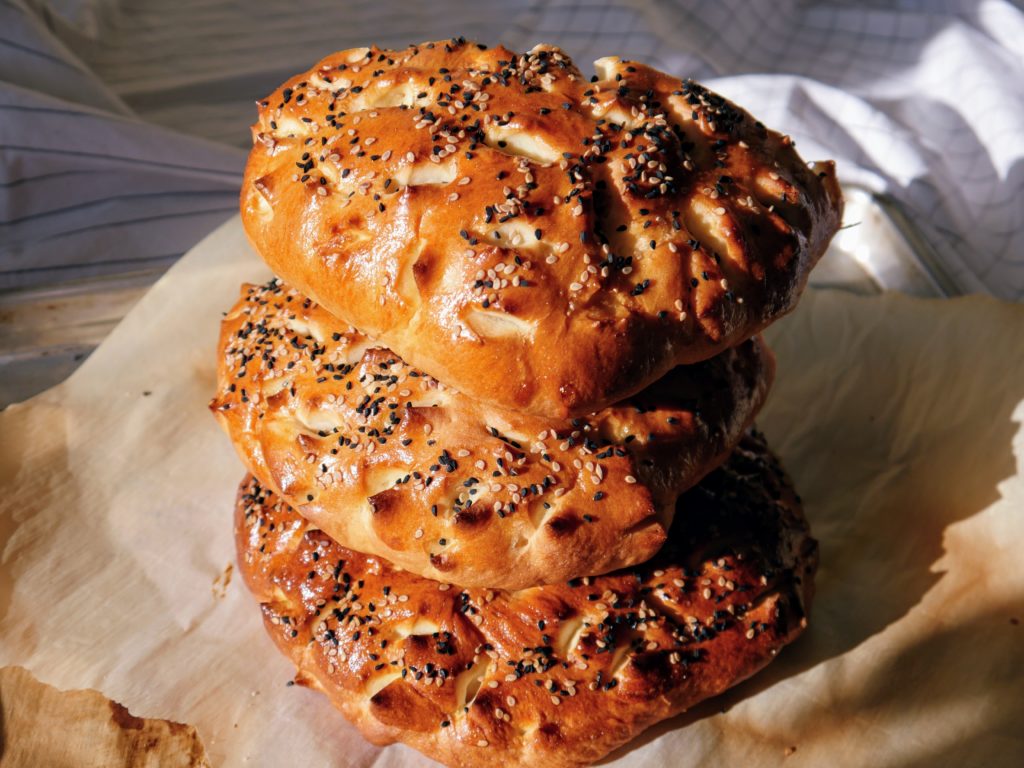
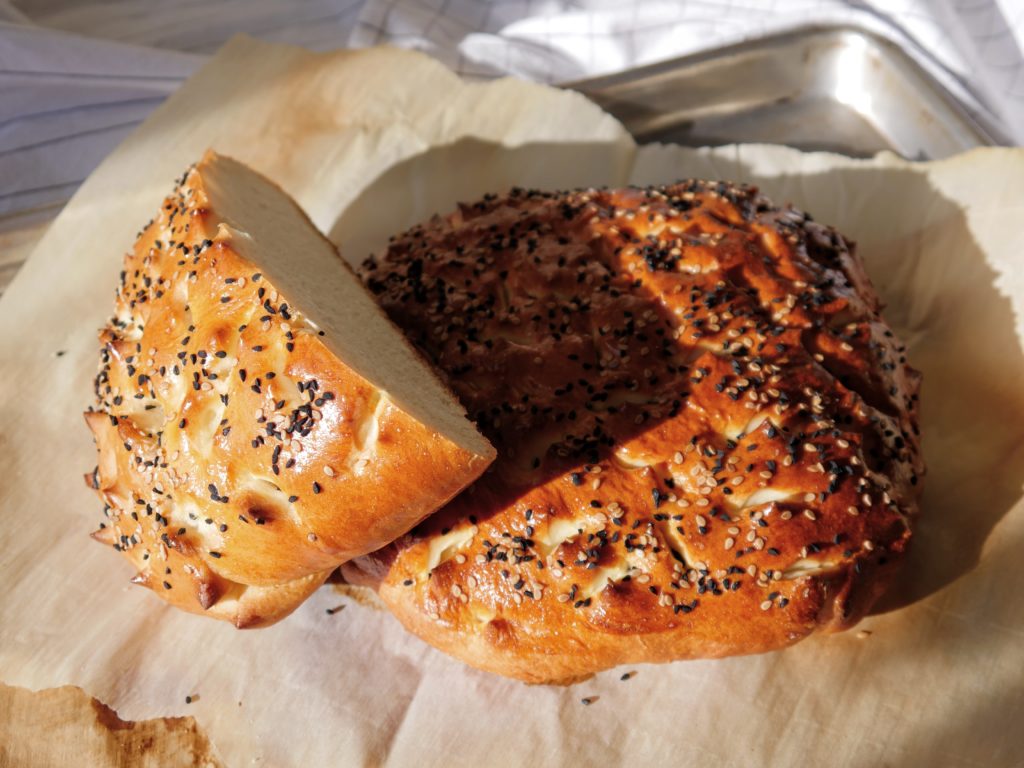
Enough talk, more carbs. Bukhari bread is inspired by the intricate breads of Uzbekistan, and it is lovely: soft, a little sweet, tender from the egg-enriched dough, and with a bit of crunch thanks to a scattering of nigella (black cumin) and sesame seeds. The top is covered with endearing little peaks, a hedgehog of a bread, and it’s deeply satisfying to plop a still-warm loaf on the middle of your table and invite your friends to tear into it. Bukhari bread makes an excellent accompaniment to virtually any meal, but I think it’s best alongside a dish of layered tahini and date molasses, which swirls together and ends up a fabulous mix of savory and sweet—an excellent reward for bravery.

Bukhari Bread

Adapted from Epicurus and Honey & Co., The Cookbook

Makes 1 large or 2 small loaves, comfortably serving 6 people

Active time: 1 hour; total time: 4 hours

Ingredients:

  • 1 1/2 tablespoons active dry yeast
  • 2 tablespoons sugar
  • 1 cup warm water
  • 3 1/2 cups all purpose flour (I prefer unbleached)
  • 2 teaspoons table salt
  • 1 egg, lightly beaten
  • 3 tablespoons neutral oil (olive, sunflower, canola—whatever you have on hand), plus enough extra to grease a large bowl
  • 1 tablespoon nigella seeds, sesame seeds, or a mixture of both (my favorite)
  • 1 egg beaten with a little water (for egg wash—optional but highly recommended)

Directions:

  • Put yeast and sugar in a small bowl. Add the water, stir to mix, and set aside to proof. It’s ready to use when the mixture is bubbly and frothy, which should take about 5 minutes.
  • Meanwhile, stir together the flour and salt in a large bowl. When the yeast is ready, add it to the flour/salt mixture along with the beaten egg and oil and stir to combine. Your dough likely won’t look very dough-like at this point and that’s fine; just work everything together a bit.
  • Once the wet and dry ingredients are largely combined, tip everything out onto a clean countertop. Knead for 10–15 minutes until you have a ball of smooth, only slightly tacky dough. If you’ve been kneading for at least three minutes and the dough feels very firm and dry, consider adding a bit of additional water, one tablespoon at a time, as necessary, kneading after each addition until you reached the desired consistency. If you have the opposite problem and your dough is so wet it’s slopping about the counter, consider adding a bit of additional flour, tablespoon by tablespoon, kneading well after each addition.
  • When your dough is ready, place in a large, well-oiled bowl. Cover and let it rise until doubled in size, 1–2 hours depending on how warm it is where your dough is living.
  • After your dough has risen, knock it down to push out the air. At this point, you can opt to bake one large loaf or two small ones.
  • To make one large loaf: Plop the knocked-down dough on a parchment-lined baking sheet. Use your fingers to press it out to a circle-like shape, about 1/2 inches tall and 11 inches in diameter. Cover loosely with plastic wrap or a damp towel and leave to rise again, about 1 hour.
  • To make two small loaves: Divide the knocked-down dough into two equal pieces (you can do this in the bowl your dough rose in). Working in turns, give each ball a few quick kneads before putting onto a parchment-lined baking sheet—you’ll need one for each loaf. The dough will likely resist being pressed out at this point, so cover it loosely and let it rest for 5–10 minutes. Come back and press each ball into a circle-like shape about 1/2 inch tall and 7 inches in diameter. Cover loosely and leave to rise again, about 1 hour.
  • When your bread is about done with its second rise—it should be at least 1 inch tall—make sure you have a rack set in the middle of the oven, then start it preheating to 475F.
  • Here’s the fun part: take a pair of kitchen shears (or exquisitely clean scissors) and snip into the bread, as little or as much as you like, as deep or as shallow as you want. You have full creative license!
  • When you’re done with the scissors, use a pastry brush to coat the top of your bread with a beaten egg, then sprinkle on the nigella and/or sesame seeds. The egg wash is optional, but without it, the seeds won’t adhere to your bread.
  • To bake one loaf: Pop your loaf into the oven and bake for 10 minutes at 475F. Reduce the oven temp to 400F, rotate the baking sheet, and bake your bread another 6 minutes or so, or until the loaf is golden.
  • To bake two loaves: If your oven is big enough to hold two baking sheets at once, do that; otherwise, you’ll need to repeat these instructions for both loaves. Bake each loaf at 475F for 7 minutes, then reduce the oven temperature to 400F, rotate the baking sheet, and bake your bread for another about 3 minutes, or until golden.
  • Bukhari bread is best eaten warm on the day it was baked. If you can’t finish it, eat it as soon as possible or pop part of your bread into the freezer for another time.