Lemon Bar Ice Cream

Dessert
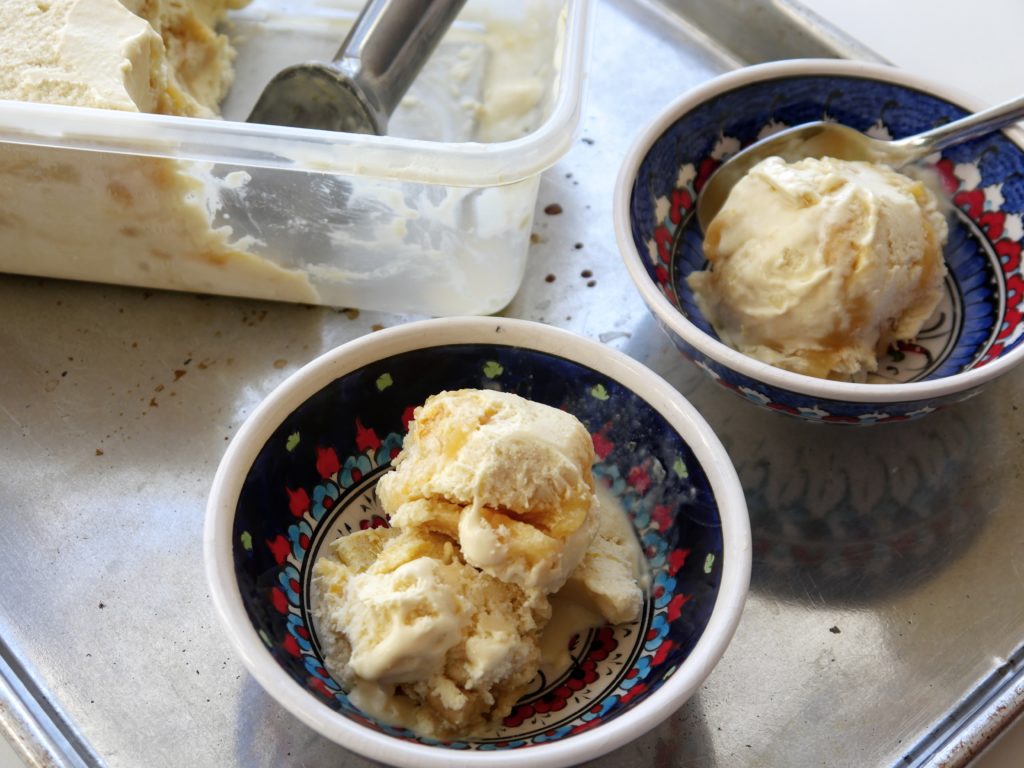
Two blue-red-and-white patterned bowls containing scoops of pale yellow ice cream sit on a metal surface next to a clear plastic tub of ice cream.

I started a new job last Monday, and it’s changed everything. All the comfortable rhythms I’d established during my fall sabbatical were obliterated the second my alarm clock went off that first morning. I’m negotiating a lot of change, and even when changes are positive, they still require some adjustments. The biggest change, of course, is time—where I used to have hours free for kitchen experiments, I suddenly need to squeeze my cooking into little windows of time throughout the week. I’m making it work because I have to, because baking and cooking are how I process the world (Exhibit A, baking bread for bravery. Exhibit B, making cookies while waiting). I might look like I’m separating eggs for a custard, but chances are good that some little corner of my mind is also puzzling over a challenge and how I want to respond to it. For me, busy hands lend themselves to a calm mind and give me a chance to think things through.

Rather than rushing to make this ice cream in a single day, I figured out how to adjust it to my new schedule. I put the ice cream bowl in the freezer and make the custard one evening; churn and layer the ice cream the following day. It’s a different pace than the one I’d developed, but no less a good one. And somewhere along the way, as I whisk the custard or crumble the cookies, I find that I’m thinking less about change, and more appreciating the time in the kitchen that I do have. From a distance, it might almost look like I were unflappable.

Lemon Bar Ice Cream

Source: I Thought There Would Be Free Food

Makes ~2 quarts

Active time: ~1 hour; total time: at least 6 hours, the majority of which is chilling

Note: If making ice cream from scratch is too difficult or time-consuming, you can use store-bought ice cream instead, and significantly cut down on the total time. Let 1–1 1/2 quarts of store-bought vanilla ice cream (my favorite is Breyer’s Natural Vanilla) soften on your counter while you crush the cookies and prepare the lemon curd, then mix in the lemon zest and proceed with layering as directed below.

Ice Cream Base Ingredients:

Lemon Bar Mix-In Ingredients:

  • 7 1/4 ounces shortbread cookies; I used 1 bag of Pepperidge Farm Chessmen
  • 10 ounces lemon curd
  • Juice of 2 lemons

Directions:

  • The day before you plan to make the ice cream, put the bowl in the freezer.
  • The next day, pour the cream and milk into a heavy-bottomed pot and bring the mixture to a boil over medium heat. Meanwhile, whisk together the egg yolks, sugar, and a pinch of salt in a medium bowl.
  • When the cream and milk are at a boil, turn off the heat and whisk one-third of the mixture into the egg yolks, whisking vigorously as you do so. Slowly add the rest of the cream and milk to the yolks, whisking all the way.
  • Pour the mixture back into your saucepan and heat over medium. Keep stirring, or you could end up with little curds in your custard, and no one wants that.
  • There are two ways to test whether your custard is done. Dip a spoon or spatula into it and then run your finger through the custard; your finger should leave a clear trail with no custard running into the track. Alternatively, take your custard’s temperature: it should be between 170–180°F.
  • Remove the custard from the heat and pour it into a clean bowl. Let it cool for several minutes before stirring in the vanilla. Cover the custard by pressing a piece of plastic wrap directly onto its surface and refrigerate until cold. The custard will be fine in the refrigerator for a day or two, if you want to spread out the work load.
  • Once the ice cream bowl and custard are cold, churn the custard per your machine’s directions. My custard took ~20 minutes to reach peak height and frostiness. Stir in the lemon zest.
  • While the custard is churning, crush your shortbread into bite-sized chunks. You’ll want a mix of smaller and larger pieces.
  • Spoon the lemon curd into a small bowl. Give it a taste—how sweet is it? You’ll want it to be quite tart so that the flavor will carry through the richness of the ice cream, as well as thin enough to spread. Heat the lemon curd gently in the microwave, at short bursts on low speed, or in a double boiler.
  • Once it’s warm, stir in lemon juice to taste. I used the juice of two lemons, but you may want more or less depending on how much tartness you enjoy.
  • Spread one-quarter of your ice cream into a large, freezer-proof container (I used a two-quart Tupperware). Top with one-third of the cookie pieces, then one-third of the lemon curd. Repeat as required, ending with a layer of ice cream. Cover the container and return to the freezer to firm up before enjoying.
Bacon, Cabbage, and Mushroom Quiche

Entrees

In my personal vegetable hierarchy, cabbage falls squarely in the “meh” category. I don’t dislike it, but I don’t crave it, either. Mostly I forget about cabbage until the late fall, when they’re some of the only local produce left in the markets and I’m again seduced by their glossy leaves—particularly the siren song of the anthocyanin-rich red cabbage.

Last fall was no exception to my seduction by cabbages. I bought a cabbage for the express purpose of making the cabbage and mushroom handpies from Joshua McFadden’s Six Seasons, which is an excellent book that you should look at immediately. We demolished the pies in short order, astounded by how well the cabbage’s earthy notes played against a buttery pie crust. (Truly, what won’t pie crust improve?)

Despite proper prior planning, I ended up with extra filling. Coupled with an errant CSA order that left me with a surfeit of bacon, I figured the best thing to do would be sauté the bacon, add it to the leftover veg filling, and bake the whole mess into a quiche. My experiment turned out to be a use-up-the-random-ingredients-in-the-refrigerator match made in heaven, good enough to make on purpose for my family’s Christmas Eve brunch, where it was promptly devoured.

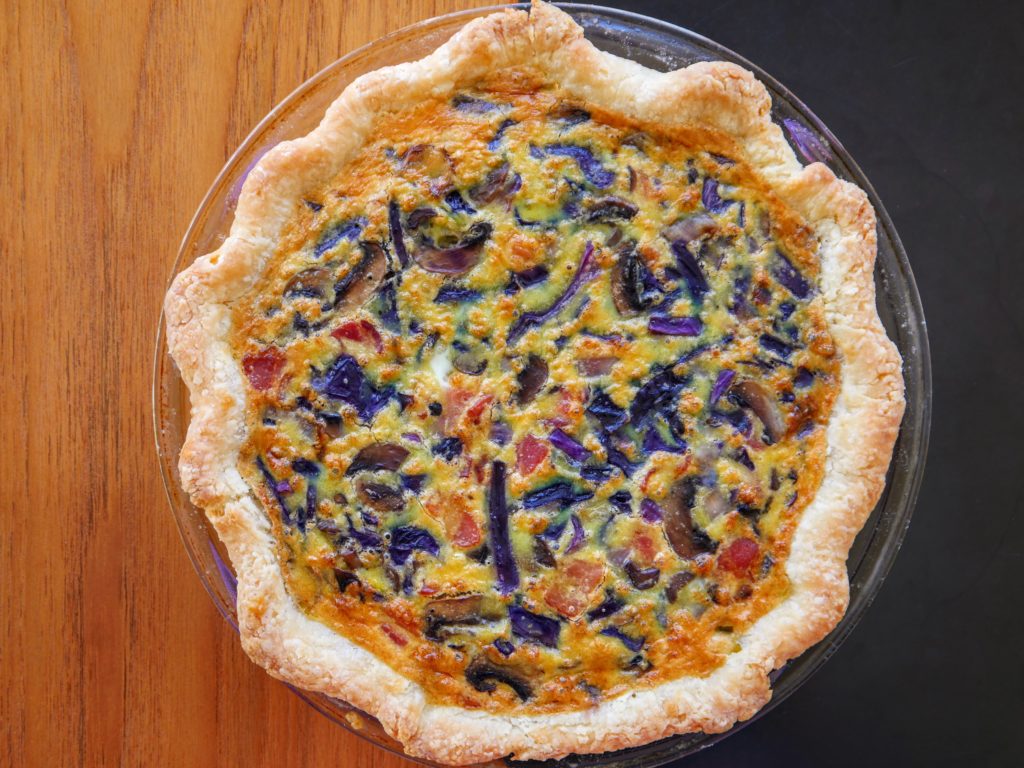
Bacon, Cabbage, and Mushroom Quiche

Source: I Thought There Would Be Free Food

Makes 1 9-inch quiche, serving 6–8 people

Active time: ~1 hour; total time: ~a little less than 2 hours

Note: You can split up the time it takes to make this dish by preparing the pie crust and filling up to two days ahead of time. Wrap the pie crust well and keep in the refrigerator until you’re ready to use it. Sauté the bacon and vegetables and store separately until ready to use, then simply combine with the eggs and cream.

Pie Crust Ingredients: (Optional; feel free to substitute one pre-made, refrigerated pie crust)

  • 1 1/4 cup all-purpose flour
  • 1 teaspoon salt
  • 1 stick butter (leave it in the fridge until you’re ready to use it)
  • 3–4 tablespoons ice water

Bacon, Cabbage, and Mushroom Filling Ingredients:

  • 1/2 pound mushrooms, any variety
  • 1 medium onion
  • 1/2 pound cabbage, any variety
  • 1/2 pound bacon (easily omitted to make this quiche vegetarian)
  • Salt and pepper, to taste
  • 6 eggs
  • 1/4 cup cream

Directions:

  • Make the crust: Do your future self a favor by laying a sheet of plastic wrap on your counter and making sure you have a large bowl handy.
  • Add the flour and salt to the bowl of a food processor and pulse to combine.
  • Take the butter from the fridge and chop it into 1/2-inch cubes. Scatter the butter into the flour mixture and pulse until the butter is coarsely ground. Add 3 tablespoons of ice water and pulse 2–3 times, then dump the contents into a large bowl. Gently press a bit of the dough together; if it holds, proceed to the next step. If it does not, add additional water as necessary.
  • Gather the dough into a loose clump and then transfer it to the plastic wrap. Use the corners of the plastic wrap to form the dough into a disc about 2 inches tall. Make sure the dough is completely covered in plastic, then transfer to your refrigerator to chill for at least 1 hour, or up to 2 days.
  • Make the filling: Wash the mushrooms and then set them in a colander to drain. Meanwhile, dice the onion, then set it aside. Core the cabbage any remove any rubbery outer leaves, then finely slice and finally chop into pieces approximately 1-inch long; set the cabbage aside, too. Trim the tough ends off of the mushrooms—no need to discard the stems entirely—then thinly slice the mushrooms and, you guessed it, set them aside.
  • I like to trim some of the excess fat from my bacon before cooking it; feel free to join me in doing so, or just plan to drain more fat from the skillet after the bacon cooks. Choose your own adventure, and then chop the bacon into 1/2-inch pieces.
  • It’s time to cook! Warm a bit of oil in a large skillet set over medium-high heat. Once the oil and skillet are hot, add the bacon and sauté it until browned and crisp. Use a slotted spoon to transfer it to a paper towel-lined plate.
  • Pour off any excess bacon grease, leaving just enough to coat the bottom of the pan. Return the skillet to medium-high heat; once it’s up to temperature, add the mushrooms and sauté. Most varieties of mushrooms release quite a lot of water, and you want to cook most of this off.
  • Once much of the water has evaporated and the mushrooms are browning, reduce the heat to medium, then add the onions and sauté them until they begin to turn translucent. Add the cabbage and cook until it has softened and the vegetable mixture is quite dry—this will help prevent your quiche from being weepy. Season your veggie medley with salt and pepper to taste, then remove the skillet from the heat.
  • Position a rack in the bottom third of your oven, then preheat it to 400°F. Take your pie crust out of the refrigerator.
  • In a large bowl, beat together the eggs and cream. Add the vegetable mixture and bacon, and stir to distribute the ingredients evenly. Set the bowl aside.
  • Prepare a place to roll out your pie crust, dusting the surface with a bit of flour and setting out a rolling pin, sharp knife, and 9-inch pie plate. I like to bake my pies and quiches on a parchment-lined baking sheet, just in case there are any eruptions or overflows, and this would be a good time to get that ready, too.
  • When the crust is roll-able, do so, working from the middle of the dough out. It’s okay to use a fair amount of flour to make sure the crust doesn’t stick, just be sure to dust it off before you fit it to the pie plate. Once the crust is about half rolled out, try to gently pick it up, dust your work surface with flour again, flip the crust over, dust it again with flour, and continue rolling.
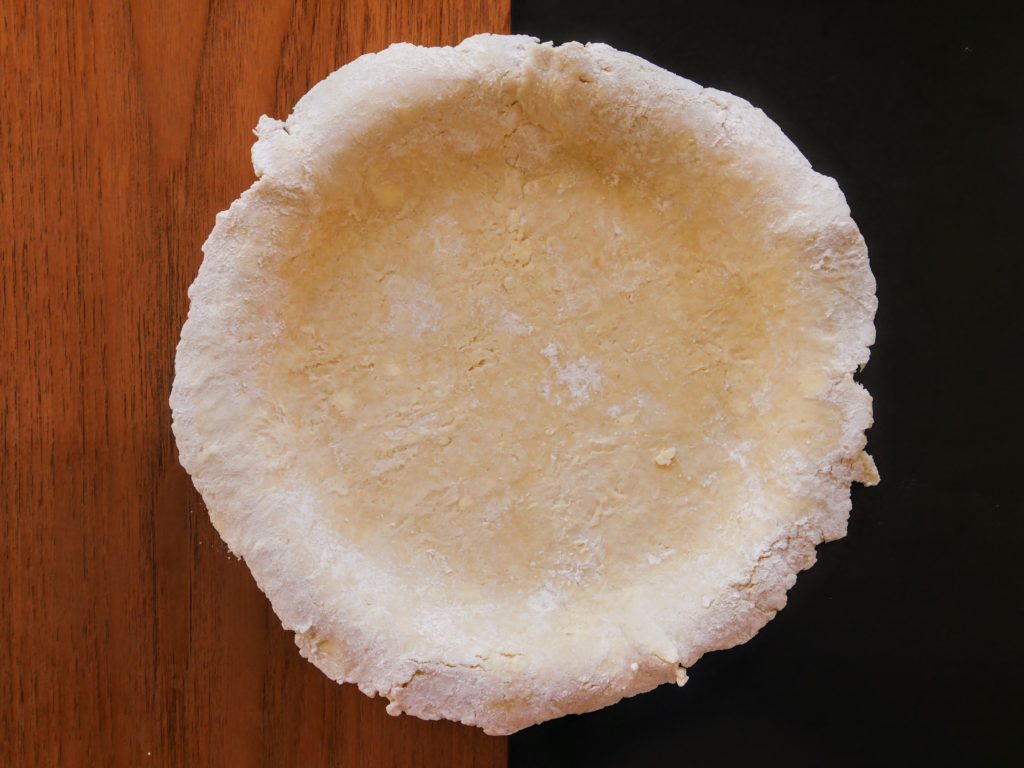
  • Transfer the crust to a 9-inch pie plate and trim away any extra dough before crimping or fluting or otherwise finishing the crust.
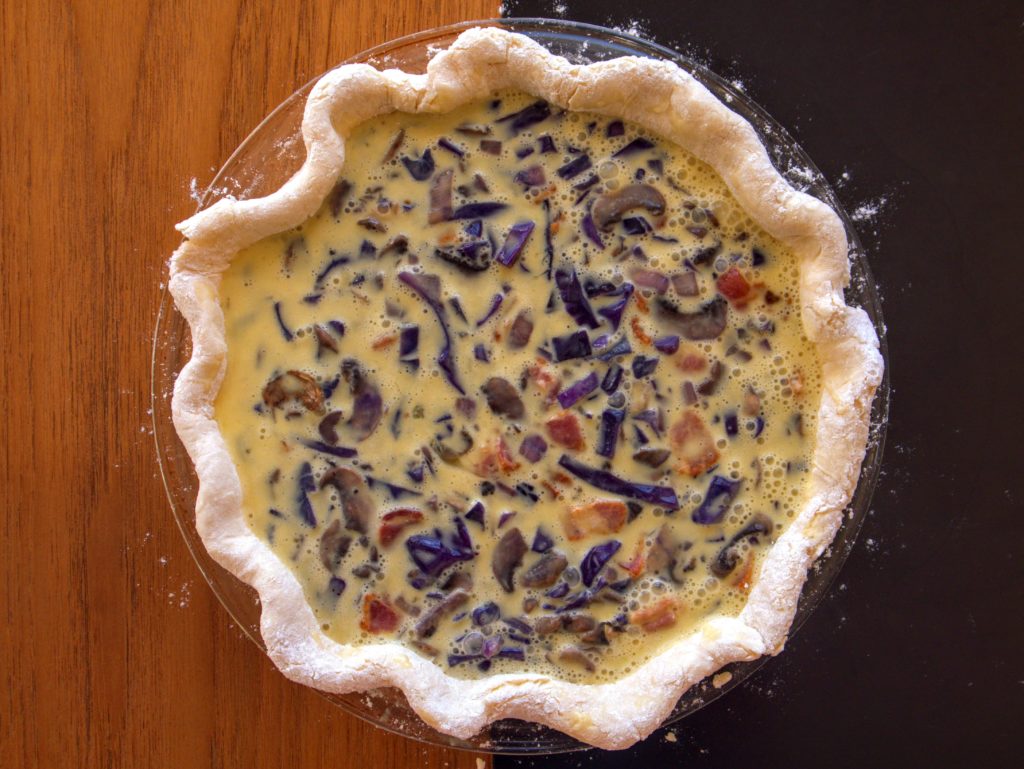
  • Pour the egg-vegetable mixture into the prepared crust and then carefully transfer the pie plate to the oven. I recommend baking the quiche on a rack set in the bottom third of your oven, which helps cook the bottom of the pie crust, but make sure that your oven doesn’t run hot or you might end up with a more-browned-than-desired crust. If your oven does run warm, just reduce the heat by 10 degrees or so.
  • Bake the quiche for ~40–45 minutes, or until the quiche is lightly browned, slightly puffed, and doesn’t Jell-O jiggle when you give it a shake. Remove from the oven and let it cool slightly before digging in.
  • Note: It’s totally unorthodox, but this quiche is even more delicious with a smear of Dijon or stone ground mustard on top.